In vREST
- A group of HTTP requests (or APIs) can be organised to be executed in sequence
- and each HTTP request is represented as a test case
- and each test case can be validated with the help of assertions and response validators.
Note: We are assuming that you have already signed up and created an instance on vREST. Now just go to your instance and follow the below guide to validate your first API.
Here is the video tutorial for the same:
Now, we will walk through step by step, how you can validate a REST API in vREST.
Suppose we want to validate the Create Contact API of our sample test application. The API has the following structure:
| API Endpoint | {{contactsAppBaseURL}}/contacts | |||||
|---|---|---|---|---|---|---|
| Request Method | POST | |||||
| Request Body |
| |||||
| Request Headers |
|
Note:
- here variable {{contactsAppBaseURL}} is the base URL of our sample test application. For more information on variables, please read Environments / Variables.
- Assuming, this API doesn't need any authentication / authorization. Because that will make this guide more complex. For more information on authentication / authorization, read Authentication.
We request you to please follow the below steps in your vREST instance also as described.
Now, let us take step by step approach on, how we can validate this API in vREST.
Define the variable `contactsAppBaseURL`
To configure this variable, follow the steps below:Open Test Cases Tab >> Test Cases Tool bar >> More Menu >> Global Variables / Environments.
And configure the variable `contactsAppBaseURL` as shown in the below snapshot:
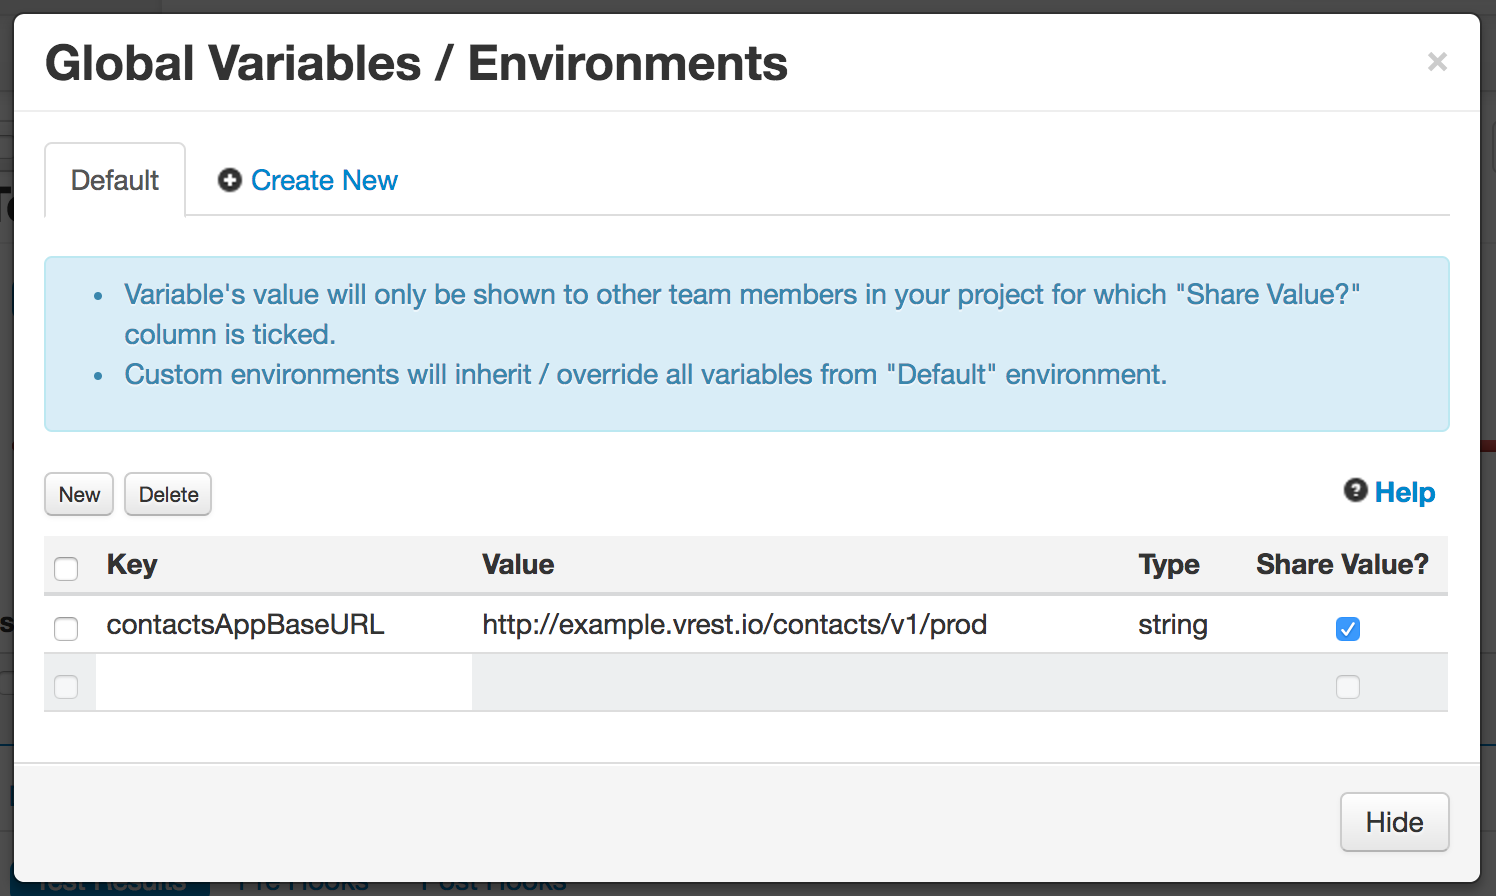
Note: While defining a variable, do not use the enclosing braces `{{ }}`, but while using this variable in test case, use this variable with enclosing braces `{{contactsAppBaseURL}}`.
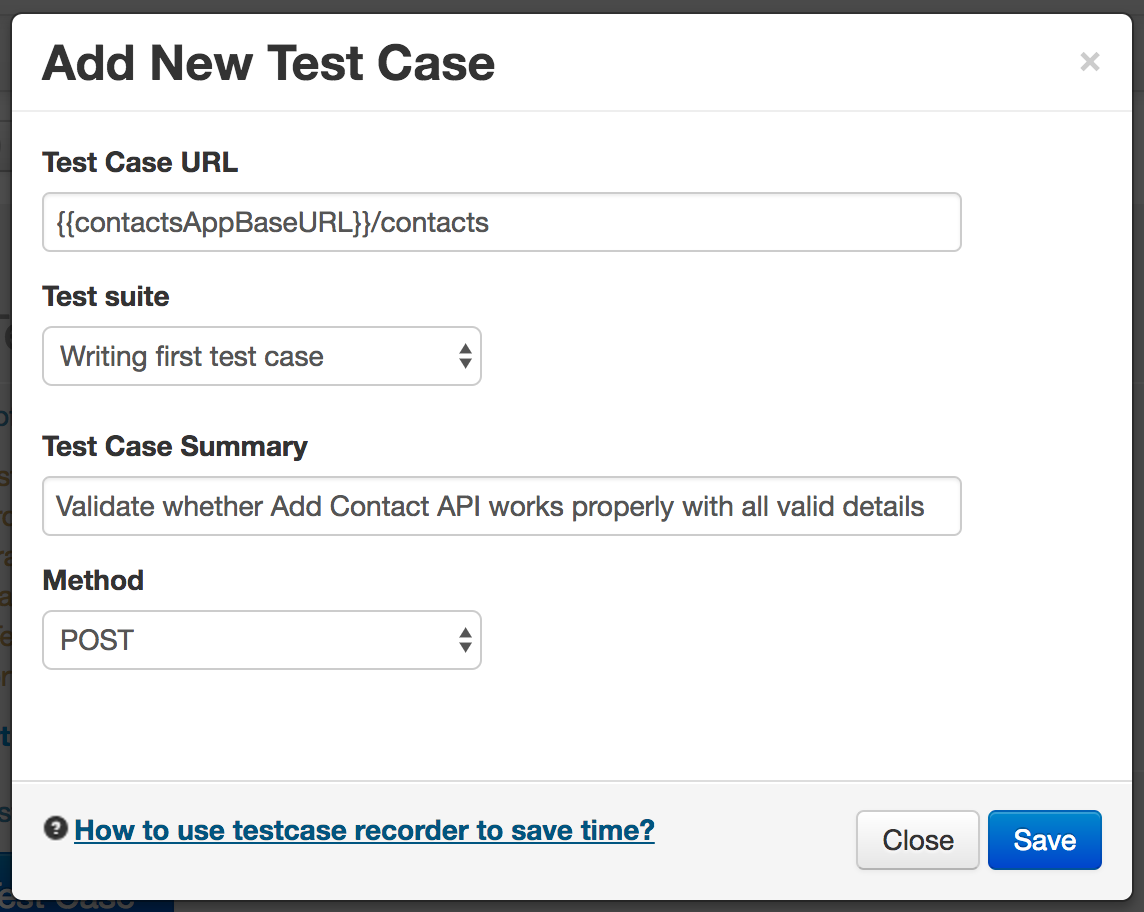
- Create a test case in vREST
A test case in vREST, can be created by simply clicking on “New” button in the “Test Cases” tab. A popup will appear as shown below and fill in the basic details to create a new test case.
After clicking on save button, a test case will be created something like as shown below. Click on the test case to expand it and see the various details: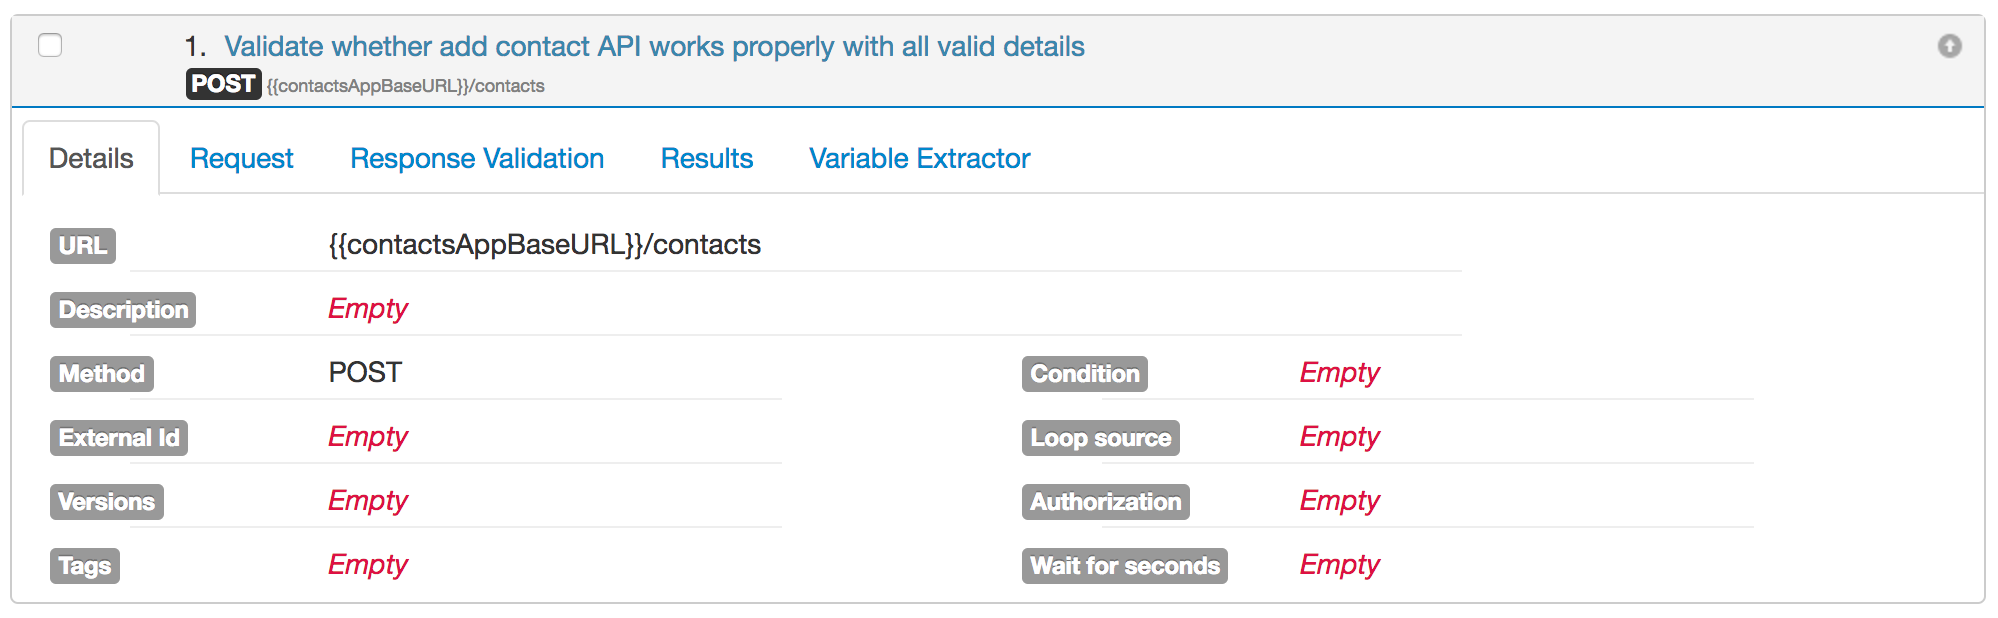
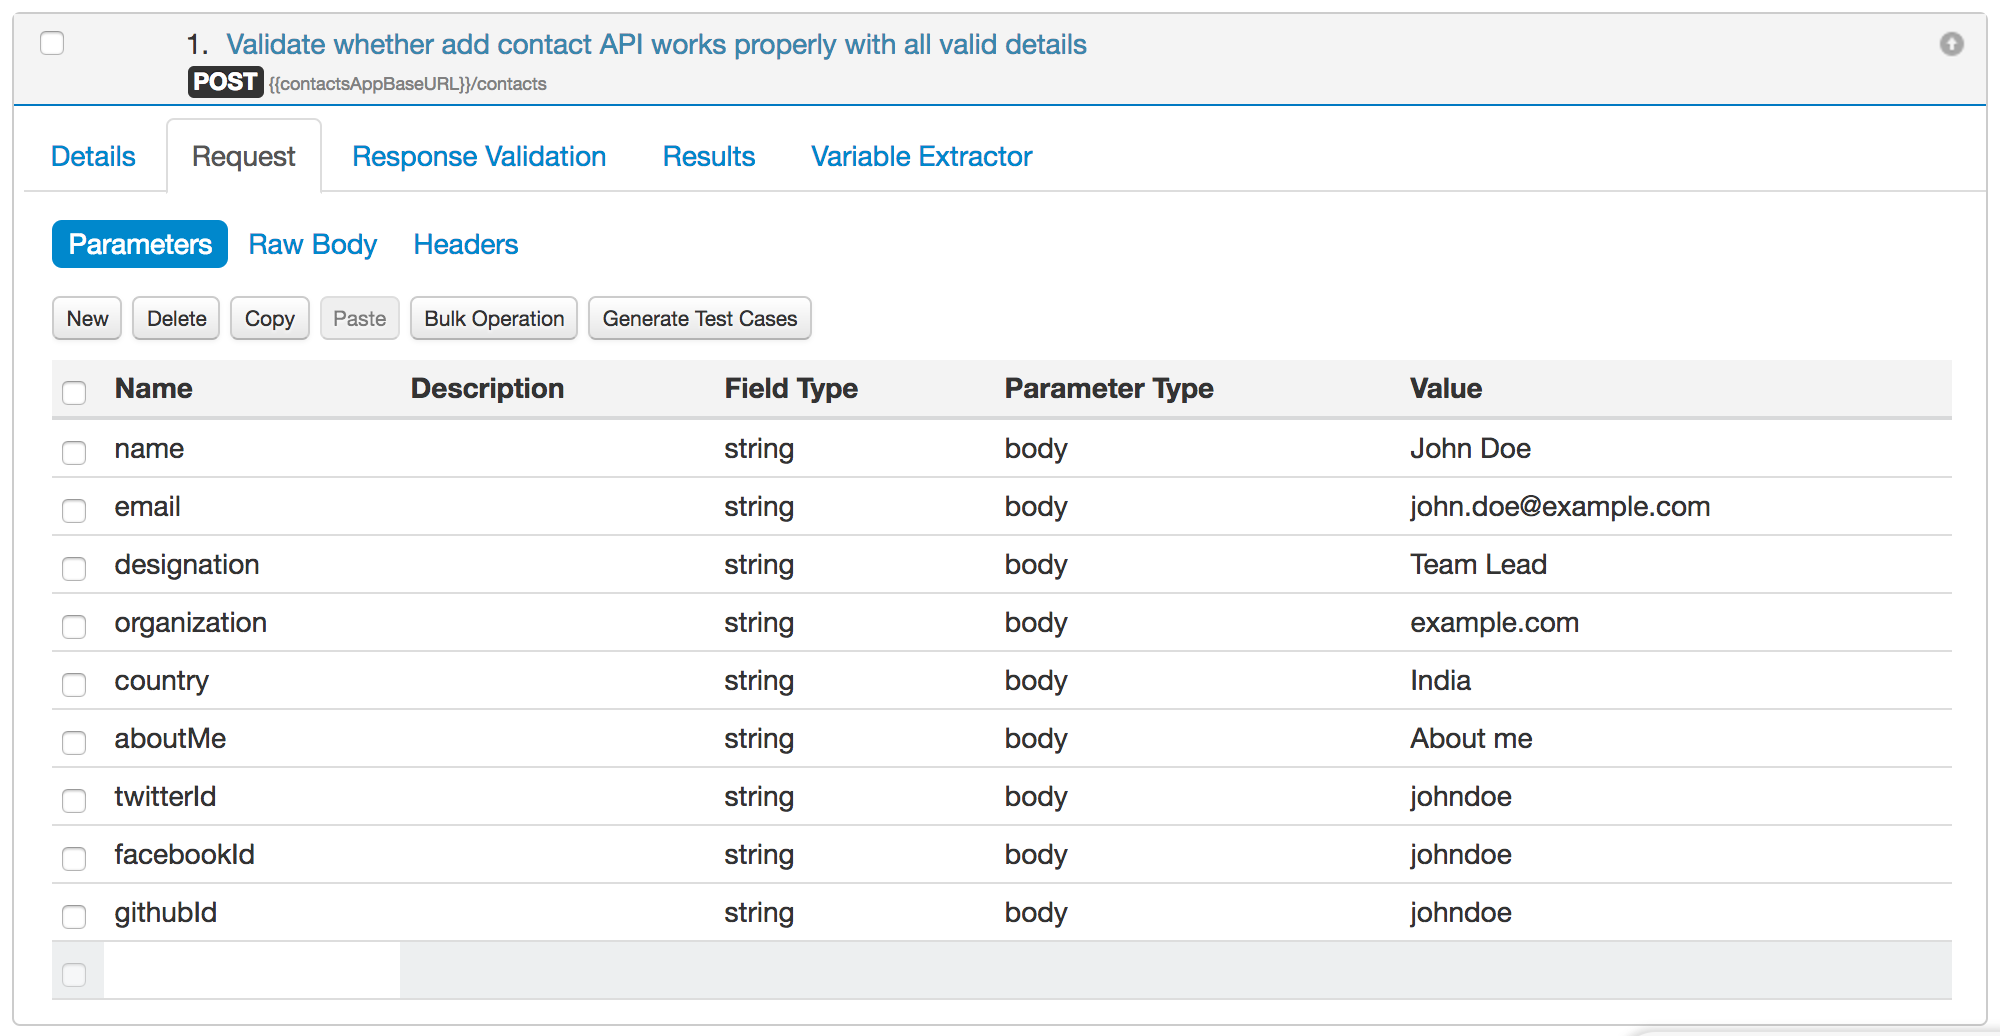
Define Request Parameters
After creating the test case, you can define API's request body parameters in "Request" tab.
or you may define the request body parameters in `Raw Body` sub tab in JSON format like below snapshot: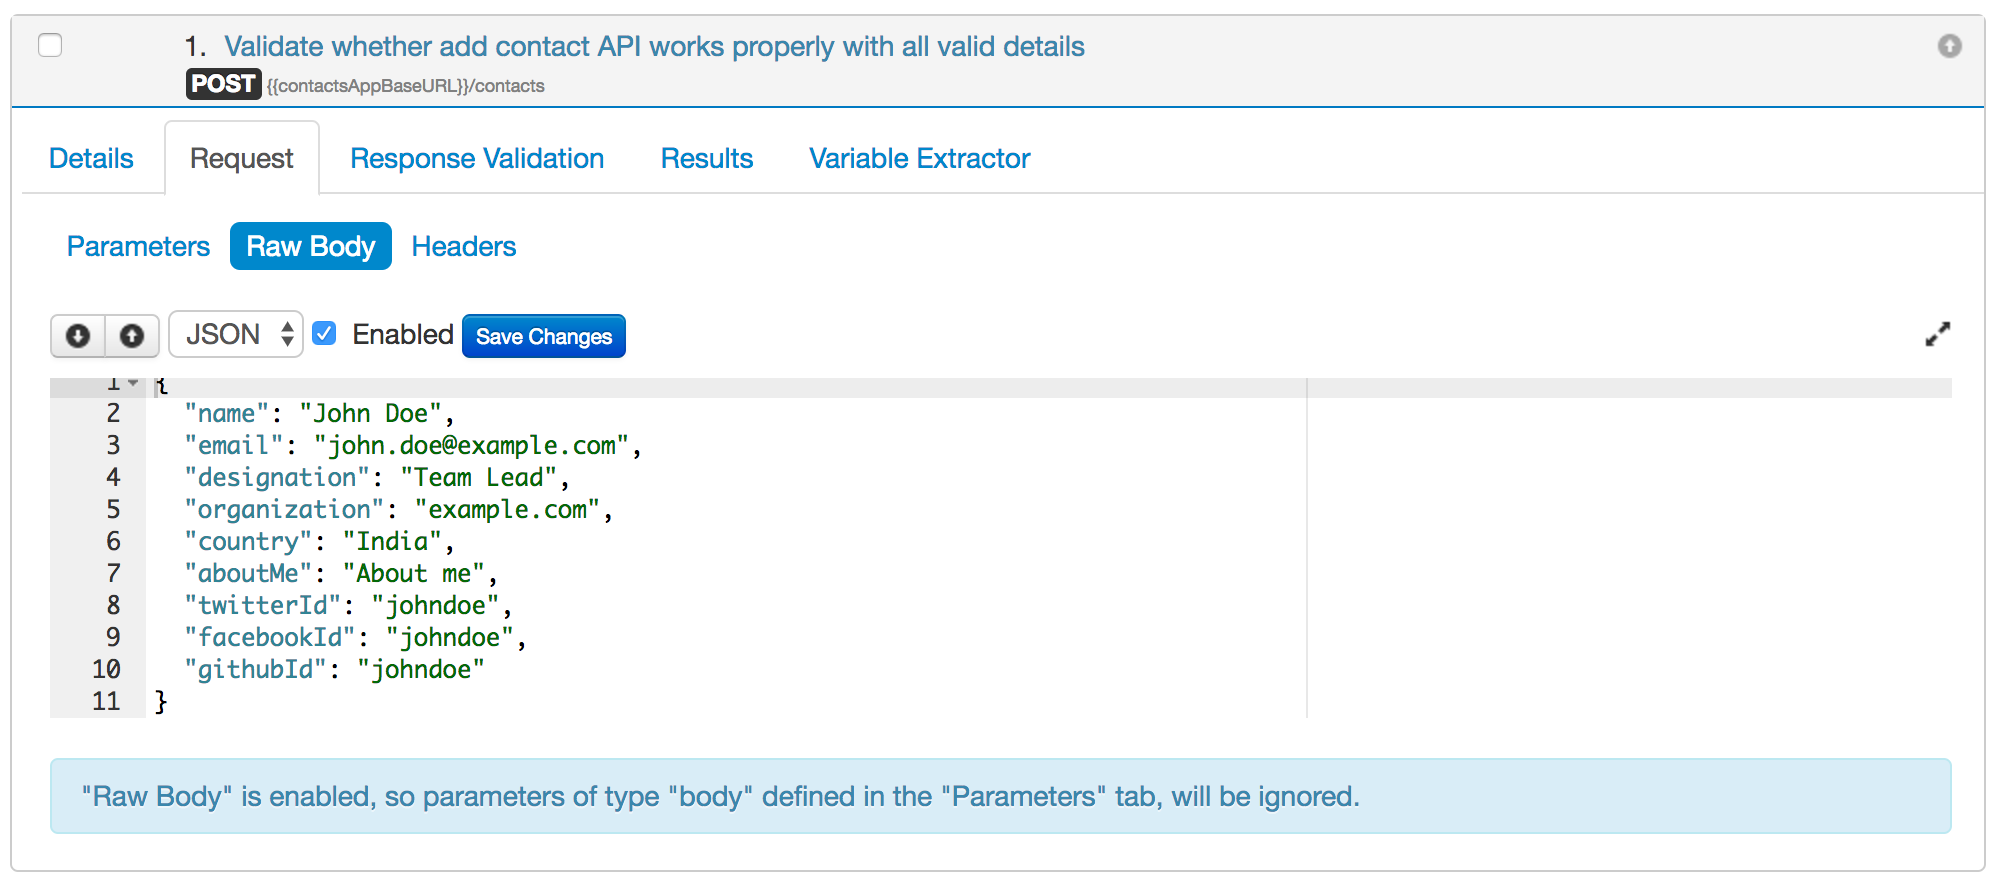
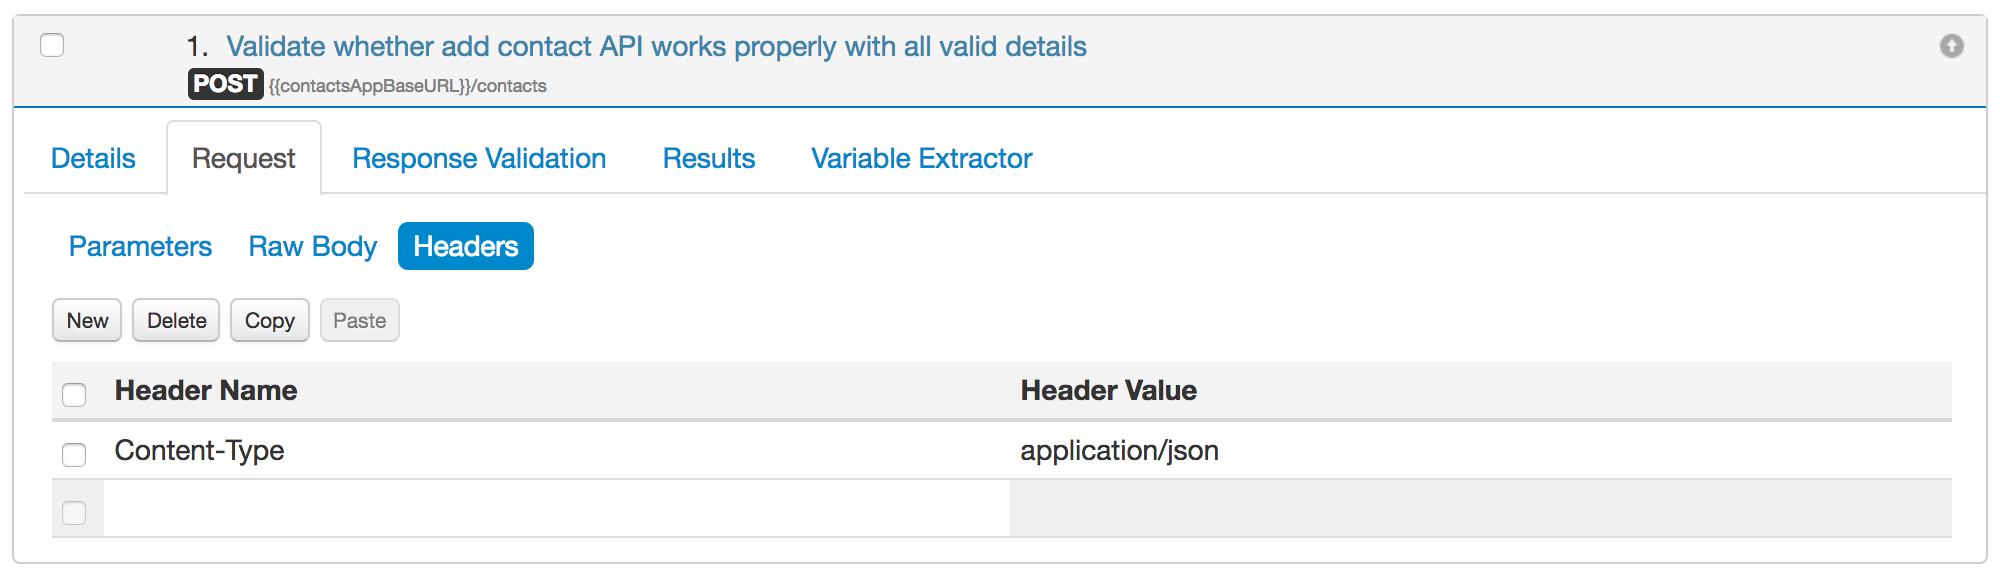
Define Request Headers
Now you can optionally define your request headers in "Request" tab > "Headers" sub-tab.
Define assertions for Response Validation and Execute the test case
In Response Validation tab, define the assertions for your test case response. It totally depends on you, how you want to validate your response. There is a default assertion already defined for status code verification. Since, our sample API returns 200 as the status code.

Let us try to execute this test case. To execute this test case, simply select the test case and click on "Run 1 testcase" button in the toolbar. The test case execution will start instantly.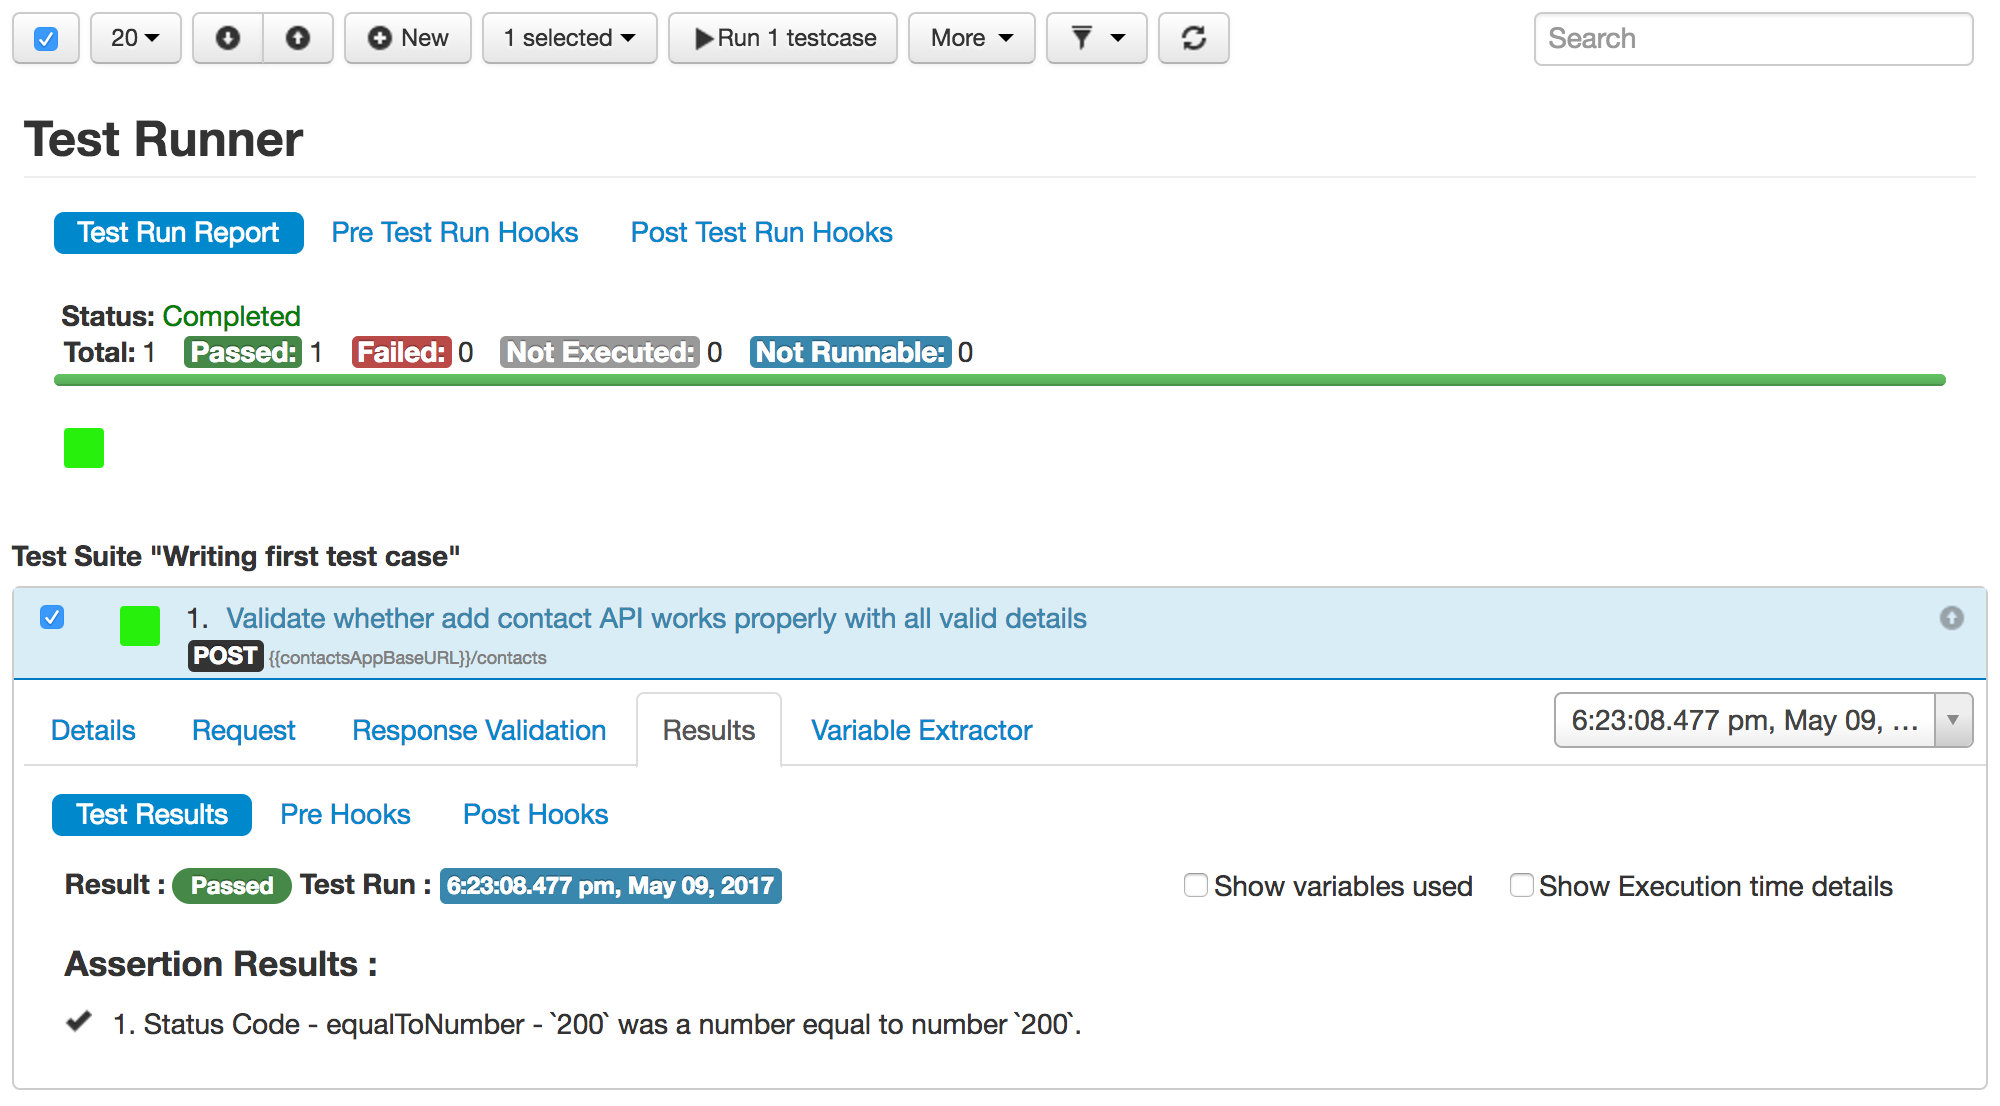
We validated the test case with simple status code verification. Let us try to add some more assertions.
Assertion to verify header 'Content-Type'
Assertion to verify response content. We are verifying the response via invoking Default Validator. Default Validator simply matches the expected response body with actual response body received.
Define the above assertions in Response Validation tab as shown in below image:

Now, when we execute this test case, the test case will failed. Now go to "Results" tab to see the failure reason. The test case has failed because we have not set any Expected Body for the test case, as you can see in the Diff Report. Default Validator needs this expected body to compare with the actual body.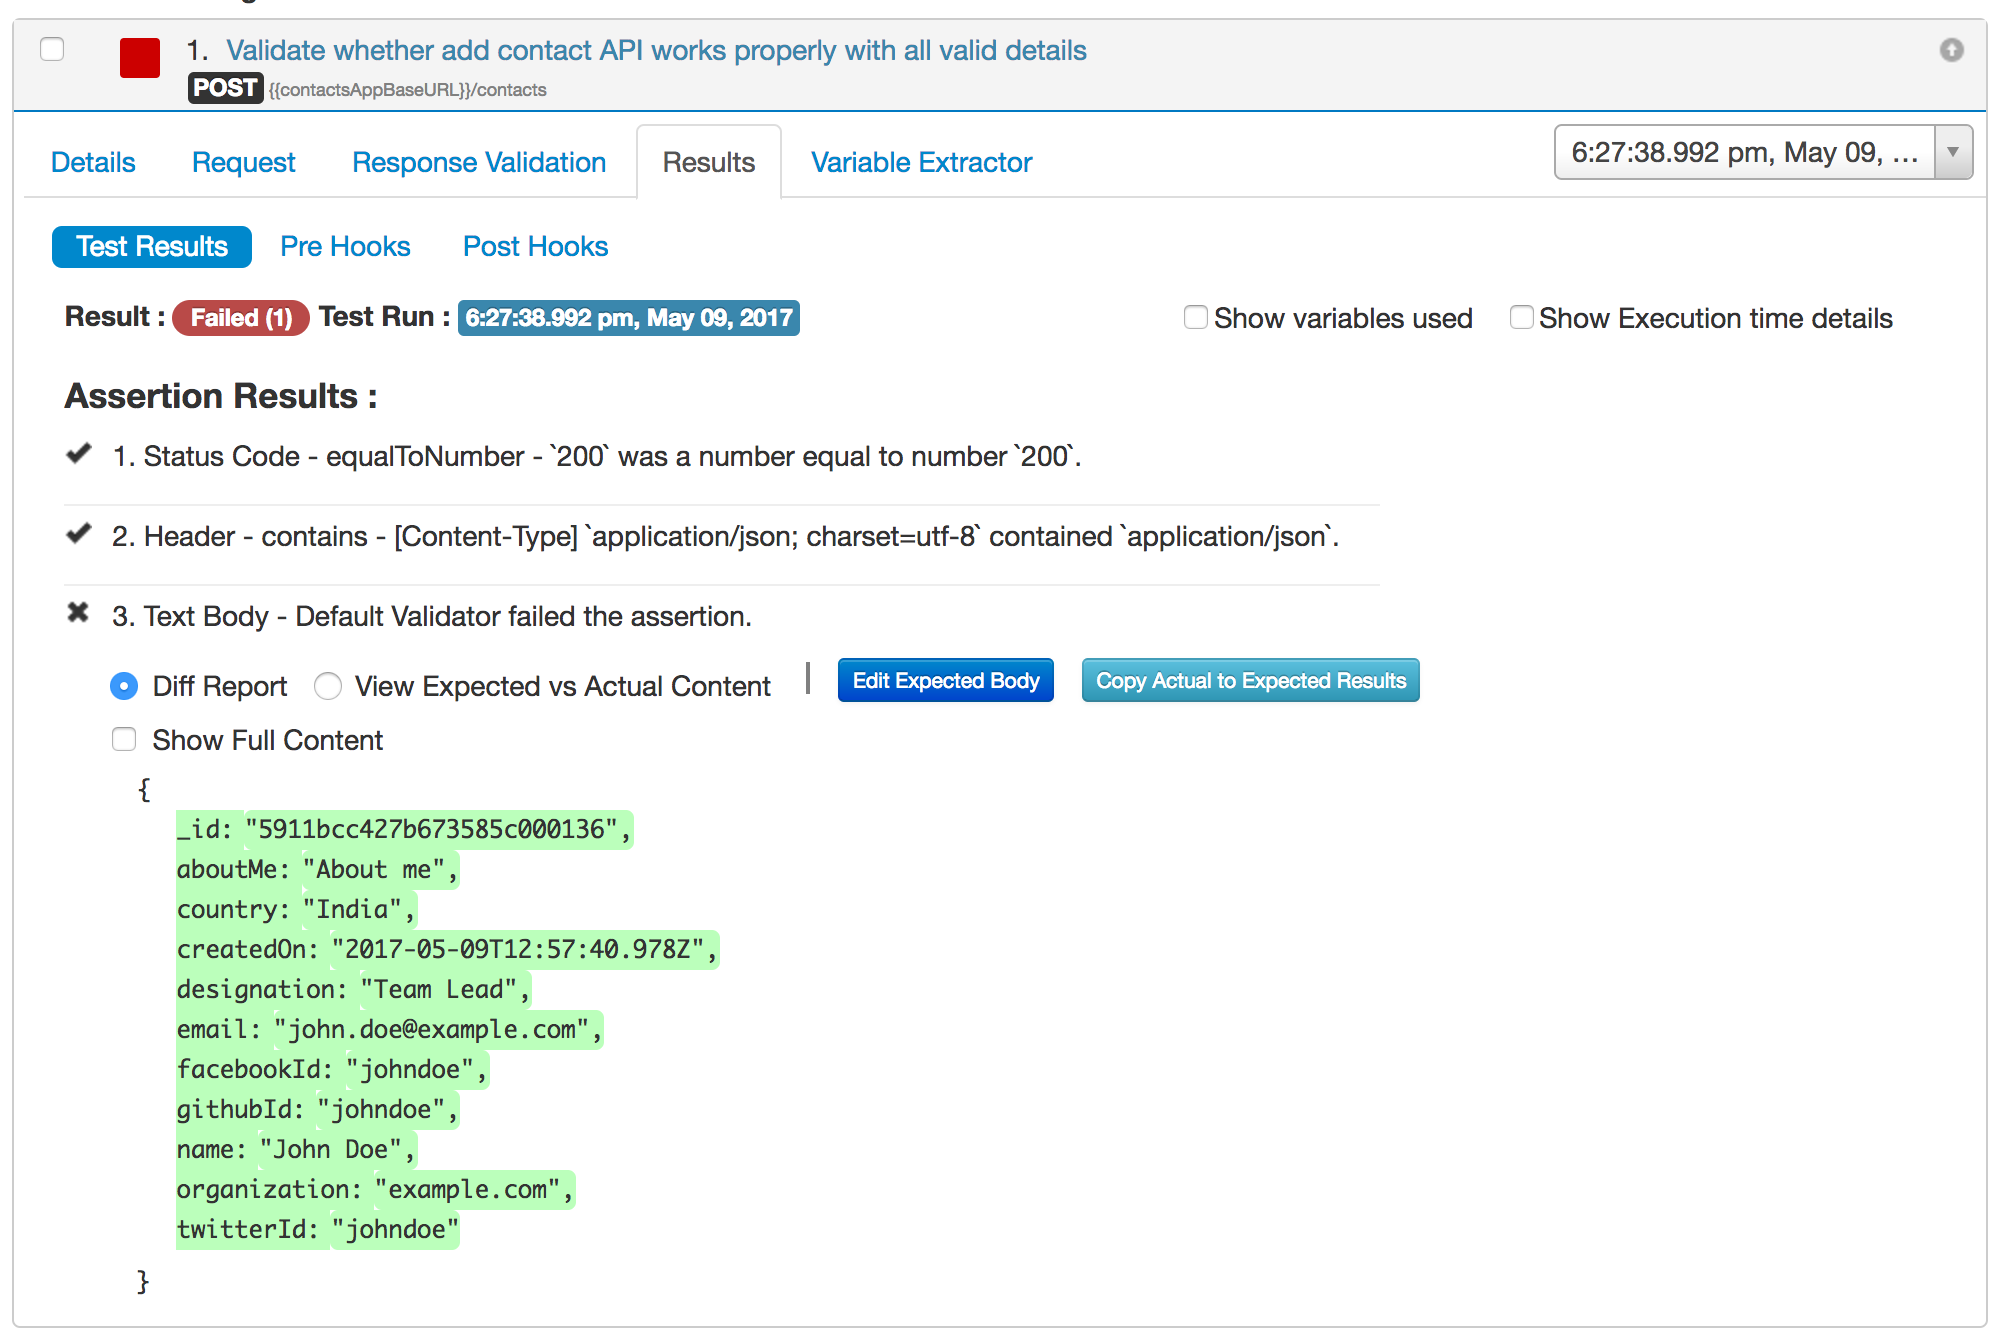
Click on button "Copy Actual to Expected Results" to copy this actual body to expected body for the test case. You can see that our test case's expected body has been automatically set to actual body.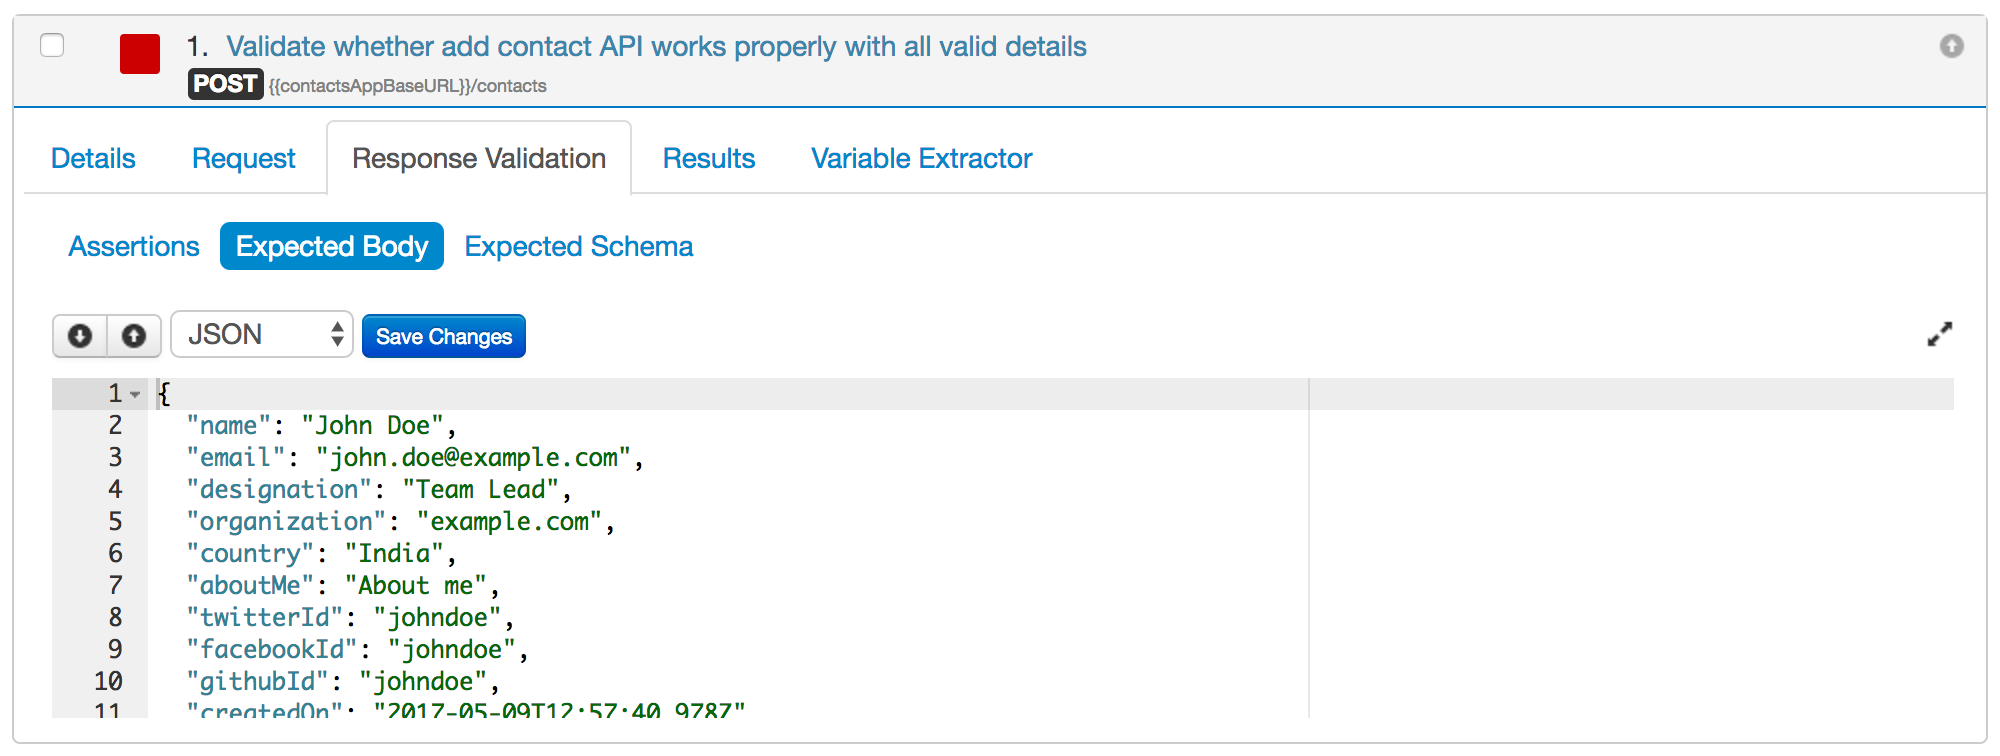
Now run the test case again. This time, the test case has failed again. Expand the test case again to see the failure reason.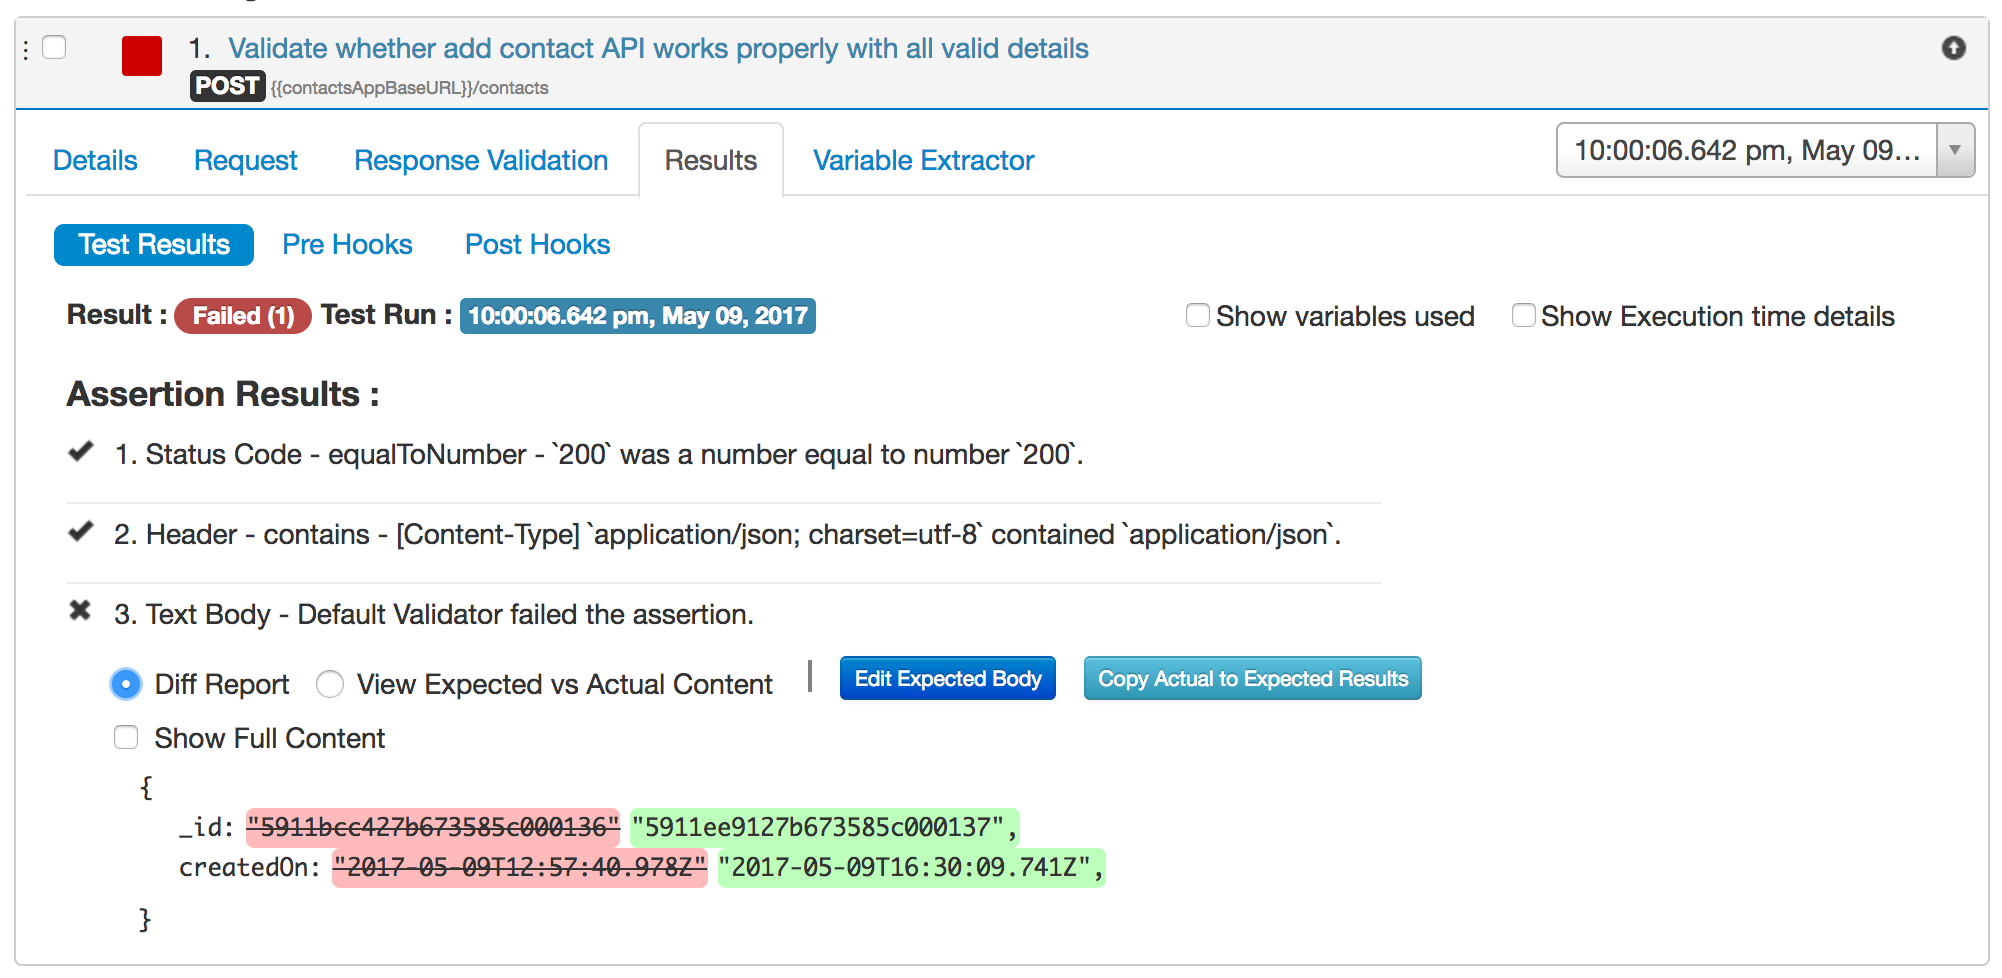
This time, the test case has failed due to some dynamic properties "_id" and "createdOn" in the API response. We can ignore these dynamic properties by using a special variable "{{*}}". We can modify our expected body as below: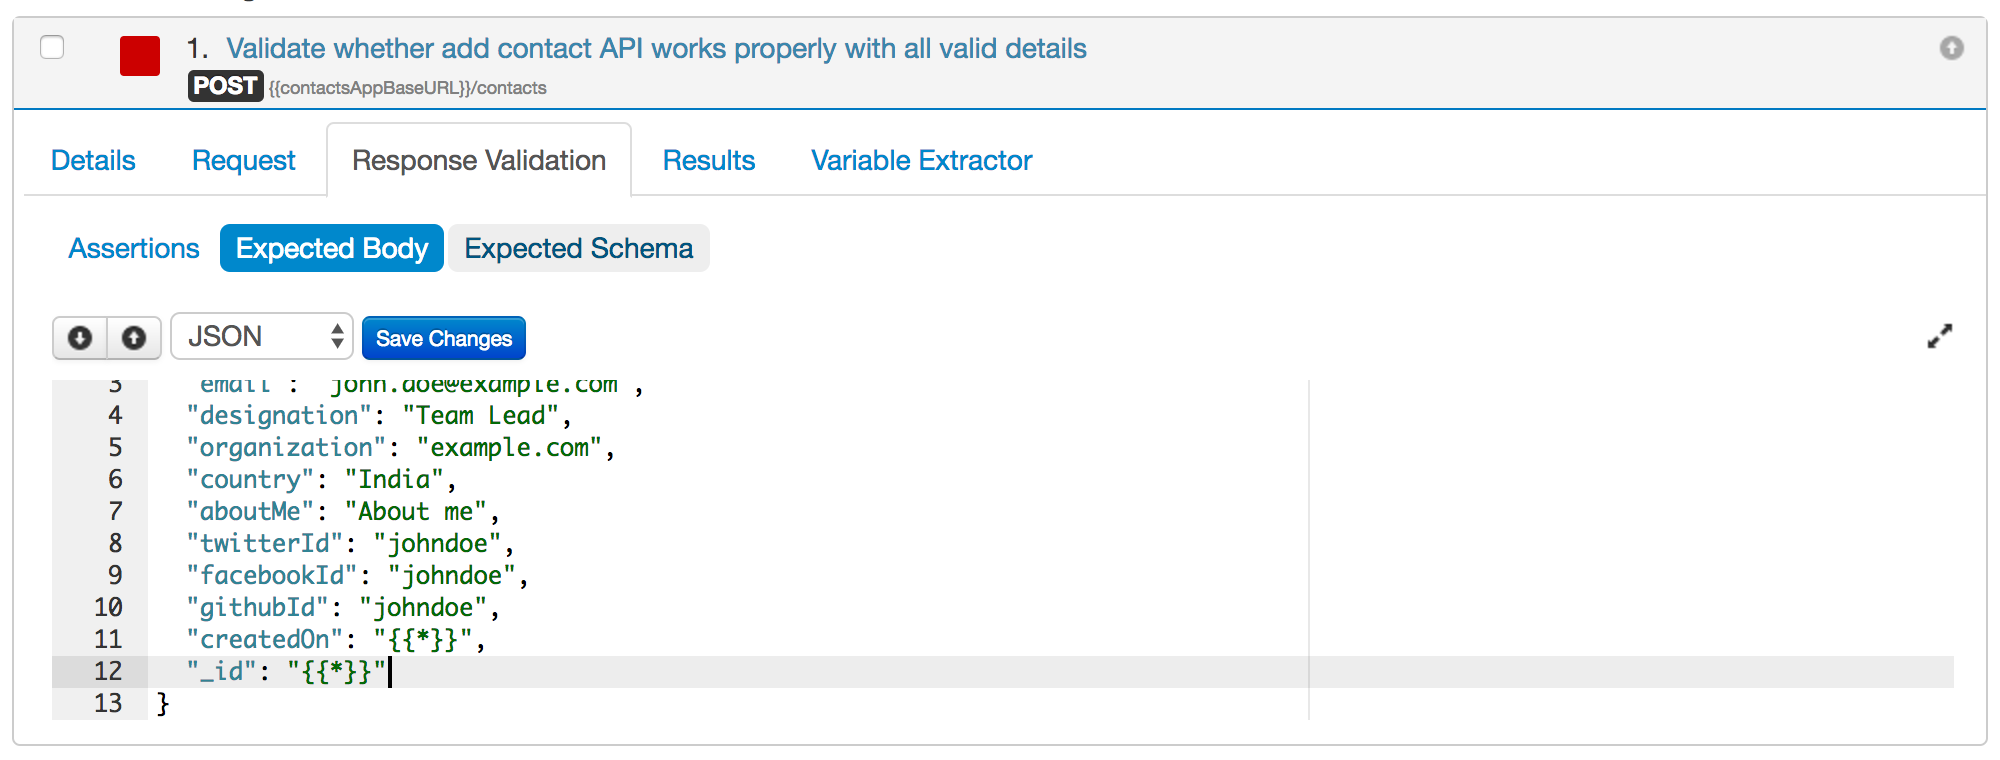
Now, run the test case again. This time, the test case passes.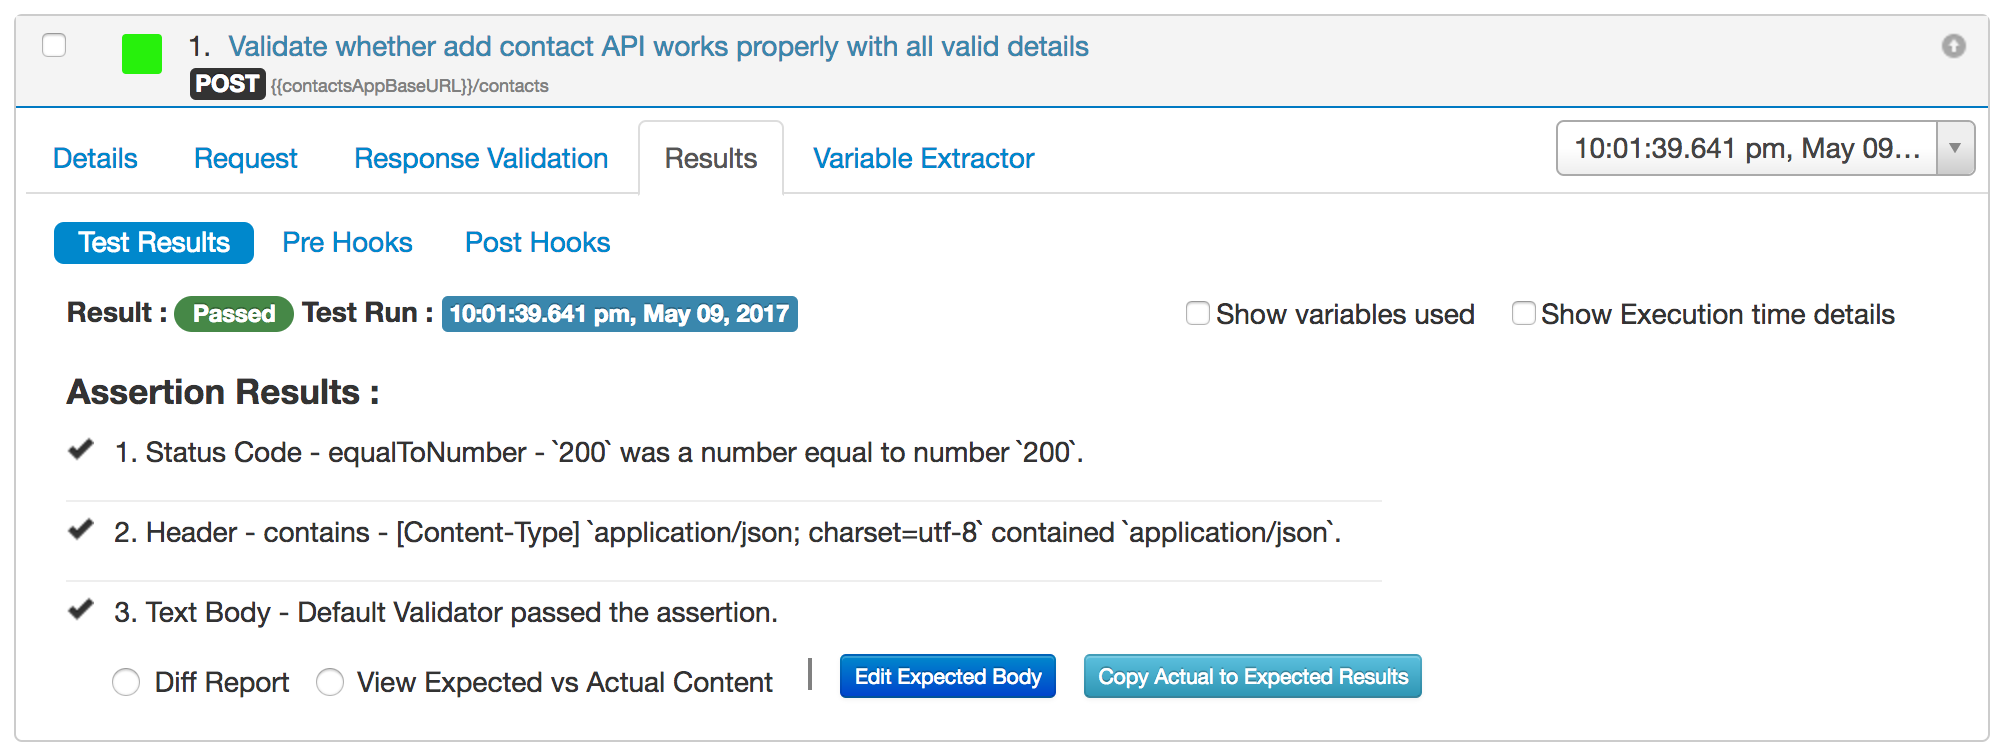
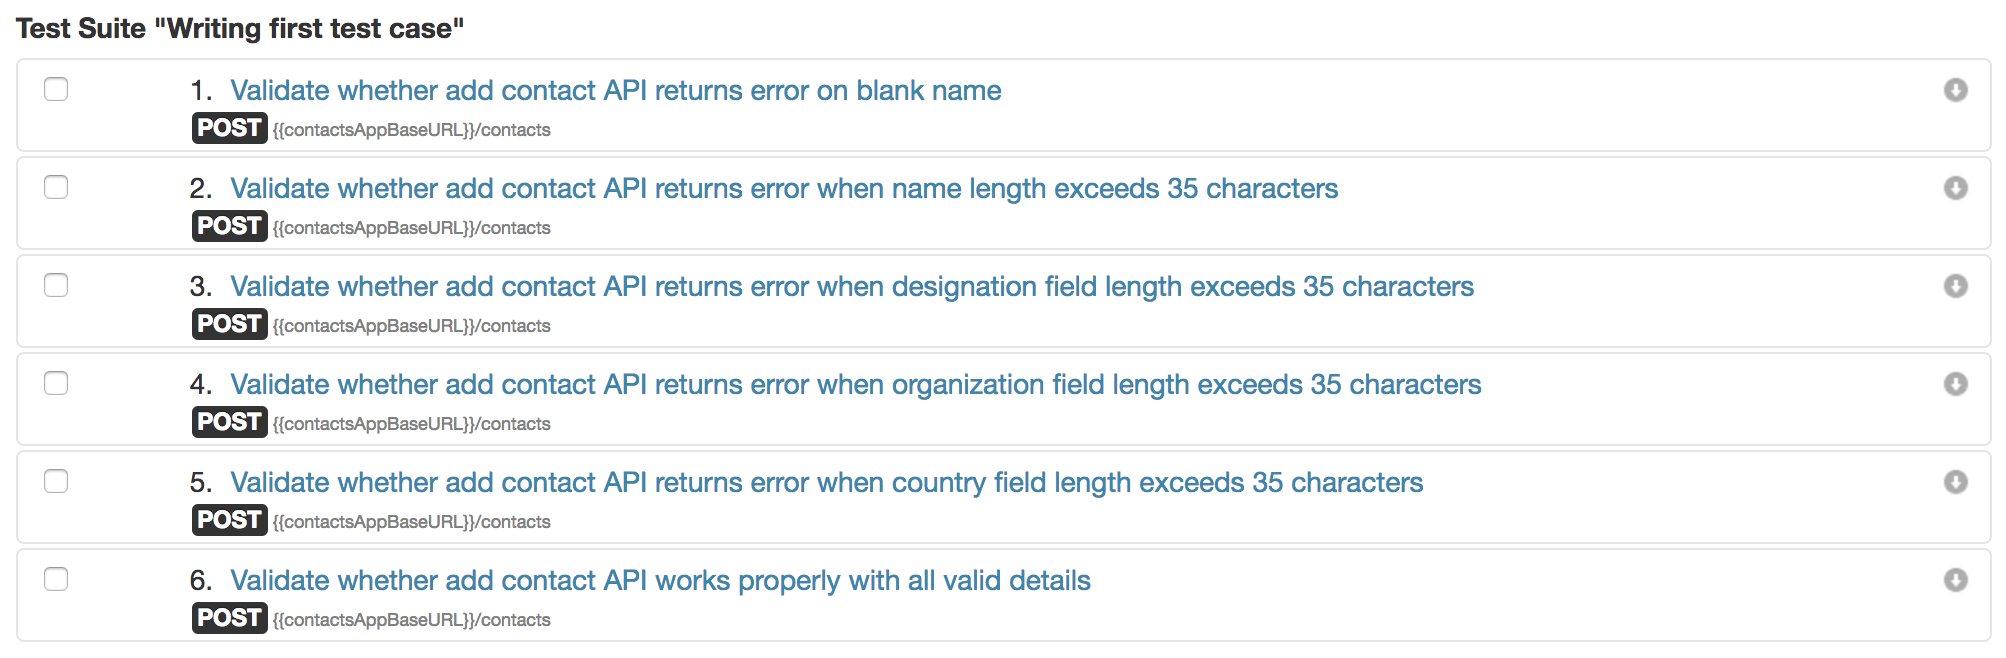
In this manner, you can create a suite of positive and negative test cases by copying and pasting the above test case and modifying particular request details. Your test suite might look like: