Visual Studio Team Services Integration
- Dheeraj Kumar Aggarwal
Visual Studio Team Services (referred as VSTS below) is a popular CI/CD tool. Now you can automatically validate your project builds using vREST test suite with VSTS.
If you are using some other Continuous Integration Server, you can integrate vREST with that in the same way as with VSTS. If you face any issues then do let us know by dropping an email to support@vrest.io.
Prerequisite
Let's take a sample application (Contacts Application) and step by step guide on how we can integrate vREST with VSTS.
Note: You can find the source code of sample application at Github.
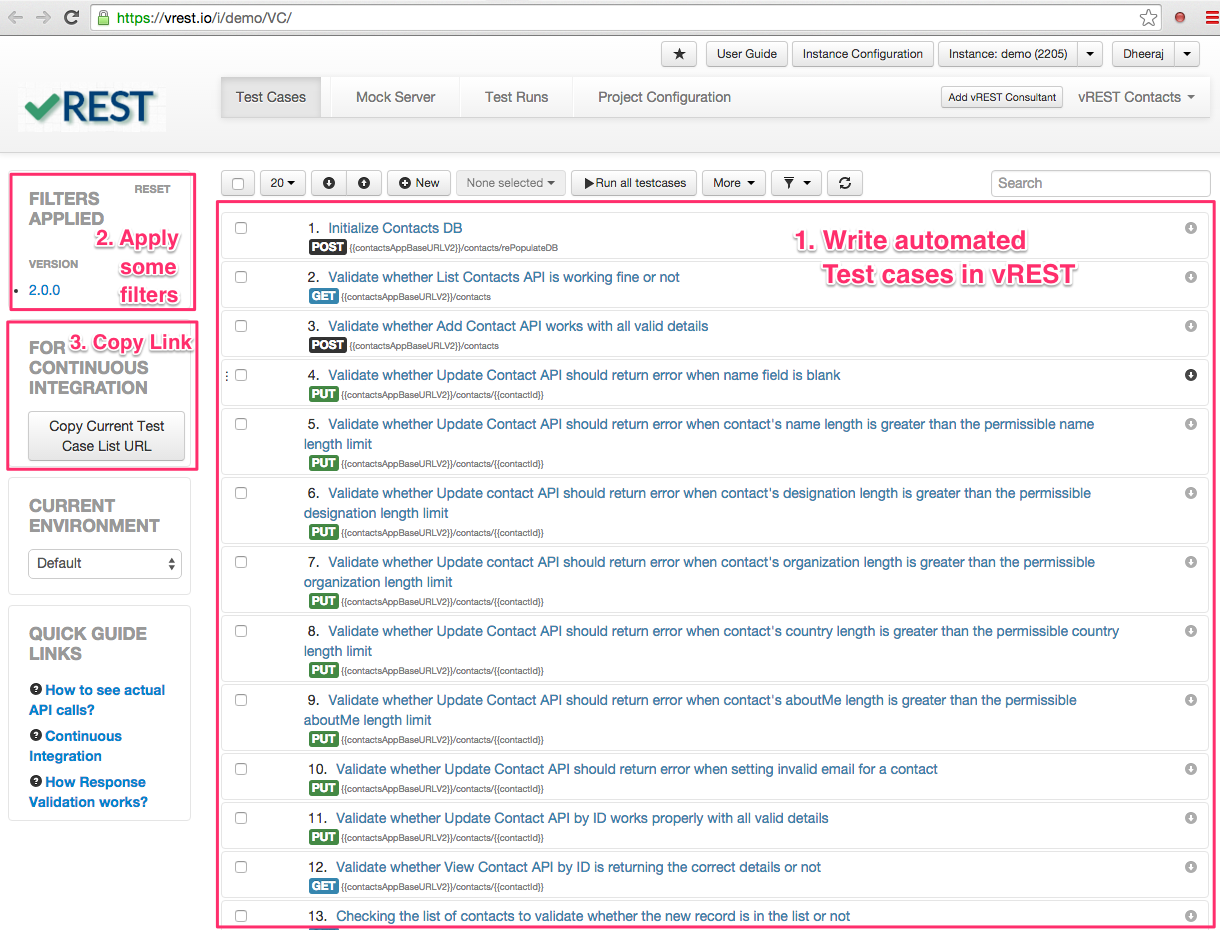
Step 1: Write your automated test suite in vREST First you need to write test cases for your test application in vREST to ensure the build quality of your web application. Then copy the test case list URL by clicking on button "Copy Current Test Case List URL" available in Continuous Integration section. You can find the test cases for this sample application in vREST here. First setup the vrunner module by following the guide Setup / install vrunner. Once you setup this module on your local machine, you can execute the vREST test cases by executing the following command:Step by Step Guide:
Step 2: [Optional] Learn how vrunner command works and get your hands dirty on it by installing it locally first
vrunner --email=<EMAIL_ID> --password=<PASSWORD> --url=<URL OF vREST Test Cases> --logger=xunit [--filepath=<absolute log file path>] [--env=<ENVIRONMENT>]
Options
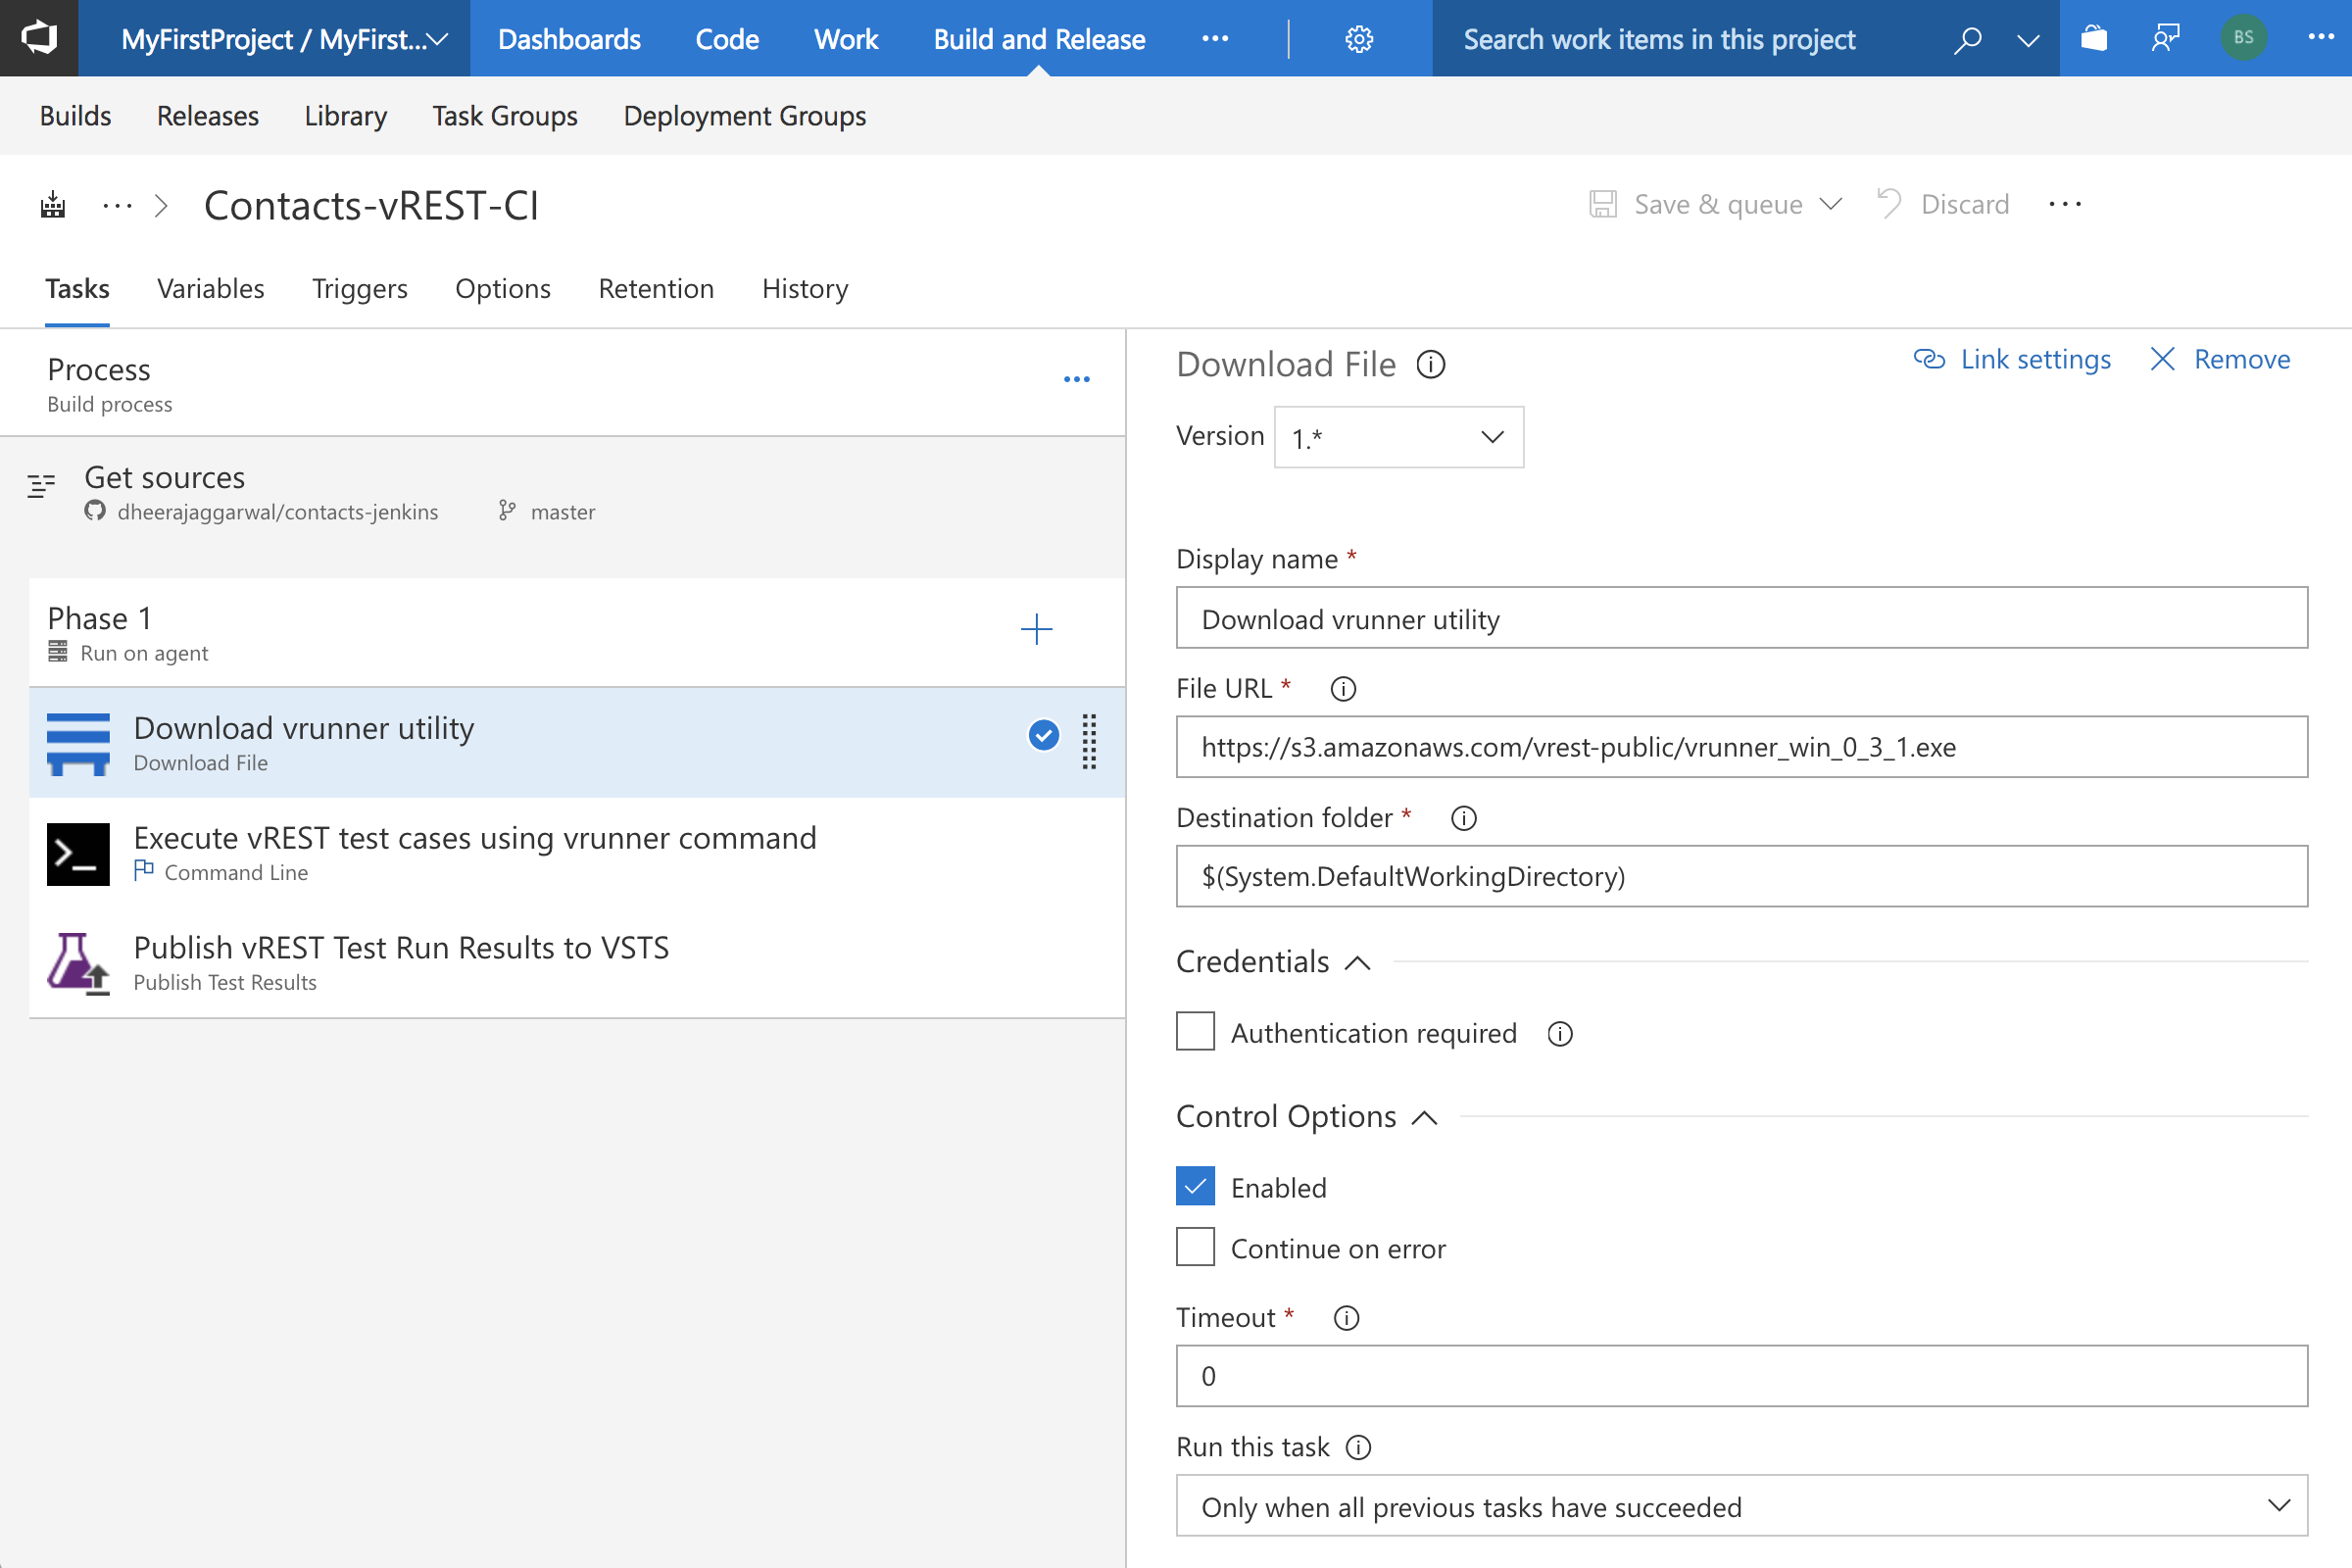
Step 3: Download vrunner utility in the build step in VSTS
In VSTS build process, you will need to add task to download the vrunner utility on the VSTS server. If the vrunner utility is already there as part of another task, then skip this step. We have added a Download task in VSTS. But it may differ in your case based on Agent Configuration.
Note: You may copy the vrunner binary download link from this guide link.
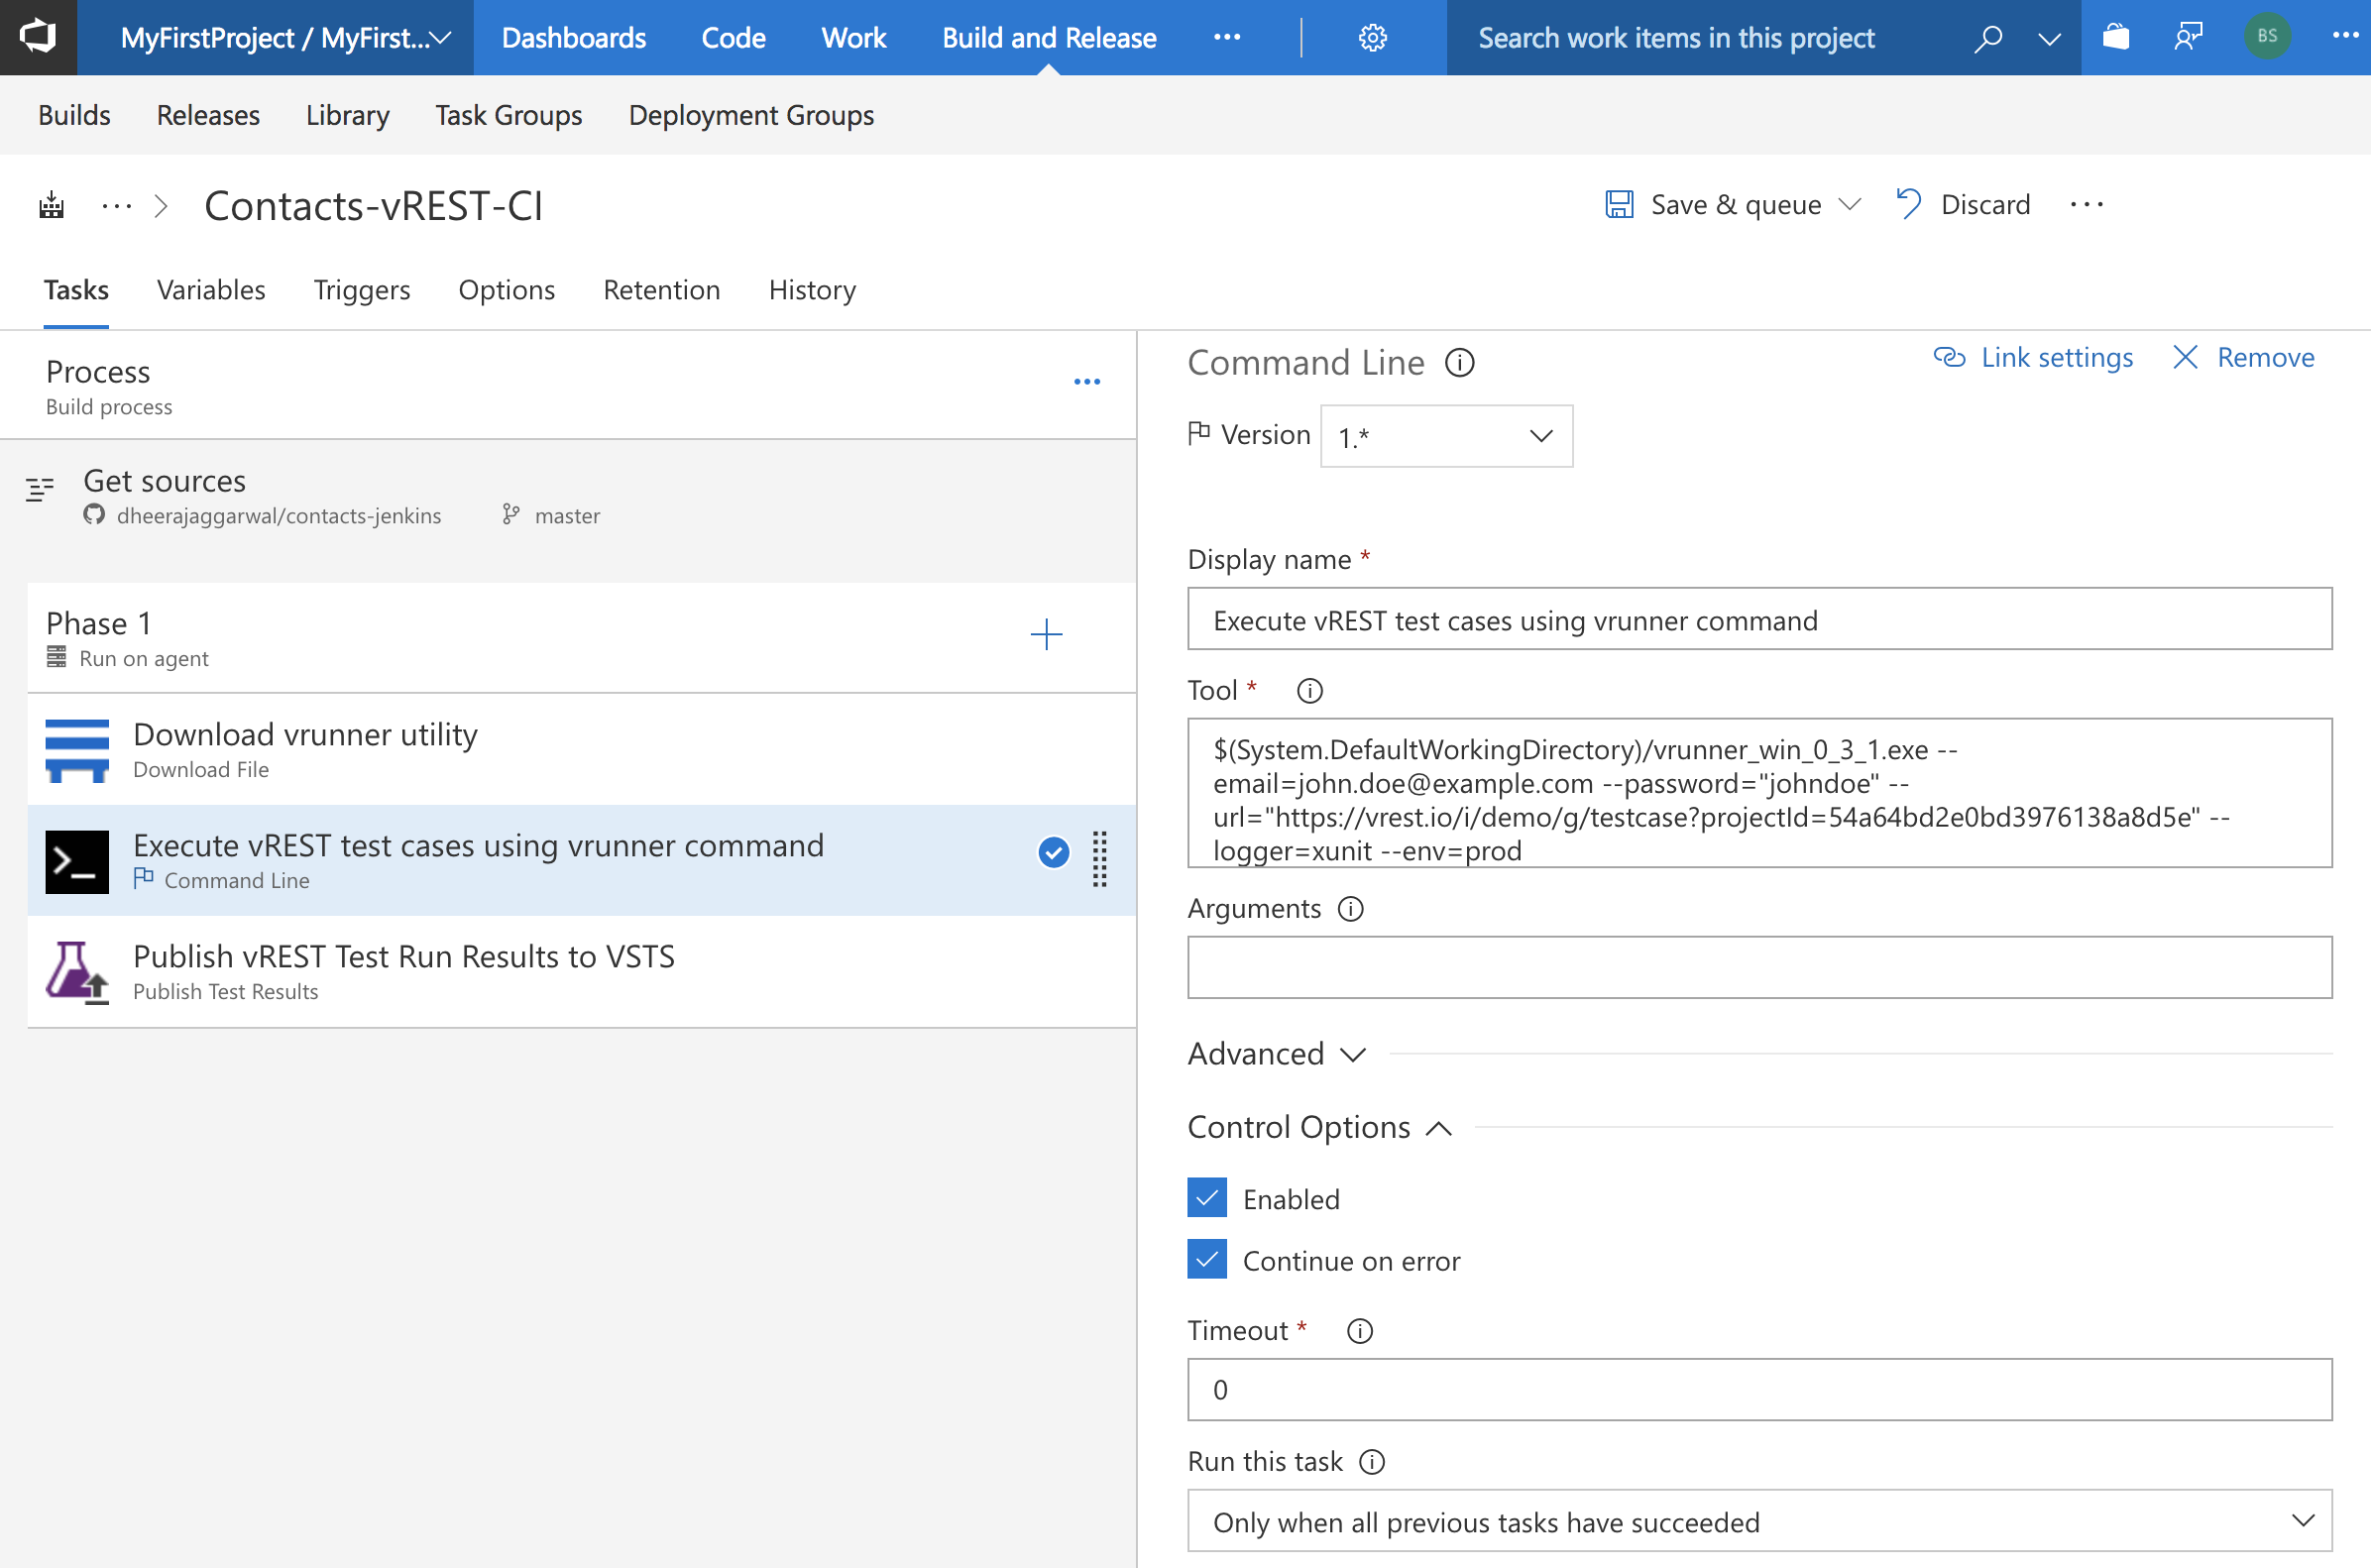
Step 4: Add vrunner command in the build step in VSTS
In VSTS Build process, add a Command Line task and just fill the form as shown in the snapshot below. Please replace the path to vrunner binary, email, password, env, url parameters of the command according to your configuration.
Note: Make sure, you have checked the Control Option "Continue on error" because in case of test failure, vrunner command returns error code and your next task will be skipped if you don't tick this option.
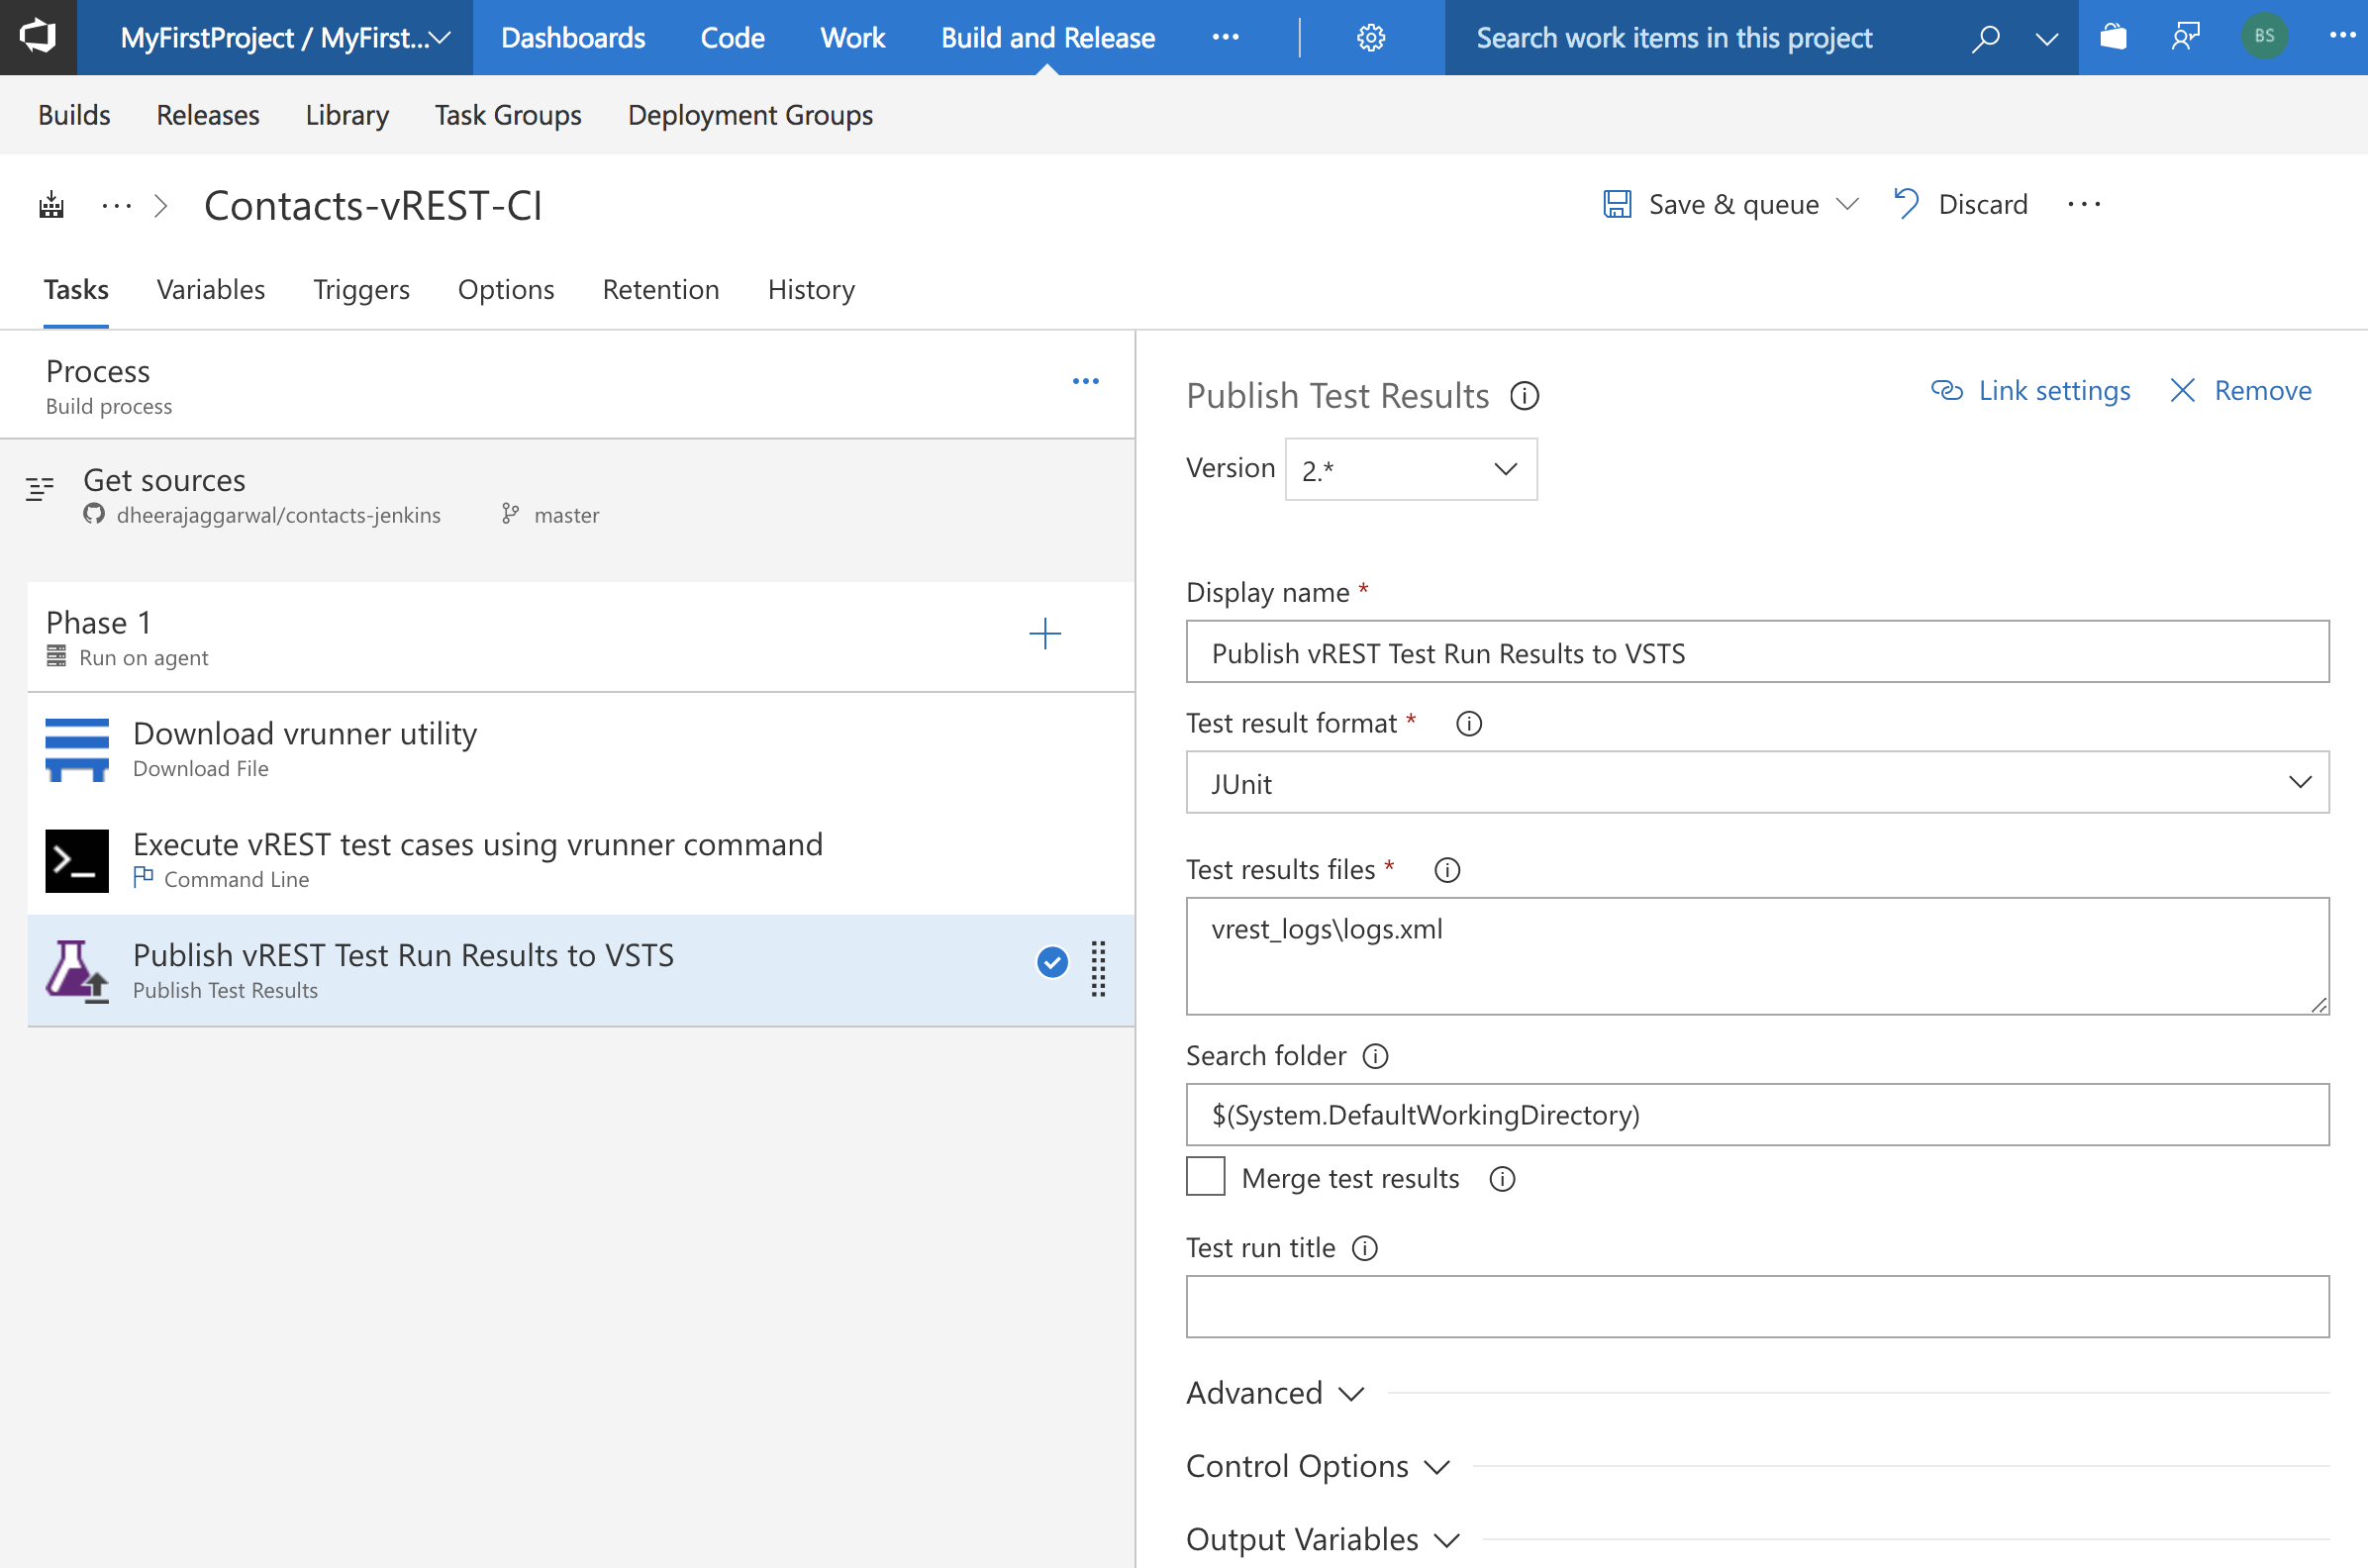
Step 5: Publish test results in VSTS Server
By default, vrunner command writes the report in 'vrest_logs/logs.xml' if logger 'xunit' is used. You may change this path by providing the filepath option in the vrunner command. In VSTS Build Process, add a build task "Publish Test Results" and specify the form as shown below:
That's it.