Scheduling on Windows
- Dheeraj Kumar Aggarwal
This post will explain, how you can schedule test cases written in vREST on Windows.
Here is a video tutorial for the same:
Prerequisite
Prerequisite for the machine, on which you want to schedule test cases.
- Download vrunner binary
- For download and setup vrunner, please follow Setup / install vrunner.
Let's take a sample application (Contacts Application) and step by step guide on how we can schedule vREST test cases.
Note: You can find the source code of sample application at Github.
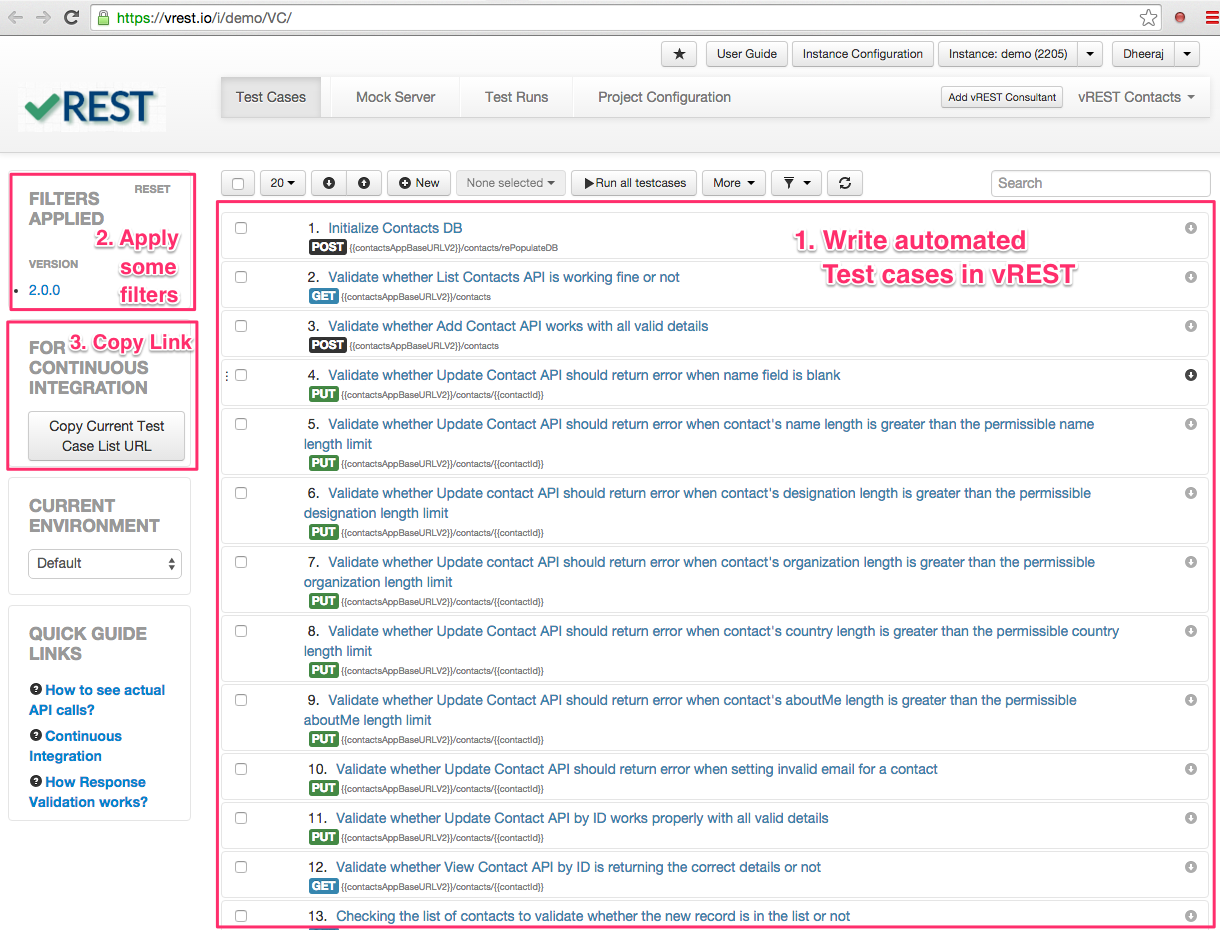
Step 1: Write your automated test suite in vREST First you need to write test cases for your test application in vREST to ensure the build quality of your web application. Then copy the test case list URL by clicking on button "Copy Current Test Case List URL" available in Continuous Integration section. You can find the test cases for this sample application in vREST here. First setup the vrunner module by following the guide Setup / install vrunner. Once you setup this module on your local machine, you can execute the vREST test cases by executing the following command:Step by Step Guide:
Step 2: [Optional] Learn how vrunner command works and get your hands dirty on it by installing it locally first
vrunner --email=<EMAIL_ID> --password=<PASSWORD> --url=<URL OF vREST Test Cases> --logger=xunit [--filepath=<absolute log file path>] [--env=<ENVIRONMENT>]
Options
Step 3: Write a batch script to executed by Windows Task Scheduler
Now, you can add this vrunner command in a batch script which you can schedule via Windows Task Scheduler. That's it.
In the below batch script,
- we have added –-debug=true to enable the debug mode of vrunner command
- we have also redirected the vrunner command standard output and error to a log file. This will help in debugging if anything goes wrong while executing test cases using vrunner.
set mydate=%date:/=_%
set mytime=%time::=_%
set logFileName=%mydate: =_%_%mytime:.=_%

"C:\Users\John Doe\Desktop"\vrunner_win_0_3_7_x64.exe --debug=true --email="john.doe@example.com" --password="johndoe" --url="https://vrest.io/i/demo/g/testcase?projectId=549550cb68e831540bd849b1&versionIds=54d86e3a4908a5a106e6243f" 1> "C:\Users\John Doe\Desktop\vrest_process_logs"\%logFileName%.log 2>&1
Step 4: Integrate this batch script in Windows Task Scheduler
For integration, please follow our video tutorial available on the top of this post.