Single Project Migration Validator
- All (Deactivated)
Pre-Requisites
- A project with previously existing project key must exist in JIRA.
- JIRA project data are already imported into JIRA using single project restore.
- See "Restoring a project from backup" page under JIRA documentation as per your JIRA version.
- For example, docs relate to JIRA version 7.9 is available at: https://confluence.atlassian.com/adminjiraserver/restoring-a-project-from-backup-938847691.html
- All the JIRA issues and Releases must have been imported prior to migration.
- Check reverse traceability and release tabs in RMsis. JIRA related data related to this project should be visible.
- Please ensure that no addition or deletion have been performed in JIRA after the data import in JIRA.
- See "Restoring a project from backup" page under JIRA documentation as per your JIRA version.
- RMsis is already installed and synced with JIRA so that the project exists in RMsis.
- Open RMsis and select the above mentioned project.
- This will sync the project with JIRA and import JIRA issues and releases inside RMsis.
- RMsis should not contain any pre-existing RMsis data(Requirements,Test Cases etc related to the project being restored) before the data import.
- Do not insert any data within this project in RMsis before the migration.
- Workflow of source and destination RMsis must be same.
- This is necessary if advanced workflow is enabled in the source RMsis.
- All the users of source instance must be mapped with new users in destination instance.
- If the users are different in target instance, please map all the users to pre-existing users of target instance.
- Data importer will create Global and Local custom fields in target instance.
- Please run the migration validator to ensure that same name custom fields does not exist.
- If it exists, you will have to rename these fields before data restoration.
Migration Validator
This is a java based utility which is used to validate the above mentioned Pre-Requisites before executing the actual backup/restore. All the operations of this utility are read-only operations. No modifications will be performed in the RMsis database. So, you can execute this utility any number of times. Please follow the steps mentioned below to perform the validation.
- Download the migration validator and store it on the JIRA+RMsis server. (Please send a mail to support@optimizory.com to get the link to download the utility)
Bring up shell/command line and execute the utility using the command: java -jar migration-validator.jar
Please ensure that Java 1.8 is installed and PATH system variable is set so that you are able to execute java programs.
See sample screenshot below.

You will be prompted to enter the path to <JIRA_HOME> directory.
Please contact your Jira Administrator to identify the location of Jira Home directory.
Steps to locate Jira Home directory is available at: https://confluence.atlassian.com/jirakb/how-to-locate-jira-home-directory-313466063.html
Enter the absolute path of the JIRA_HOME folder.
- See sample screen below.

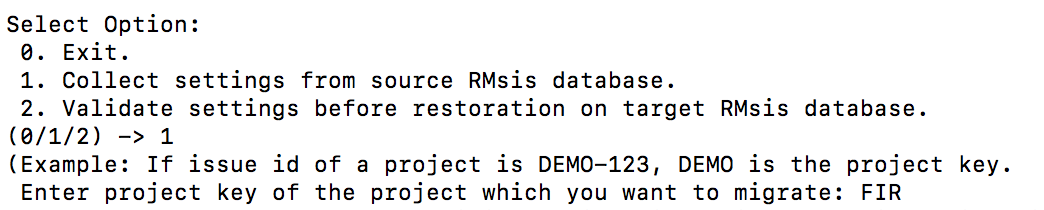
- You will be prompted to choose an option. Select option 1 to gather information from source database.
- You will be prompted to enter the project key of the project you want to backup/restore. Enter the project key of the project.
- Here, FIR is the project key inserted by the user.
- See sample screen below.
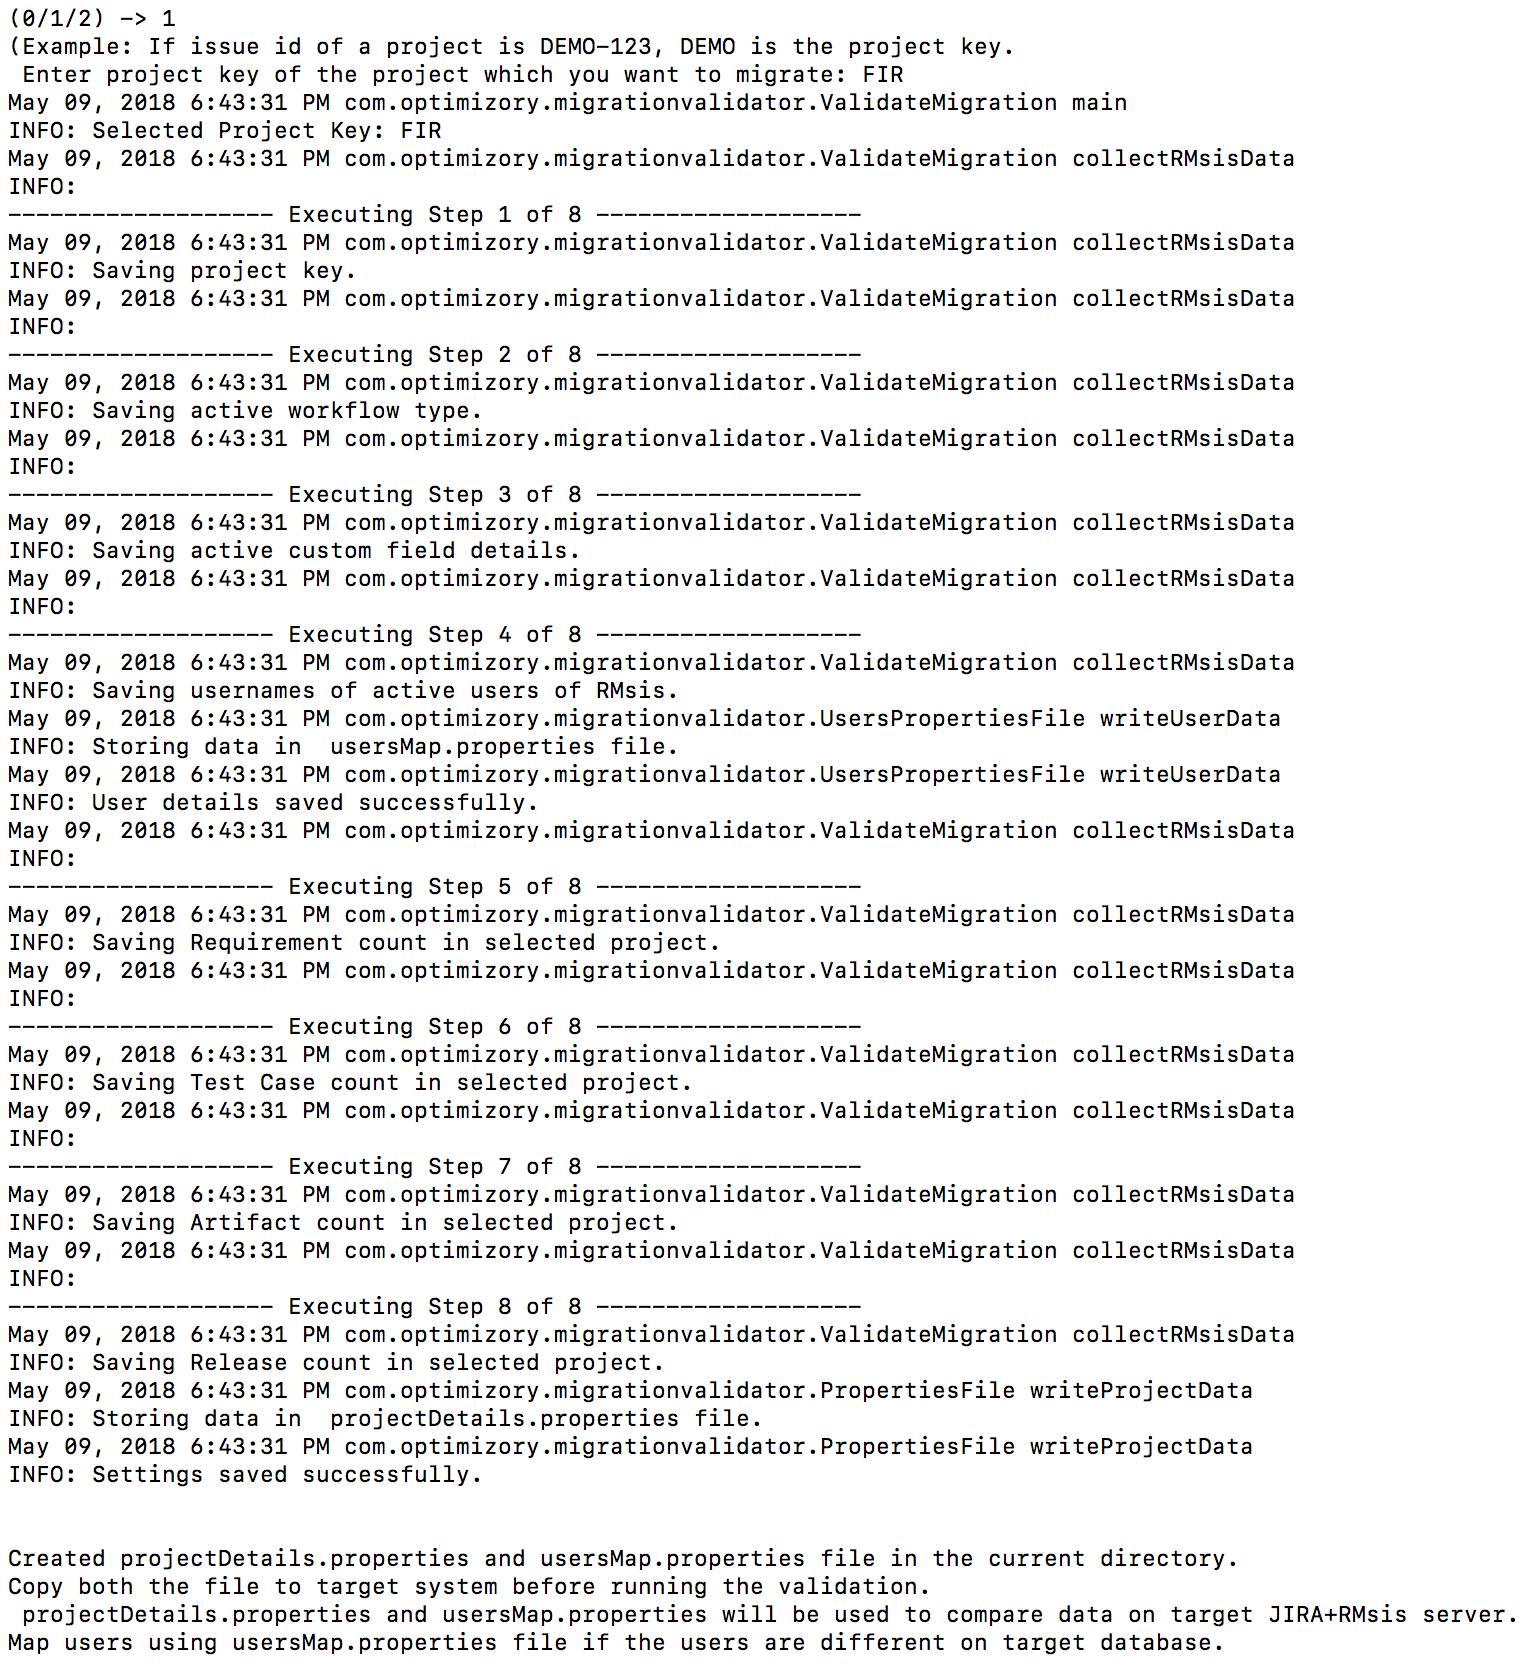
- Above operation will create two files in the directory where migration-validator.jar is stored.
- projectDetails.properties : This file consists of database settings which will be used to validate settings on target database.
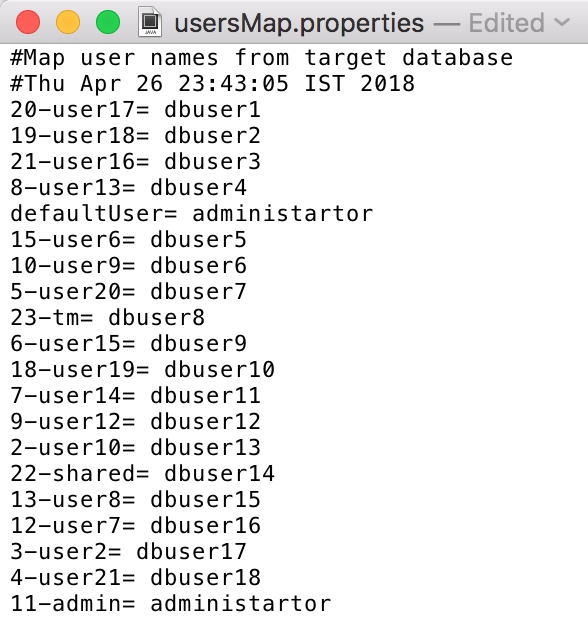
- usersMap.properties : This file consists of usernames of active users in RMsis. These users must be mapped to pre-existing users of target database.
- See sample screen below:
- It is possible that the target database has different set of users, if this is the case, please open the usersMap.properties file and map the users to existing users of target database.
- Backup and restore JIRA project into target JIRA instance.
- Copy the migration-validator.jar, projectDetails.properties and usersMap.properties to target JIRA+RMsis server.
- If the users in target database are different, open usersMap.properties in a text editor and map users to some existing users of the database.
- Details regarding user mapping is listed at the bottom of this page under the heading Mapping users of source and target database.
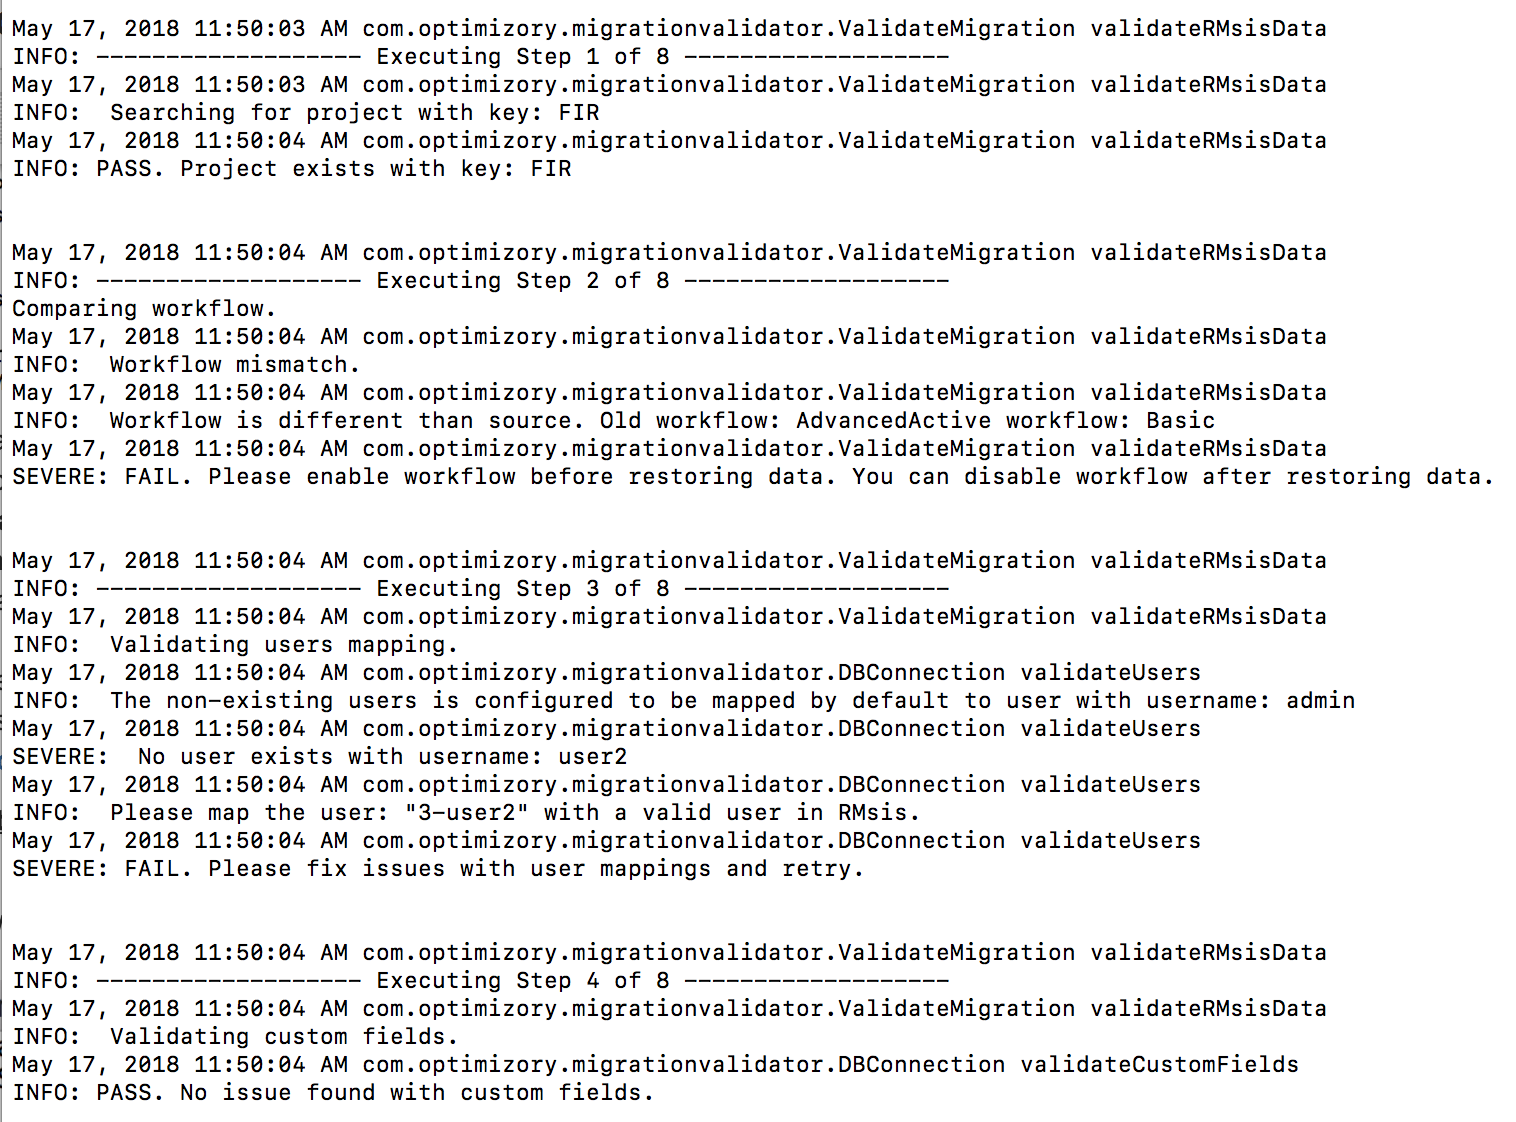
- Execute step 2 & 3. You will be prompted to choose an option. Select option 2 to validate the target RMsis database before restoration.
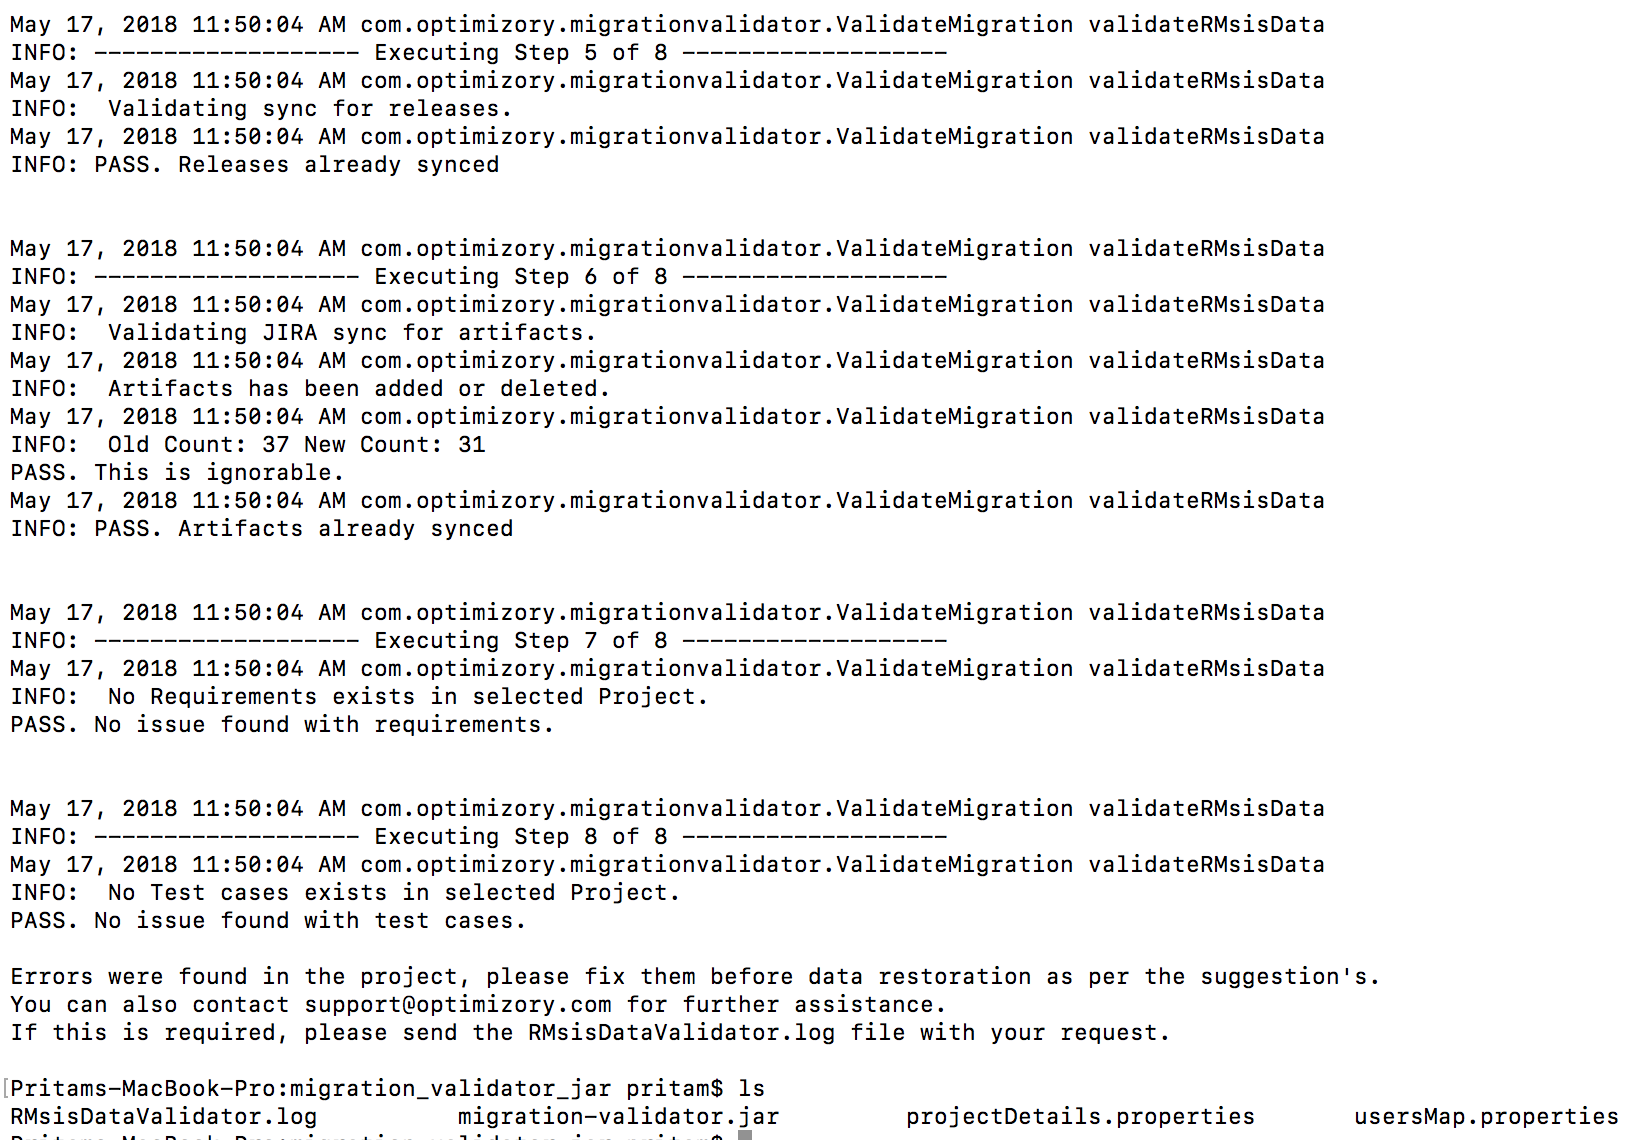
- The utility will validate the pre-requisites and report errors, if any. See sample screen below:
- Please take the corrective measures reported by the utility before performing the data restoration using the migration utility.
- Details about single project migration utility is available at: https://docs.optimizory.com/x/tKDB
- You can also contact support@optimizory.com for further assistance. If this is required, please send the RMsisDataValidator.log created by the utility along-with your request.

Mapping users of source and target database.
- The usersMap.properties can be used to map the users of two different instance if the users in both the instance are different.
- The usersMap.properties file will contain the list of active RMsis users of source instance.
- See sample screen:
- At present, it is assumed that the users in source and target database are same.
- If they are different, please map each user to some other user of target database.
- You will have to edit the above file and add the corresponding users against each entry.
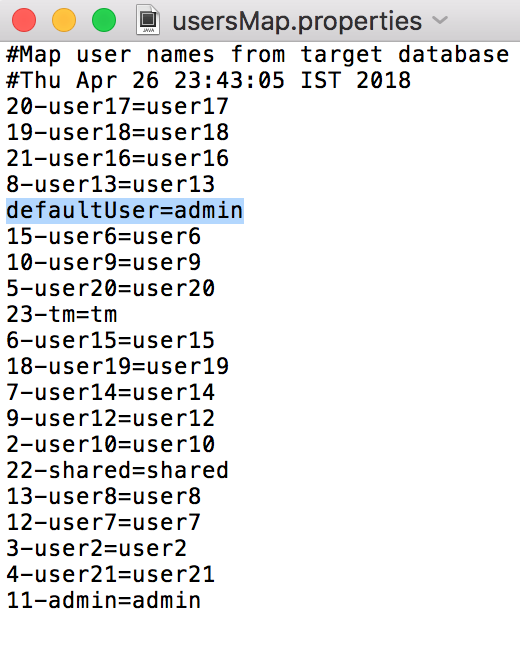
- For example, if username of administrator in source database is admin and administrator in target database. You will have to replace the admin with administrator in right hand side.
- After the change, the entry 11-admin=admin will change to 11-admin=administrator
- Similarly, map other users to some other active/inactive users of target database.
- Please ignore the number before the username in left hand side. It is the user ID of the user which is used during the data restoration process.
- A special note for the entry defaultUser This will be used to map the inactive users of source database to the user provided username in target database.
- This entry must be updated to a valid user in target database. This user will be used as a fallback if no mapping is available for a user which exists in source but not in target.
- See screen of updated file: