Deploying RMsis on JIRA Data Center
- Deepak Jangid (Deactivated)
- Sonu Kumari
- Pritam Kumar
Deploying RMsis on JIRA Data Center
RMsis 3.x DC installation is essentially in two parts
- Install RMsis 3.x DC
- RMsis plugin can be installed through JIRA Universal Plugin Manager.
- Configure RMsis 3.x DC
- After installation of RMsis 3.x DC, RMsis tab will appear in Jira menu bar.
- Login as administrator in JIRA and then click on RMsis menu to configure RMsis.
Please note that RMsis 3.x DC server will be deployed on the JIRA DC node from which you are performing the installation. However, it can be accessed from any node after the installation.
The entire sequence of the installation process is elaborated below:
Step 1: Install using JIRA Universal Plugin Manager
- Login as JIRA administrator on the node on which you want to install RMsis 3.x DC and select Settings > Manage apps
- Search for “rmsis” inside the Find new apps section

Click on the Free Trial or Buy Now button to begin the installation of RMsis.
Click on Accept & Install button to proceed further.

- If you don't have access to the internet, you can use the below-mentioned option to download/upload RMsis
- Download the desired version of RMsis 3.x DC from https://optimizory.com/rmsis-downloads.html and copy it to the server where Jira is installed.
- Click on the Upload app and enter the URL when prompted.
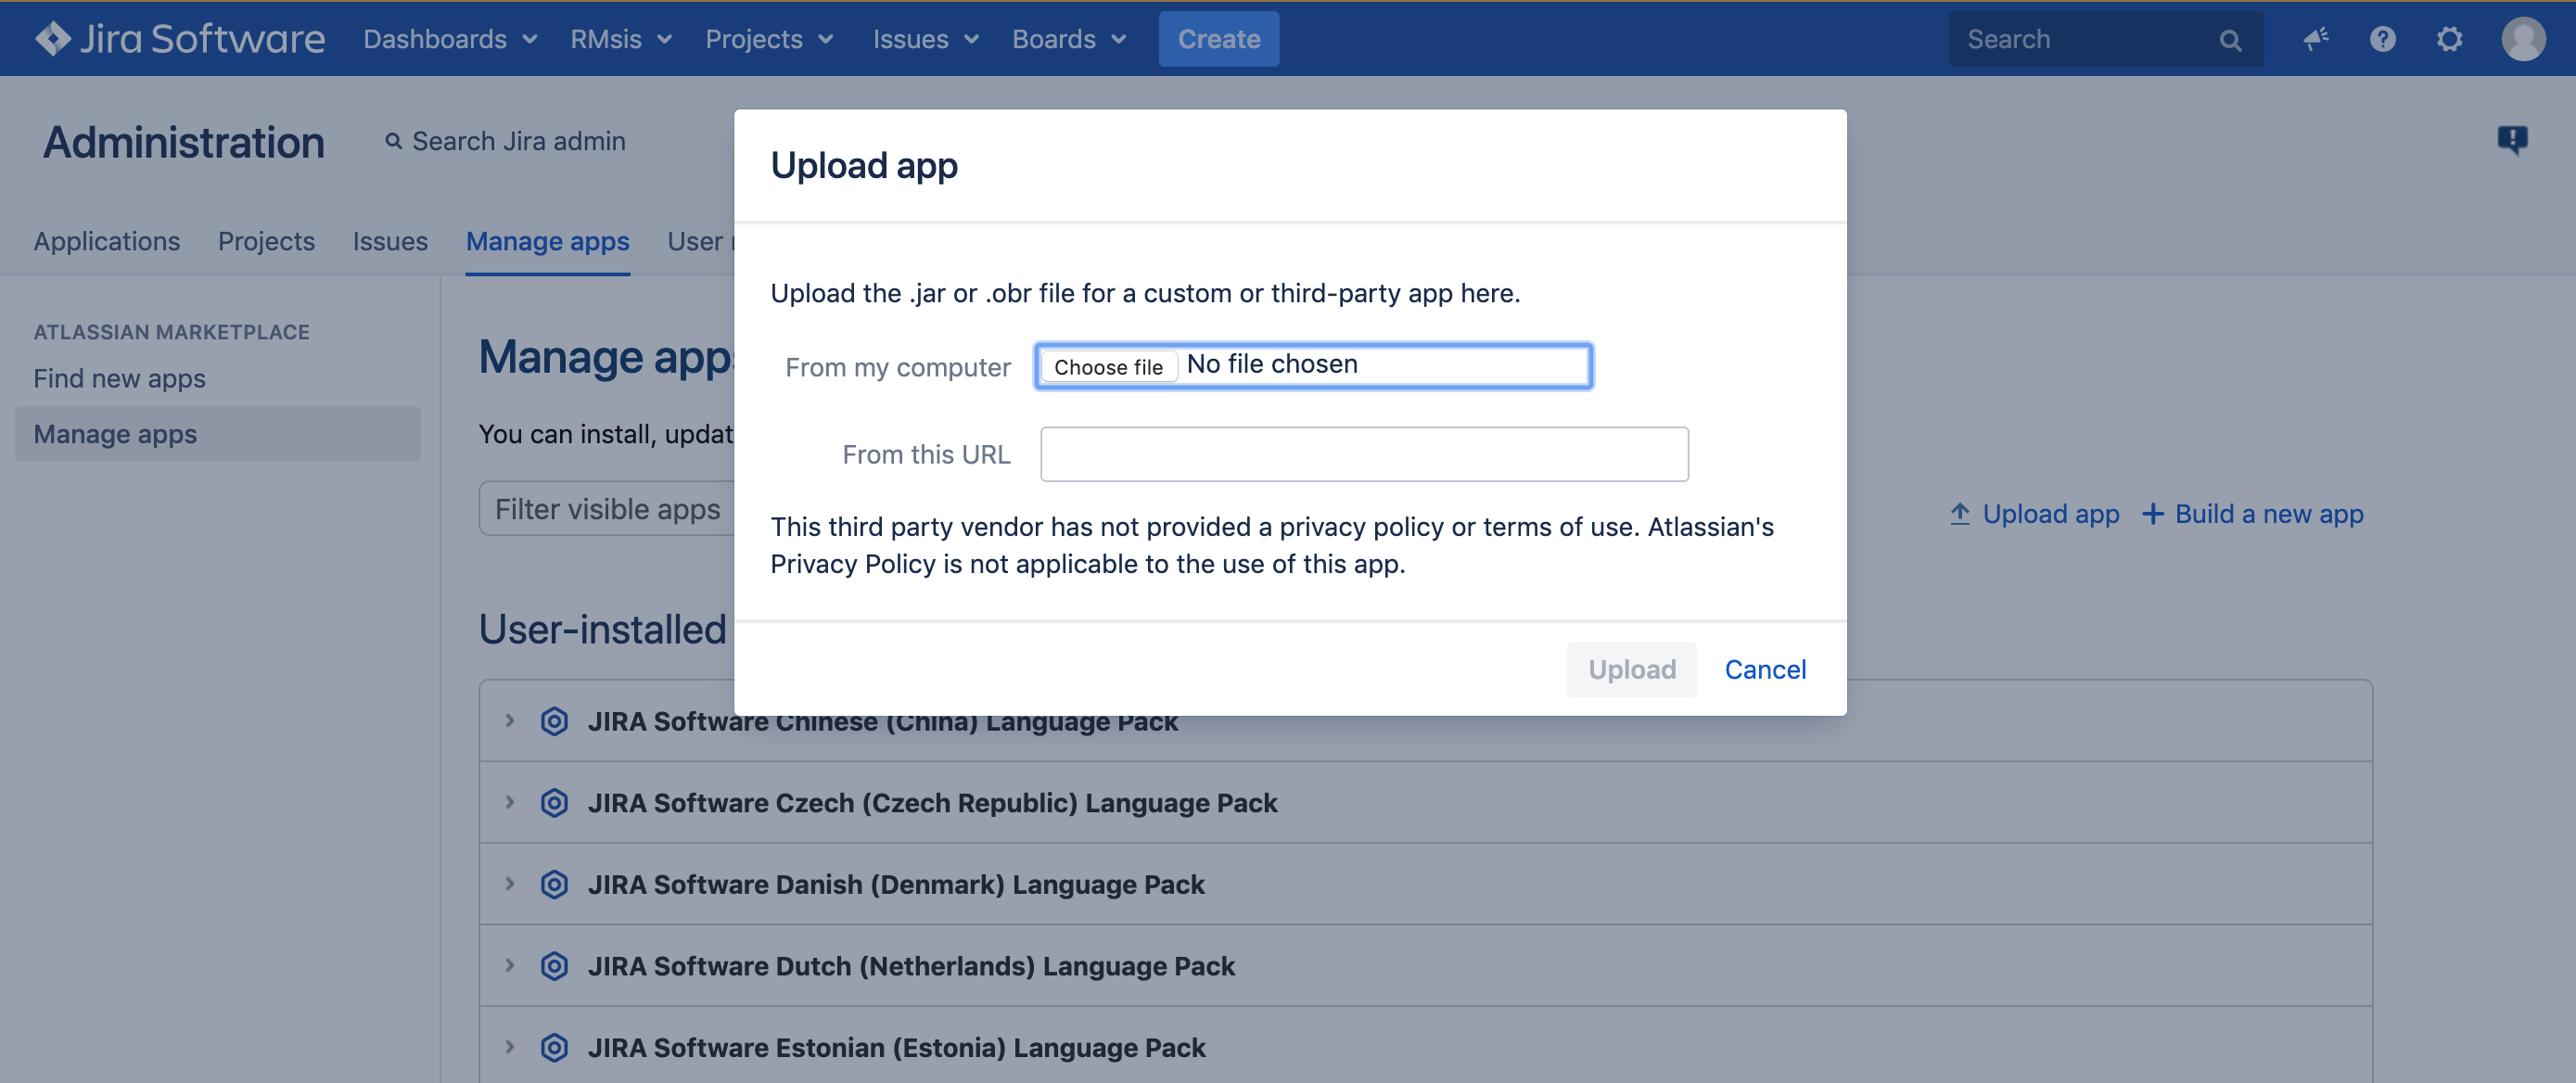
- Click on the Upload button.
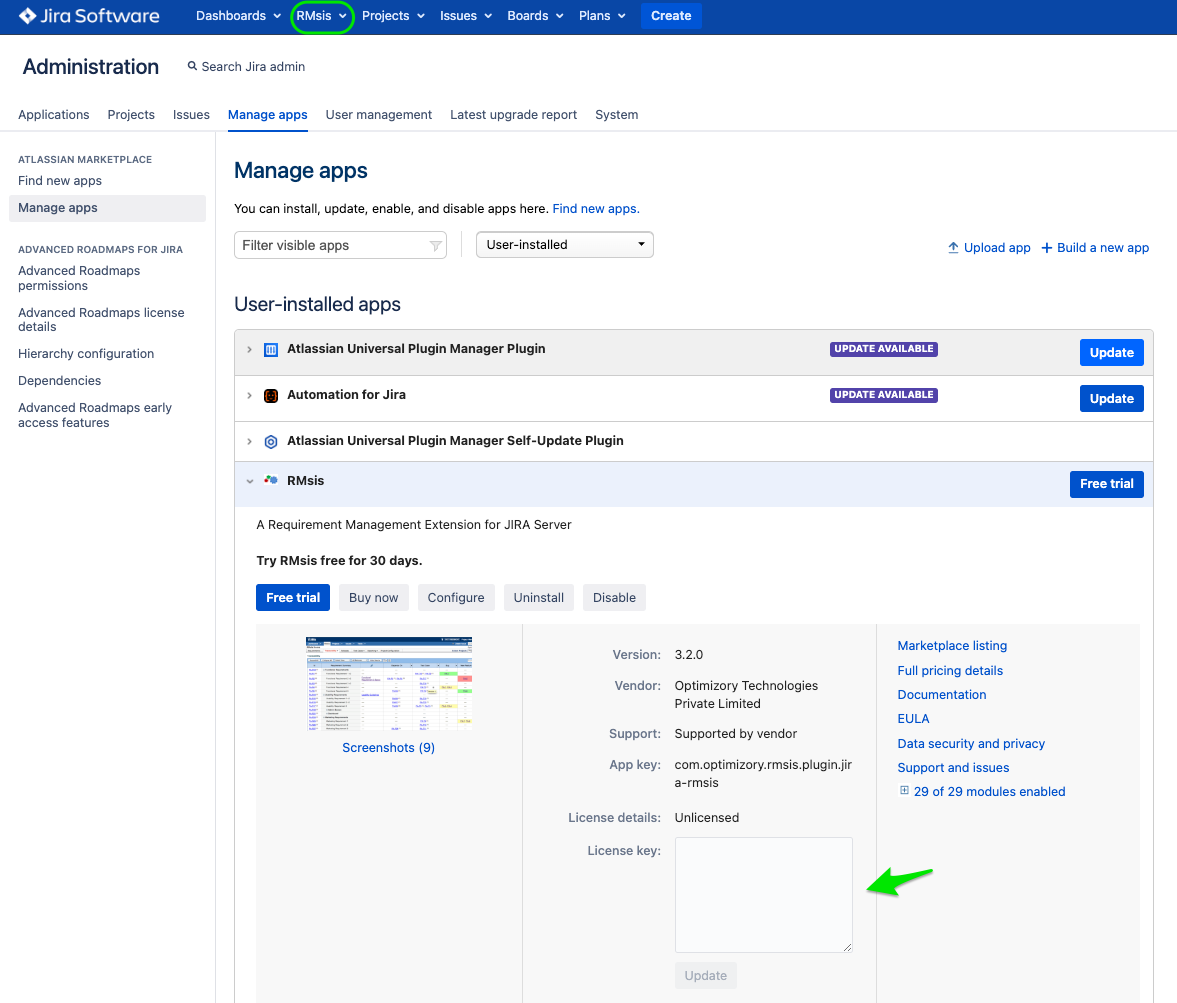
- RMsis will be installed and you will get a prompt to generate a license. Click on Get license button
- You will be redirected to https://my.atlassian.com
Generate the license at https://my.atlassian.com using your Atlassian account
- Update the license key for RMsis.
- Refresh/Reload the page once RMsis 3.x DC is installed successfully.

Step 2: Configure RMsis Home Page
- Click on the RMsis button which appears on JIRA Menu bar.
- Click on RMsis Home, you will be redirected to the installation welcome page, as shown below:
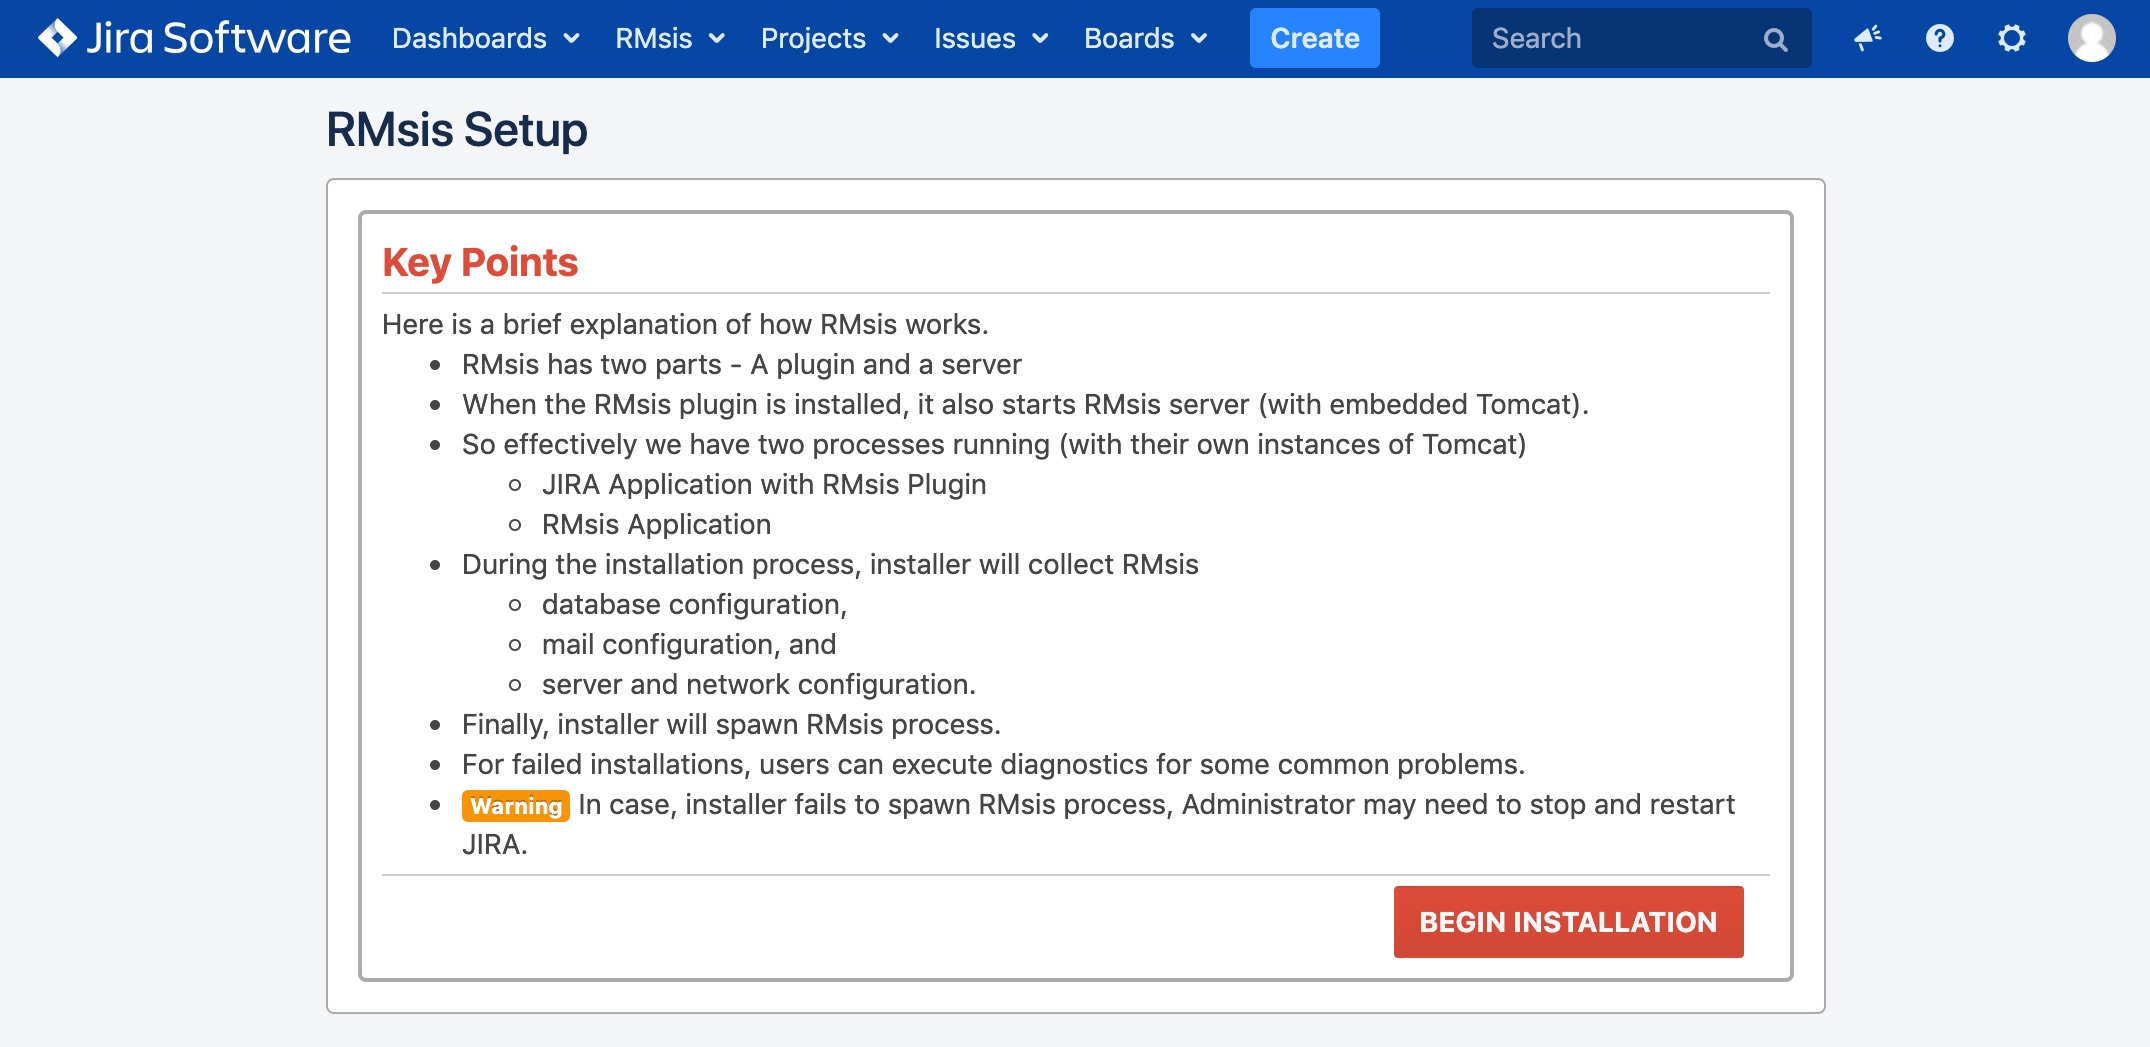
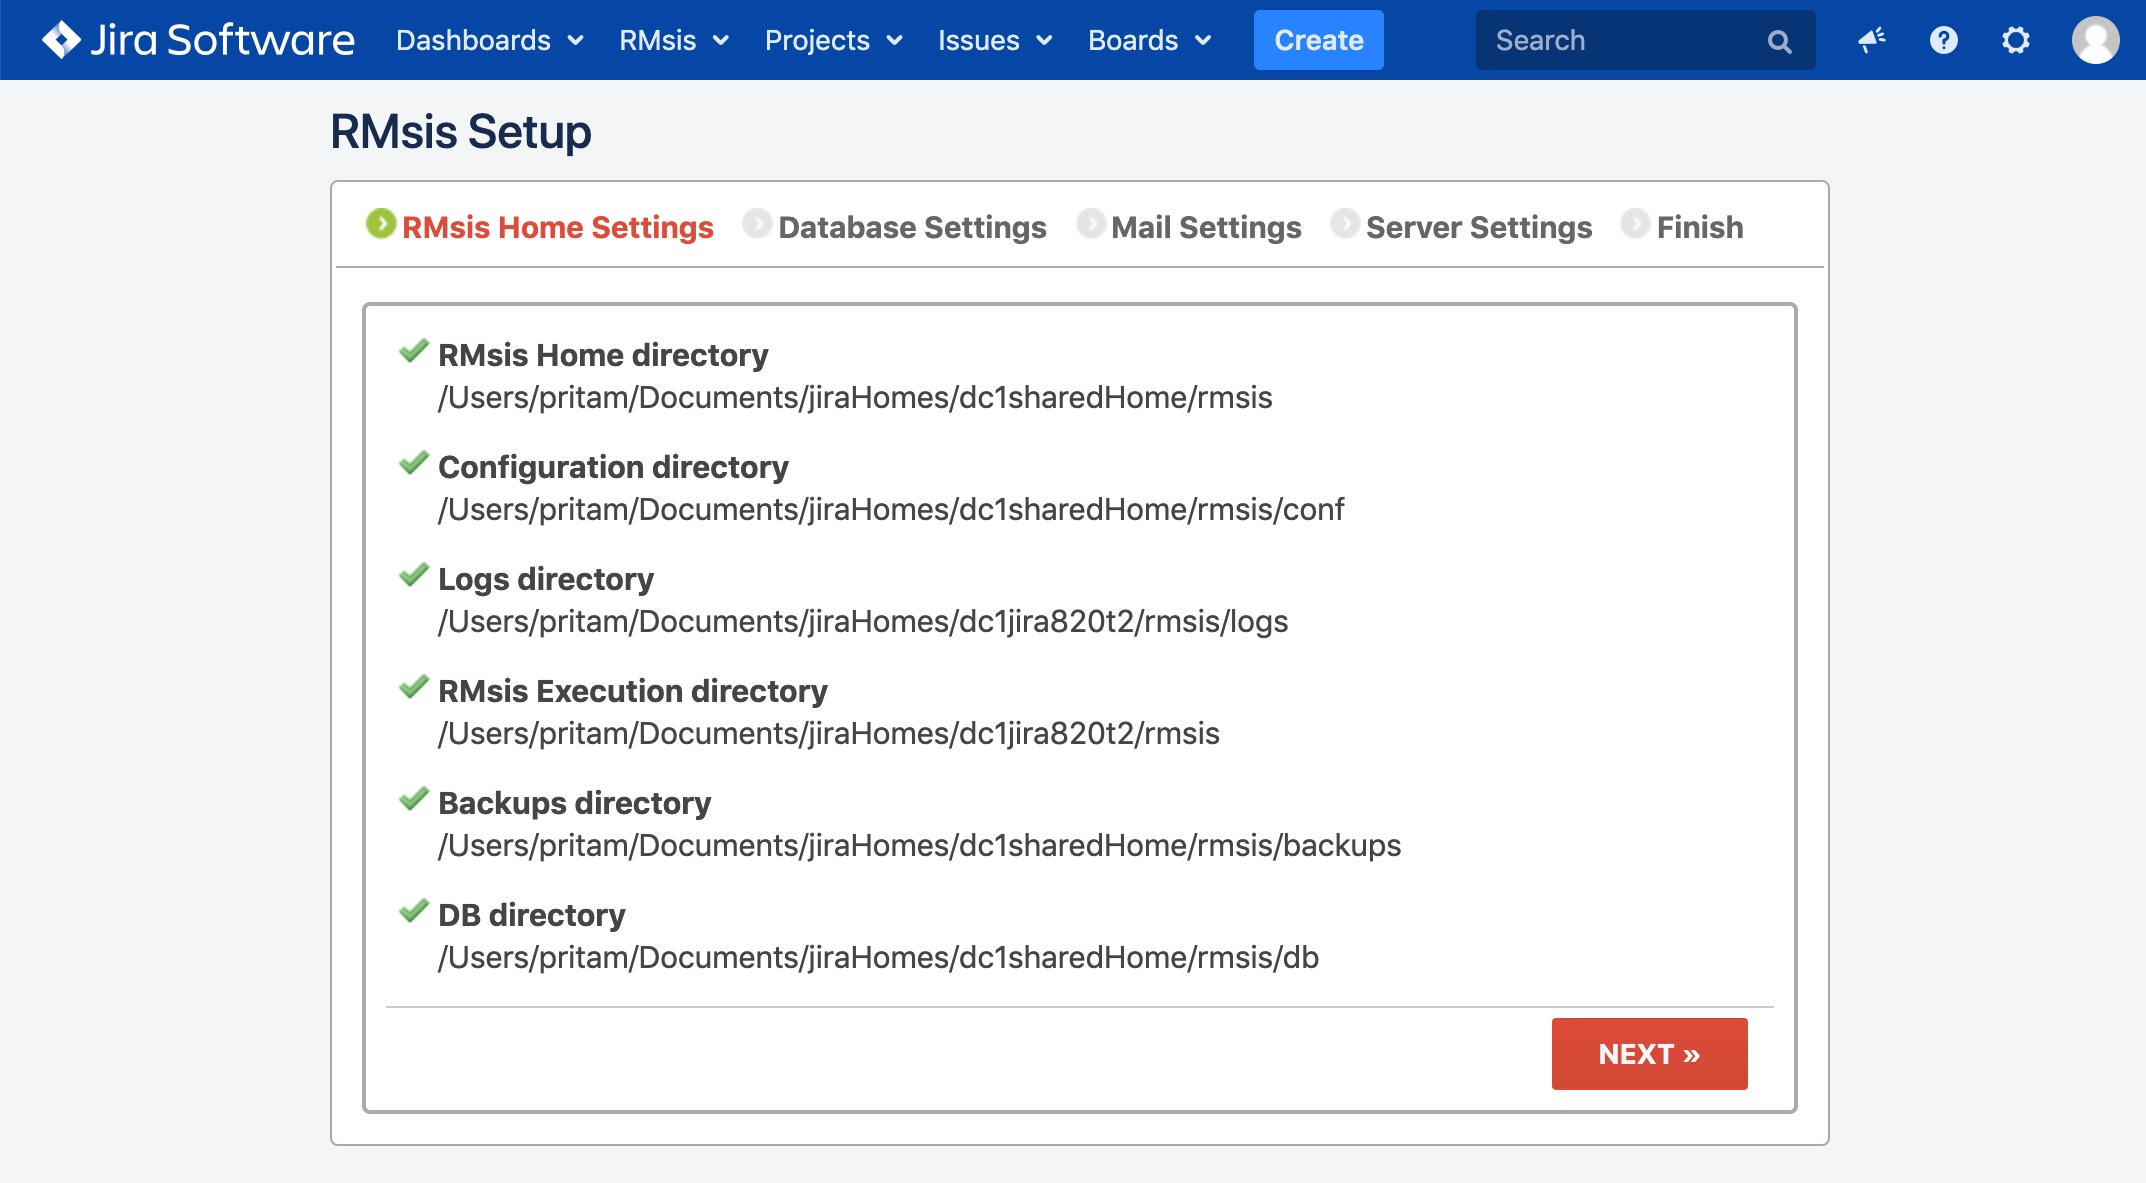
- Once you choose an option to Begin Installation, you will be redirected to RMsis Home Settings page.
- In this step, RMsis will create RMsis Home directory to store backups, configurations (jdbc, mail etc.), logs etc.
- Take note of the information provided and click on next to move to the next step.
Step 3 : Configure RMsis Database
- At present, RMsis DC 3.x supports MySQL, Postgres, MSSQL and Oracle databases
- Create a database in either MySQL / Postgres / MSSQL/ Oracle and specify database connection details, as shown below
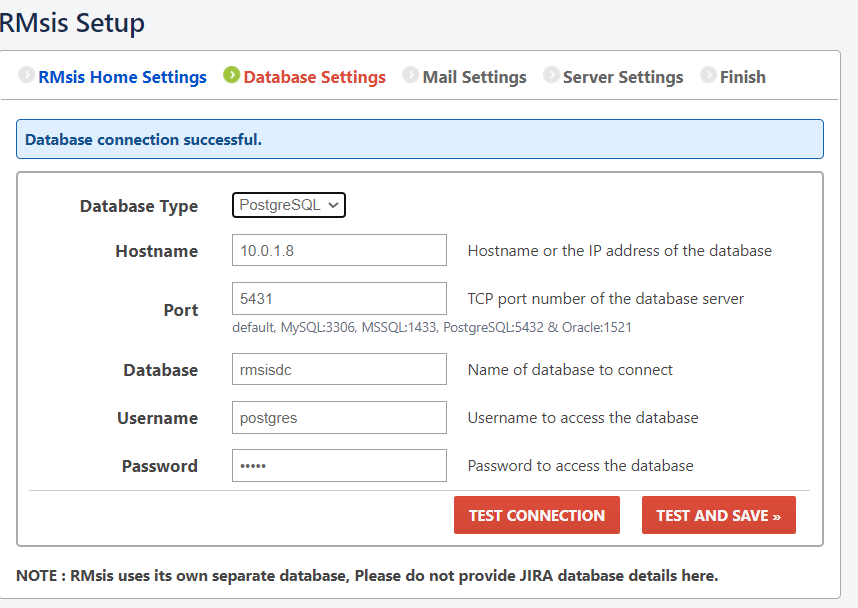
- RMsis Database must be different from JIRA Database.
- You can use different database types for JIRA and RMsis e.g. MySQL for JIRA and Postgres for RMsis.
Step 3.2 : Test Database Configuration
- After filling the database details, you can check the database connection by clicking on TEST CONNECTION button.
- Clcik on TEST AND SAVE button to save the database details.
Step 4 : Configure Mail
- You can either disable OR configure your mail settings in this step.
Step 4.1 : Enter Mail Configuration
- The details are shown in the following screens
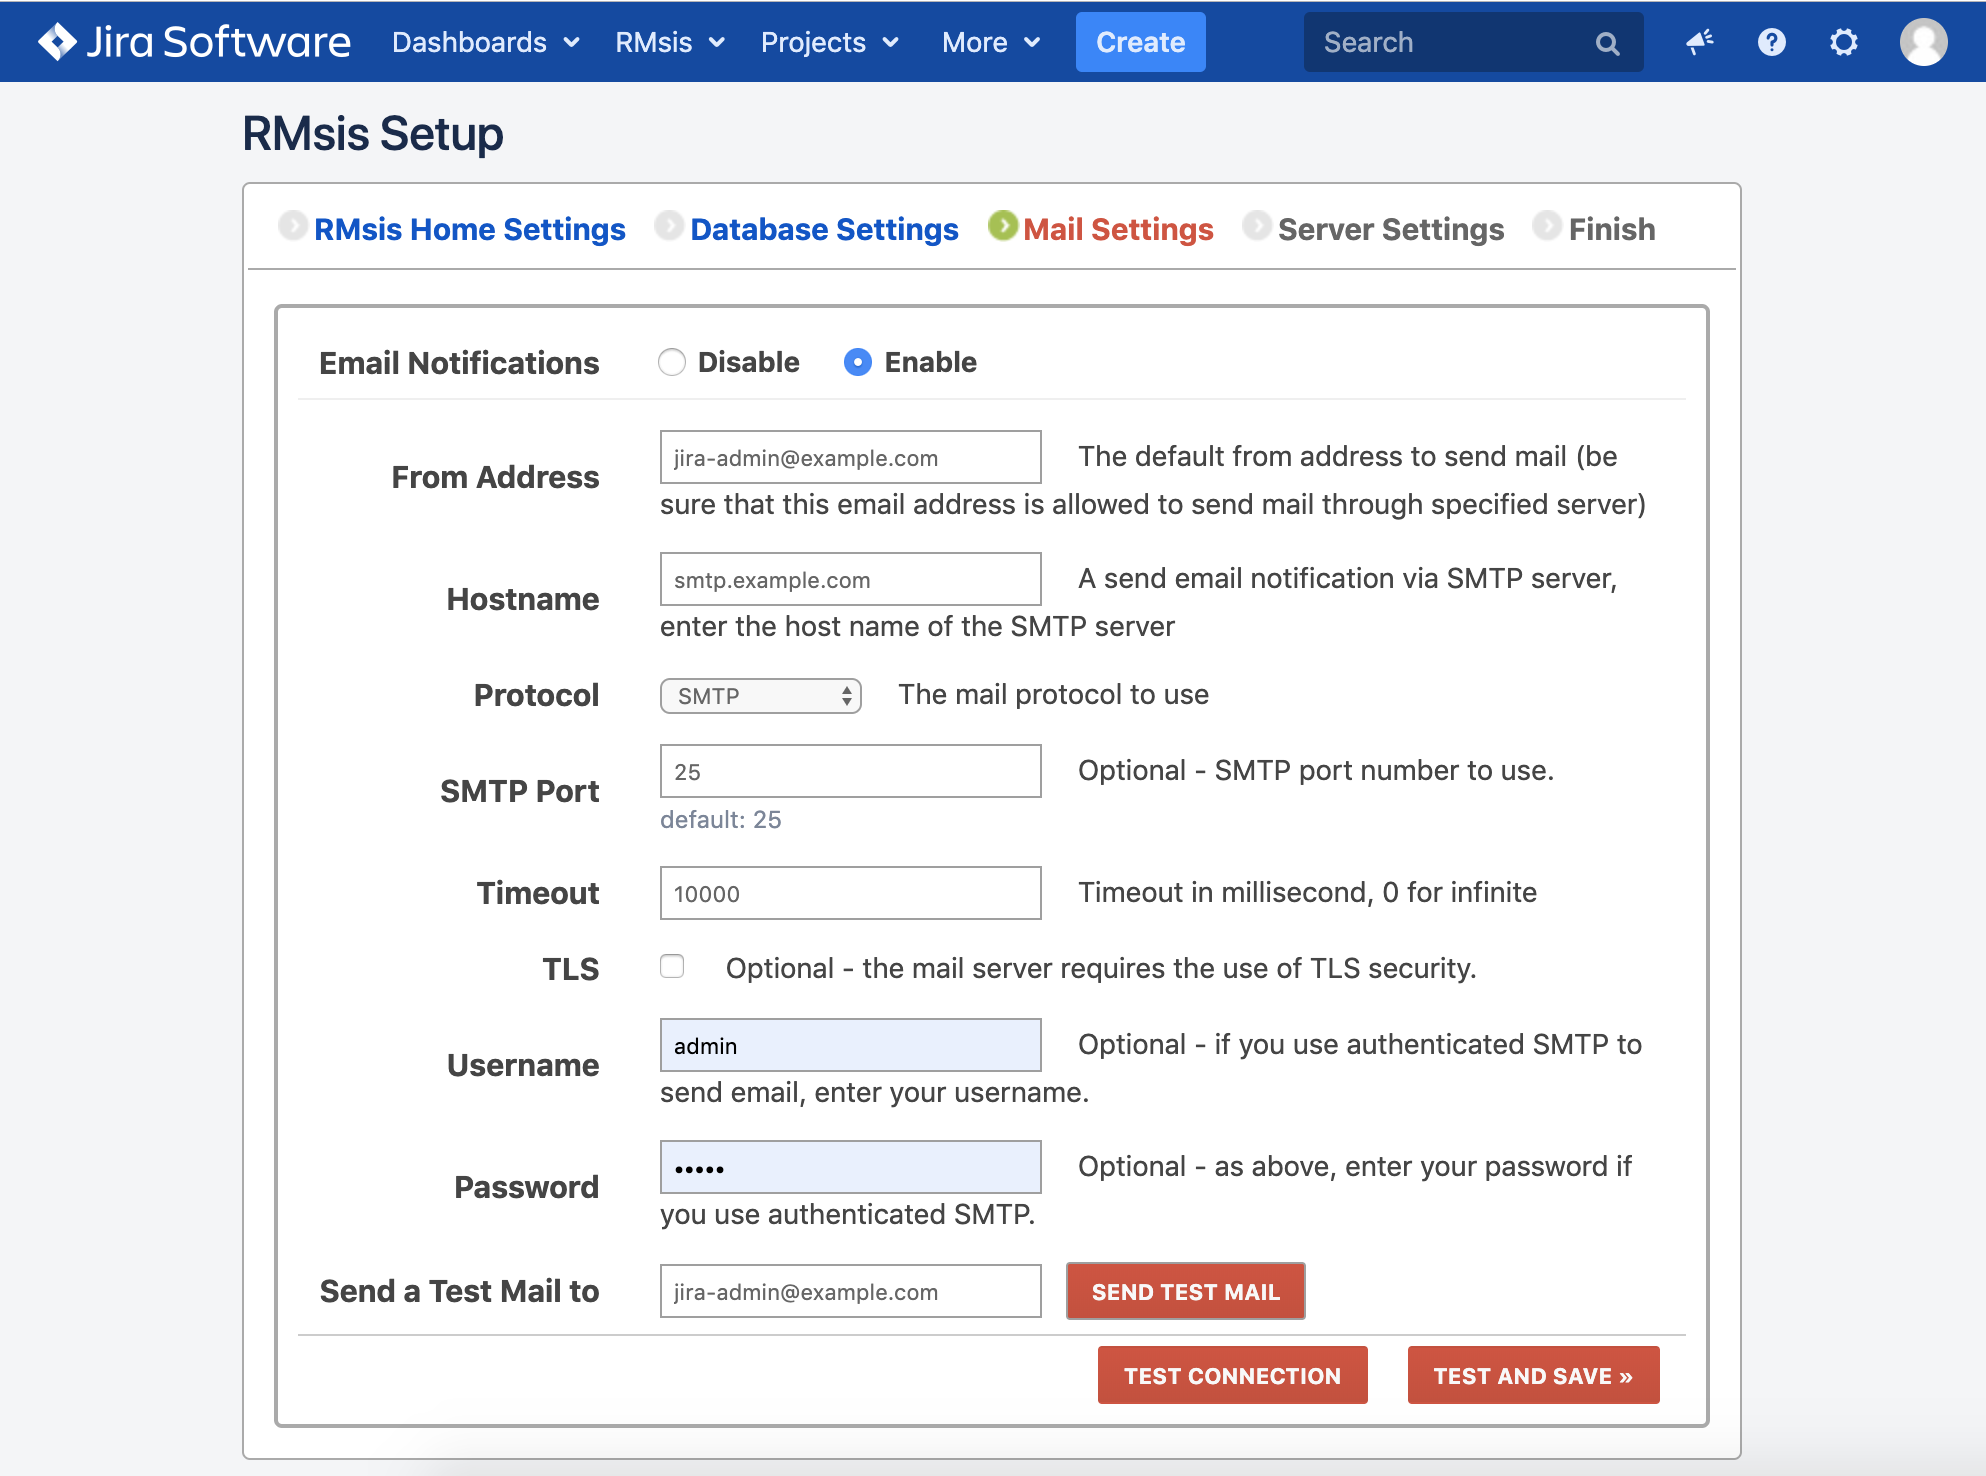
Step 4.2 : Test Mail Configuration
Once the Mail Configuration is entered, user has an option to test
- Connection to Mail Server
- Send a Test Mail to ensure that the mail has been correctly configured
CLick on Test AND SAVE to save the mail configuration details.
Step 5 :Server Settings
- By default RMsis 3.x DC Server will be configured with http on port 3060 without any proxy settings. In order to deploy RMsis 3.x DC on JIRA DC, you will have to configure and enable Reverse Proxy.
- A detailed description for configuring RMsis 3.x DC with JIRA DC using reverse proxy is available here: https://optimizory.atlassian.net/l/c/RuhB5EWK
- Please configure your reverse proxy and apply the changes before proceeding further.
- User has an option to specify the Minimum and Maximum memory used by the JVM. 256 MB and 512 MB are the minimum acceptable limits here.
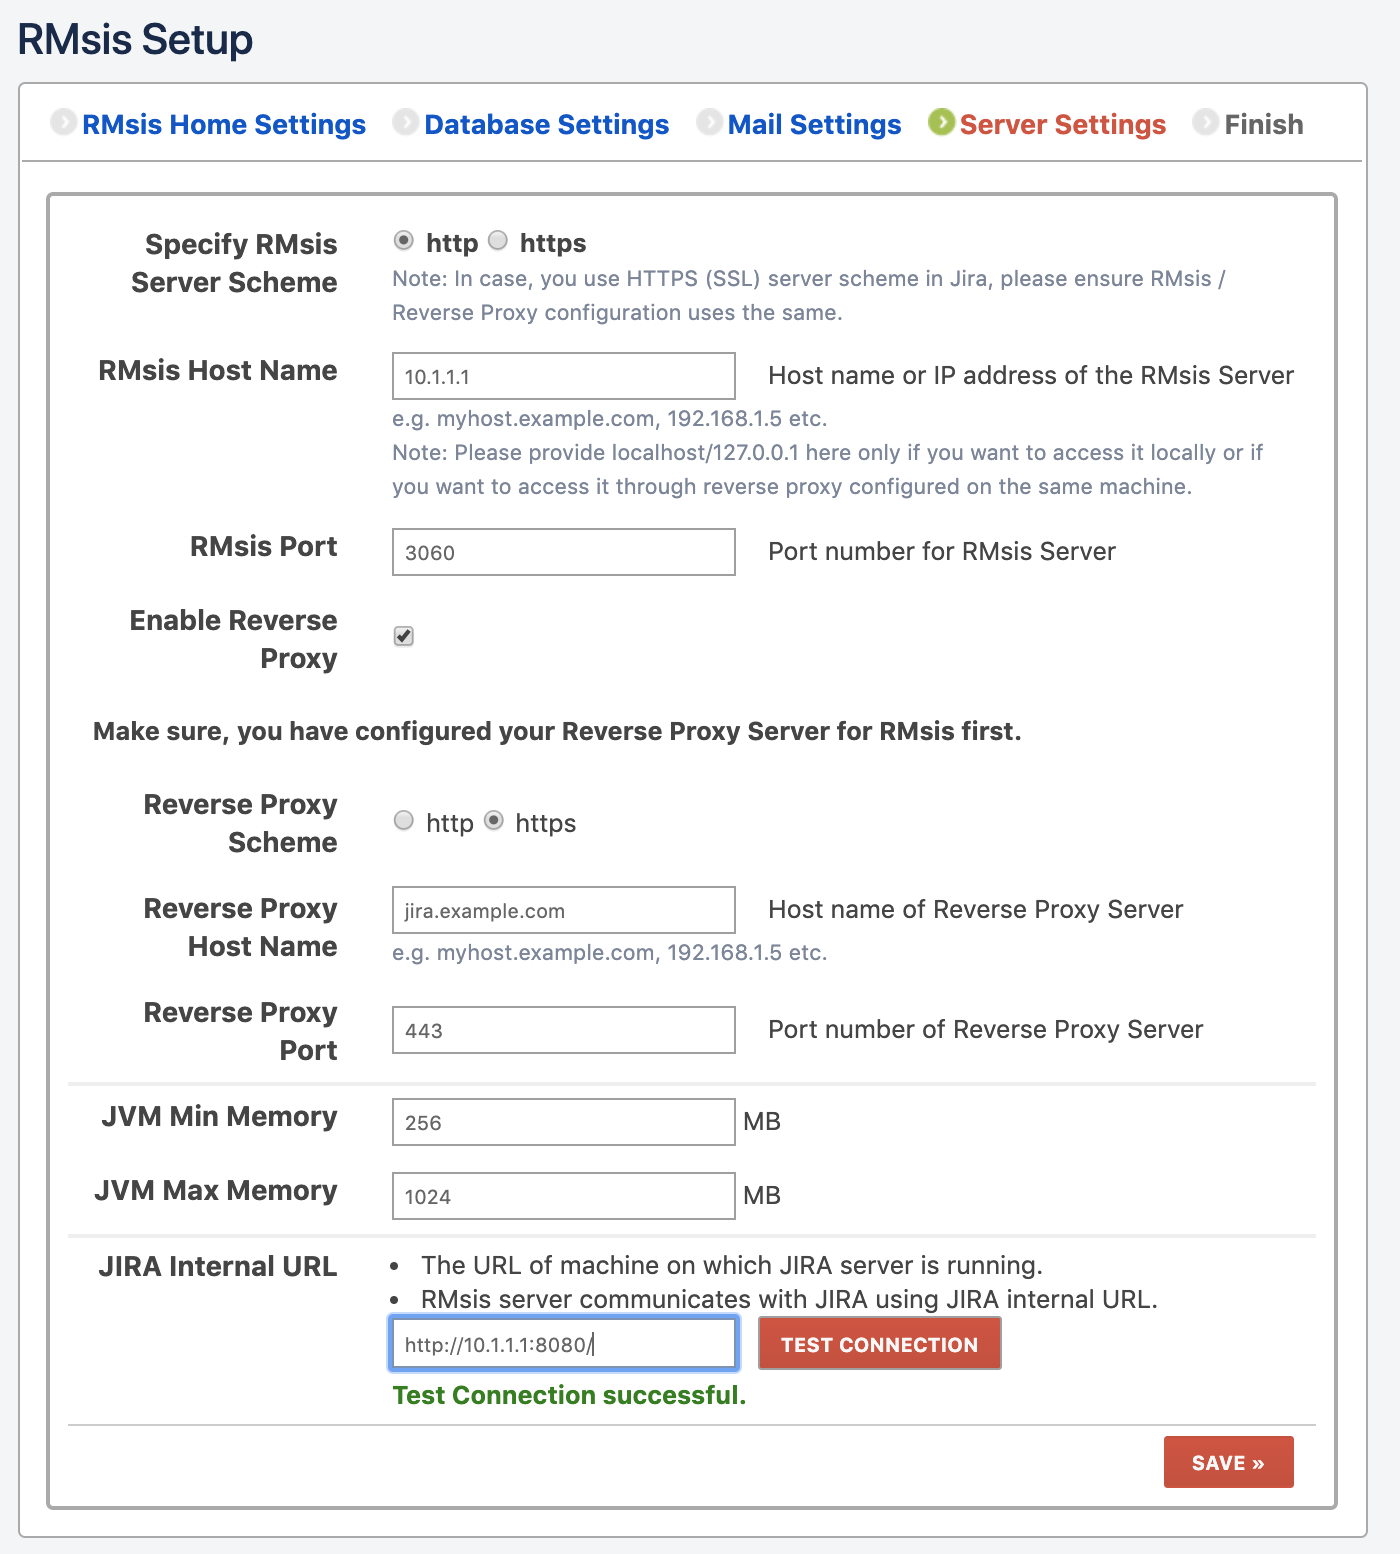
- Specify server scheme:
- This should be similar to your JIRA setup.
- If you are running JIRA on http, choose http for RMsis as well.
- If you are running JIRA on https, choose https for RMsis and configure certificate details:
- To run RMsis Server on https, select the option https from "Specify RMsis Server scheme".
- After selecting https, RMsis will ask for "Key Alias", "Keystore File" and "Keystore Password", where
- Keystore Type: The type of keystore file to be used for the server certificate. Tomcat operates only on
JKS,PKCS11orPKCS12format keystores. - Key Alias:The alias used for the server certificate in the keystore.
- Keystore File: The pathname of the keystore file where you have stored the server certificate to be loaded.
- Keystore Password:The password used to access the specified keystore file.
- Keystore Type: The type of keystore file to be used for the server certificate. Tomcat operates only on
- Configure reverse proxy for RMsis 3.x DC Server by checking the Enable Reverse Proxy Settings.
- RMsis will ask for "Proxy Scheme", "Proxy Host Name" and "Proxy Port", where
- Proxy Scheme: The scheme on which the proxy server is running, can be either http or https.
- Proxy Host Name: The host name or IP address of the proxy server.
- Proxy Port: The port number, on which the proxy server is running.
- Click on Save button.
Step 6 : Deploy RMsis 3.x DC
- In this step, RMsis plugin will install RMsis application with an embedded Tomcat Server.
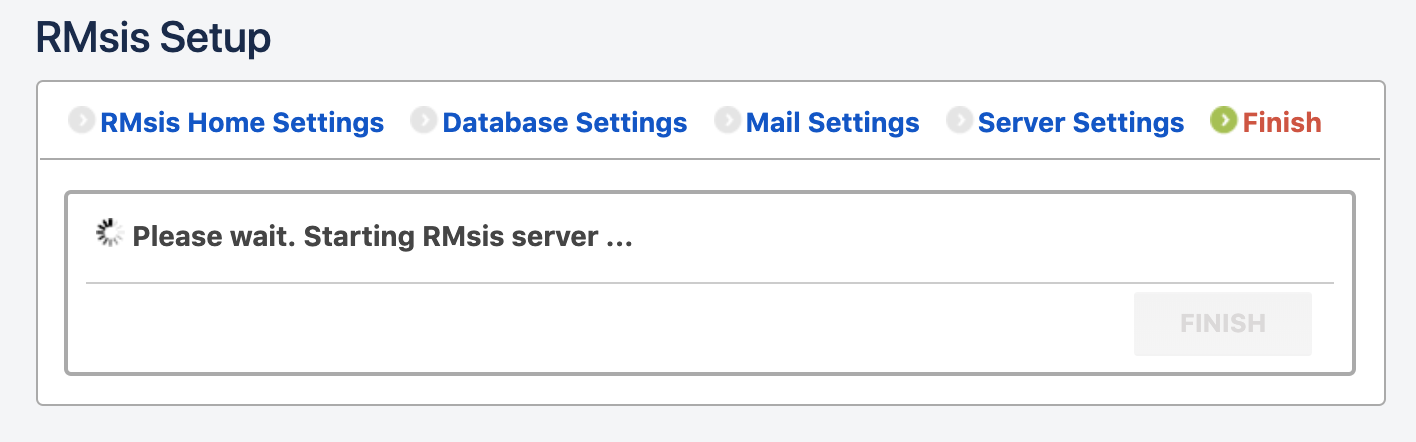
- Please wait for some time (It will take one to two minutes). After RMsis server startup, the screen will show :
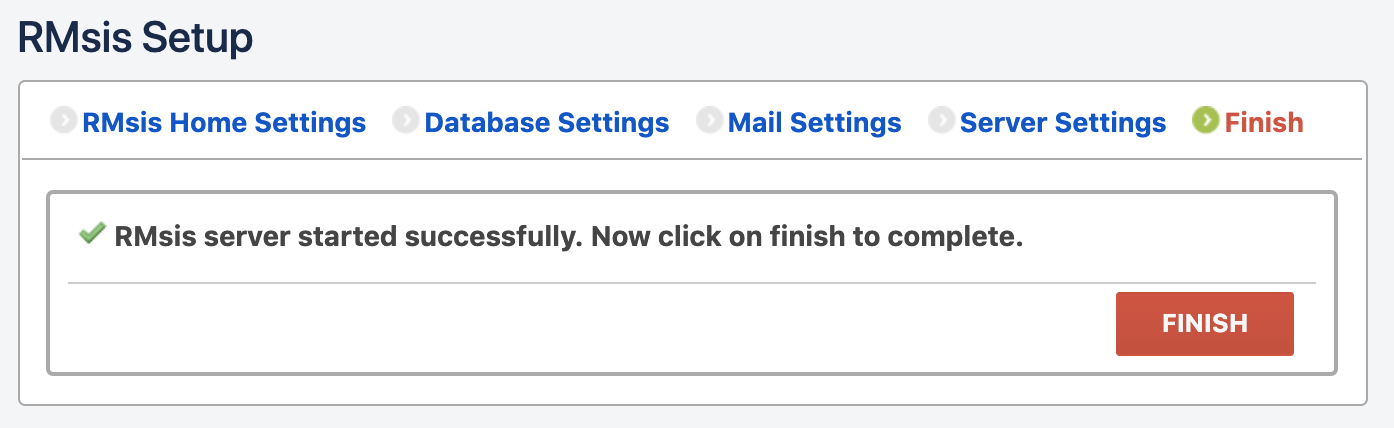
- Congratulations !!! Now RMsis 3.x DC server is running successfully,
- Click on FINISH button to complete the setup process.
- Subsequently, you will be automatically redirected to the project selection and license activation page.
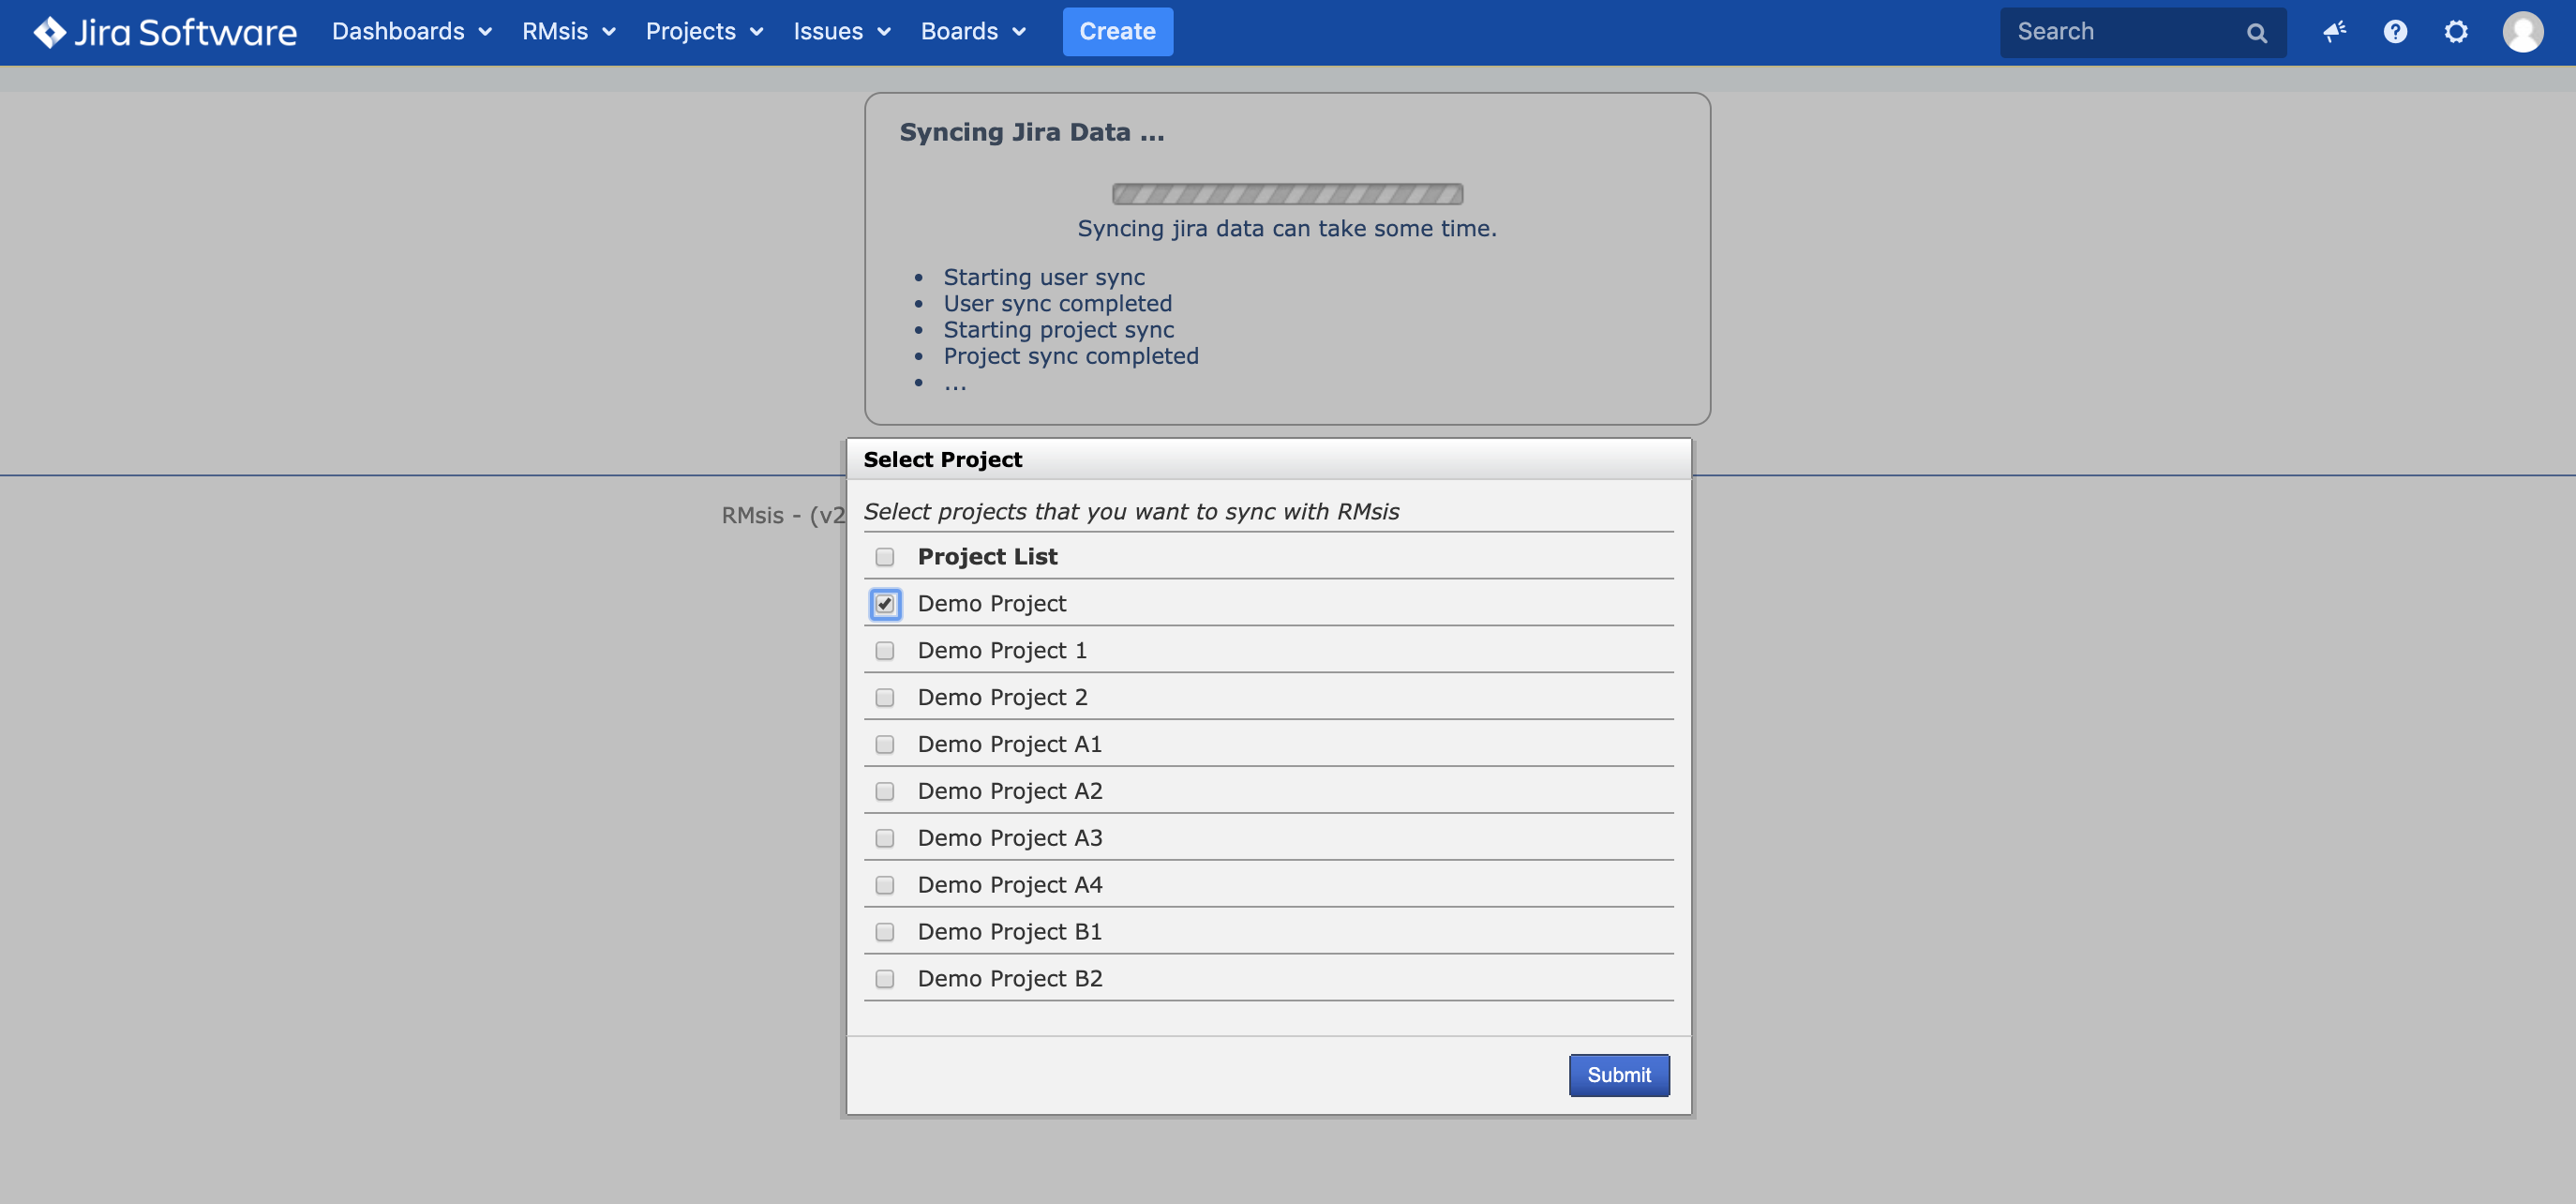
Select at least one project and click on Submit. The project selected here will be available in RMsis for use.
We recommend selecting a few projects as more projects can be activated later. This will reduce the time required to complete the initial sync, especially for huge installations.
Re-Initializing RMsis 3.x DC Configuration
In case, you wish to re-initialize RMsis 3.x DC installation (due to some reason), please follow the following steps:
- Login into JIRA with an administrator account.
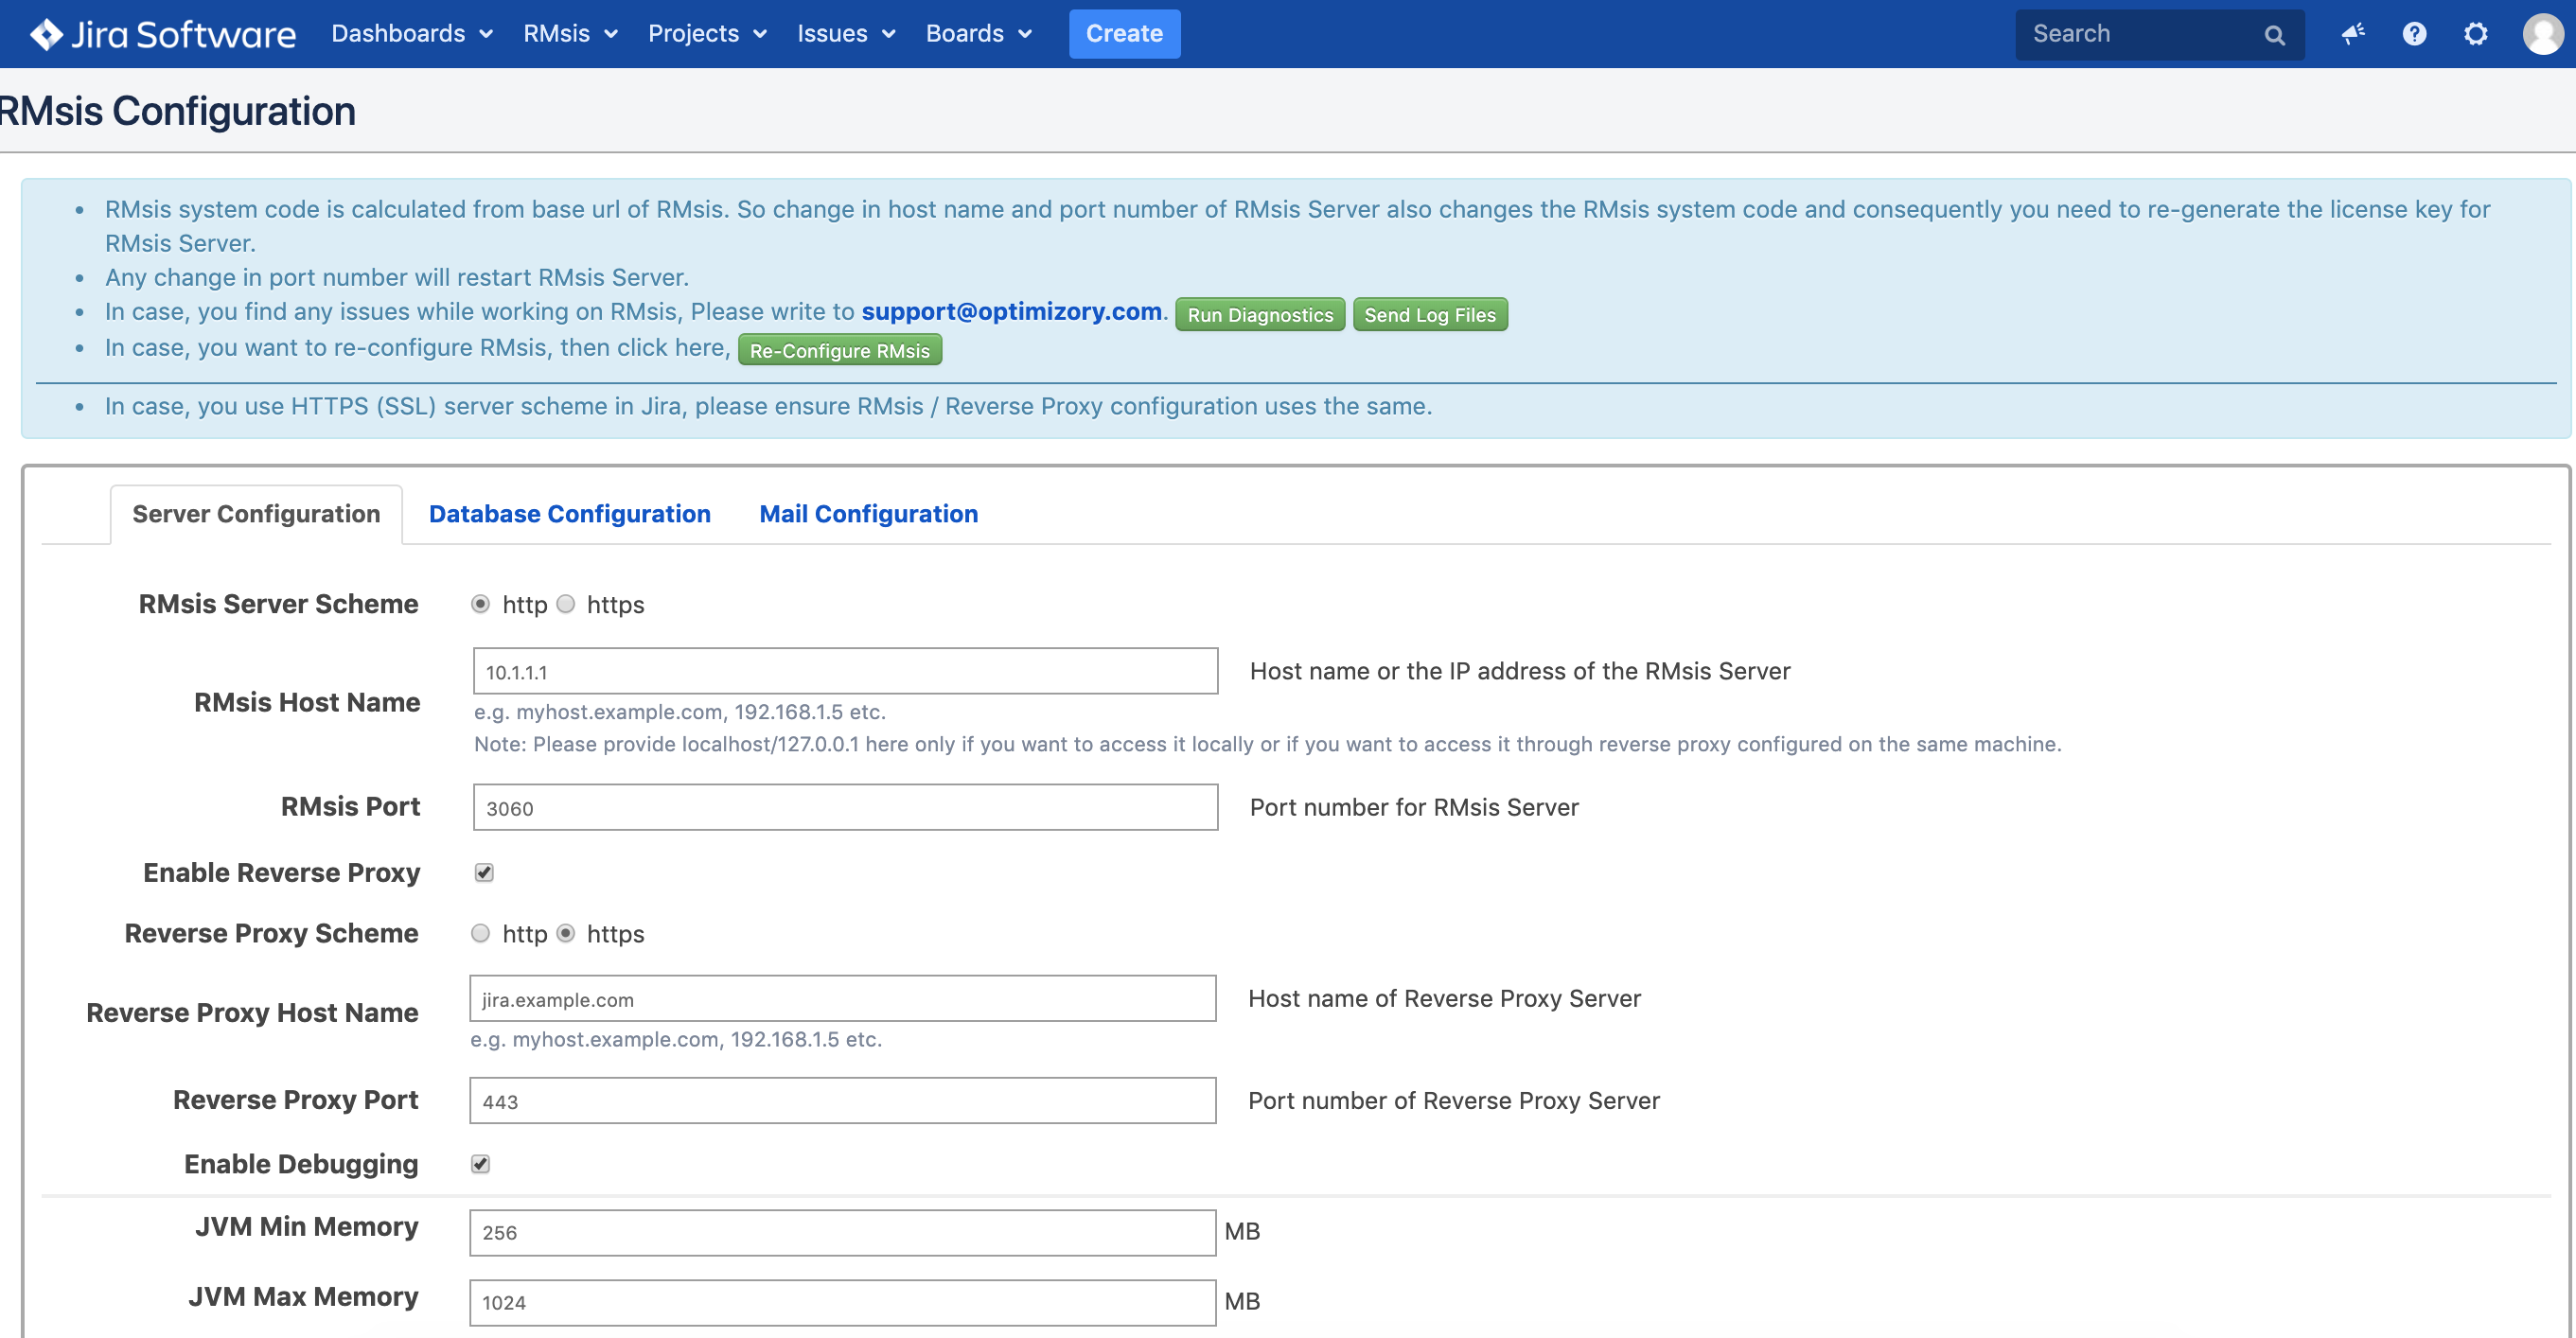
- Click on RMsis (on JIRA Menu Bar) > RMsis Configuration
- The following page will appear and you will have the option to change any of the key parameters related
- In order to completely Reset the RMsis 3.x DC configuration
- Click on Re-Configure RMsis from the RMsis Configuration in JIRA Menu.
- Subsequently, you will be automatically redirected to the RMsis setup page.
- Please follow the on-screen instructions to configure RMsis.
- Click on Re-Configure RMsis from the RMsis Configuration in JIRA Menu.
- Making a change in configuration can lead to loss of data.
- Please make sure that you have noted the current settings and have taken a backup of the Database.