Requirement Configuration
- Deepak Jangid (Deactivated)
Enable Rich Text in Summary Field
In order to enable Rich text in "Requirement Summary" field,
Switch to RMsis Administration > Configuration > Application
Enable the "Enable Rich Text in Summary Field" checkbox available under the heading "Summary Field".

Configuring Requirement Approval Workflow
The Requirement Approval Workflow can be configured by clicking on the option provided.
A detailed description of the functionality can be found at Requirements Approval Workflow
Configuring Default Attribute Options
- Users have an option to reconfigure the Default Attribute Options for Requirements.
- On the "Requirement Configuration Page", all default options (which can be configured) are displayed.
- User will have an option to
- Add Option
- Edit Option, buy simply clicking on the option.
- Delete Option
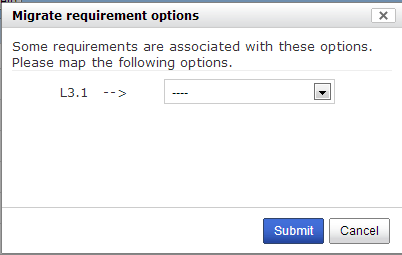
- In case of Delete, the system will automatically prompt the user to map the (existing) assigned values.
- A sample for a Configurable Attribute is shown below :

Function Attributes
- Weight
- The options will sorted for weights from "High to Low".
- Even though there are no limitations imposed, the default convention is to use the range between 0 - 10
- The weights are planned to be used in future for "Computed Fields"; even though they do not have any significance at the moment.
- Default
- This specifies the default value assigned to a newly created Requirement.
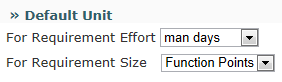
Configuring Effort and Size Units
The administrator can set the effort and size units to the following possible values:
Effort
- Man Weeks
- Man Days
- Man Hours
- Man Minutes
Size
- Function Points
- Feature Points
- Story Points
Defining Custom Attributes for Requirements
- RMsis provides a table, which can be used for managing custom fields for Requirements.
- These custom fields will be applied globally to all projects.
- These attributes can be configured for display in the Planned Requirement Data Table and are also included in the PDF reports generated for Planned Requirements.
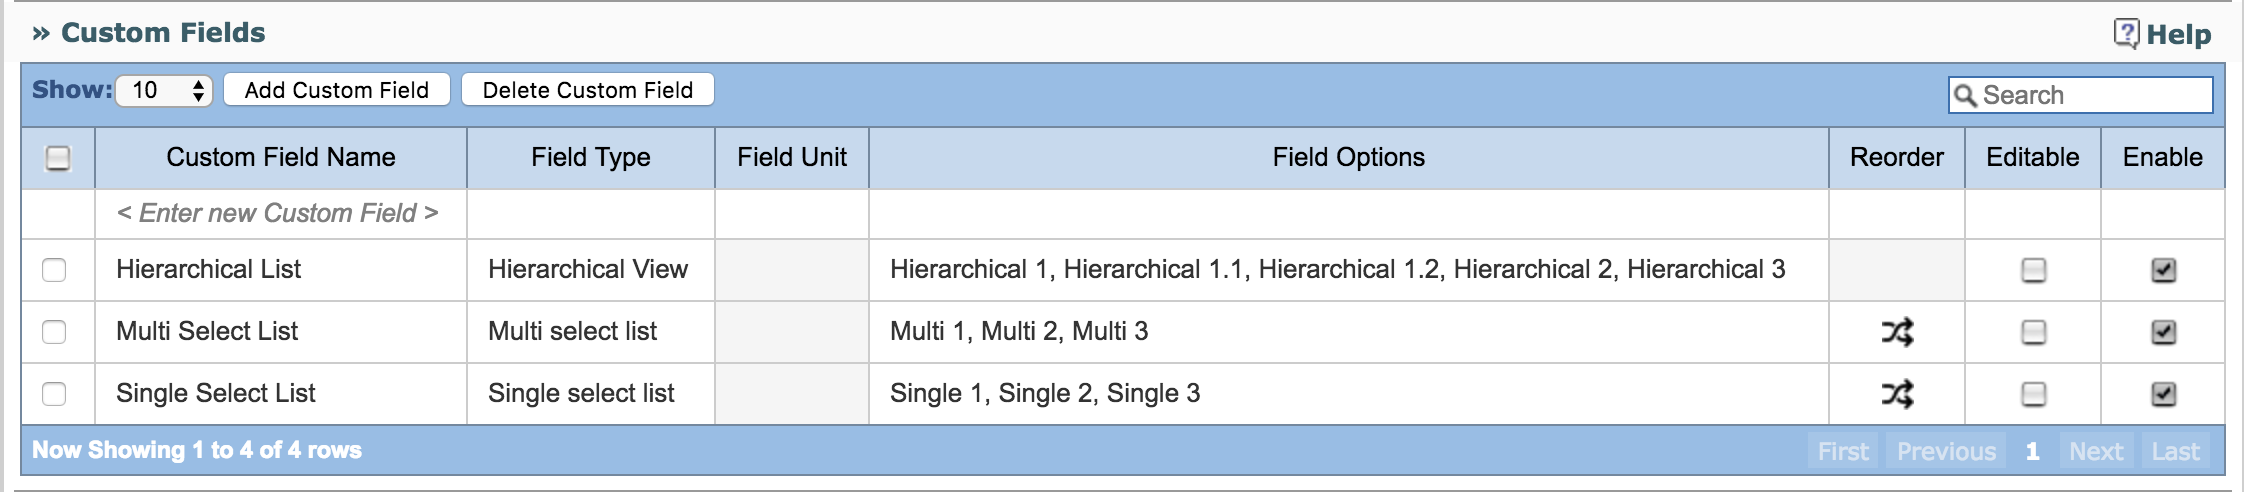
Custom Field Attributes
A custom field has the following attributes:
- Custom Field Name
- This field specifies name of the custom field.
Field Type
This field specifies the field type of the custom field.
Just click on "Field Type" column against a custom field row to enter its field type.
Possible values for this field are
Text
Integer
Real value
- Date
Single select list
Multi select list
- Rich Text Area
- Hierarchical View
- JIRA Data
Field Unit
This attribute specifies the unit of the custom field.
It is only applicable for "Text", "Integer" and "Real value" type custom fields.
- Field Options
- This attribute specifies the field options for the custom field.
- It is only applicable for "Single select list", "Multi select list" and "Hierarchical View".
- The options can be entered by clicking on respective cell.
- By default, a blank option is added to the list; this is displayed as "—".
- Editable
- Editable flag when set, implies that this custom field can be modified, even after the Requirement has been committed.
Custom Field Operations
- Add Custom Field
- A new custom field can be created by clicking on the first row of the table under the "Custom Field Name" column labeled "< Enter new Custom Field >".
Edit Custom Field
- A custom field can be edited simply by clicking on it.
- Note: Once a custom field is associated with some requirements,
- then its field type cannot be altered
- and associated field options cannot be deleted
- Delete Custom Field(s)
- Custom Field(s) can be deleted in the following two ways:
- First select custom field(s) and then click on "Delete Custom Field" button to delete them.
- By selecting context menu item "Delete Custom Field" to delete a single custom field.
- However, if a custom field is associated with some requirements, then the system will prompt a message and confirm deletion from the user.
- Custom Field(s) can be deleted in the following two ways:
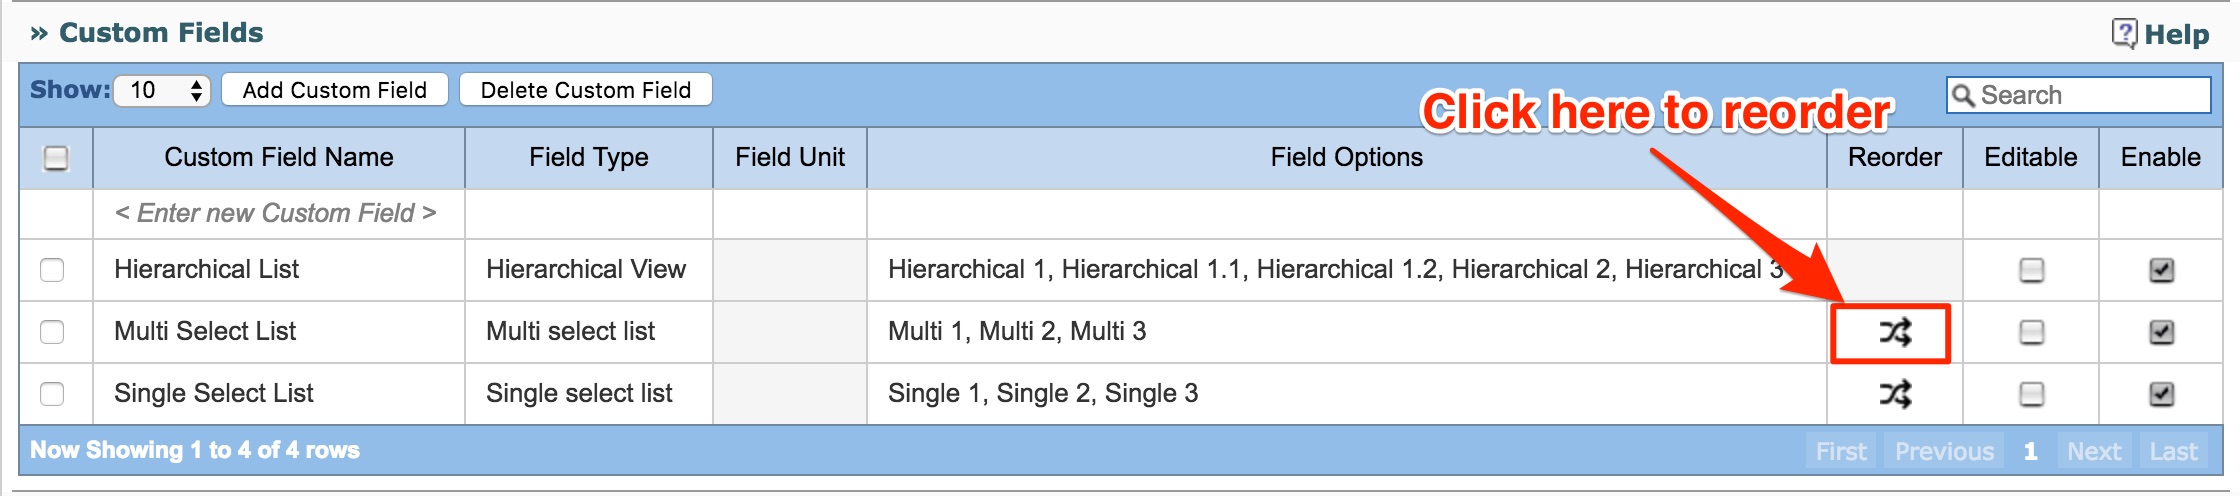
- Reorder
This functionality can be used to reorder field options for a custom field.
It is only applicable for custom fields of type "Single select list" and "Multi select list".
- In order to reorder field options for a custom field,
- Click on the cell corresponding to the "Reorder" column for the custom field whose field options need to be reordered.
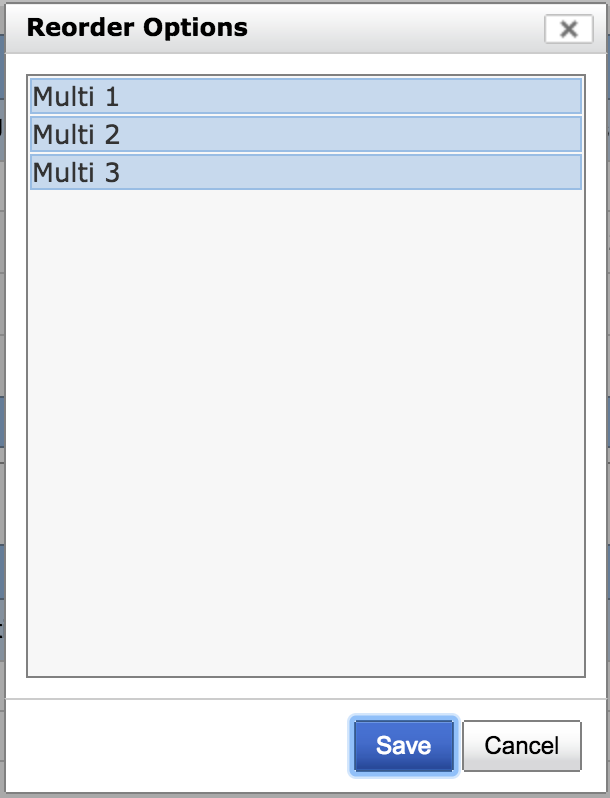
- A panel "Reorder Options" will open up using which field options can be reordered (drag and drop to move/reorder field options).
- Click on Save button after reordering the field options.
- Enable
- A custom field can be enabled by clicking on the check box on the extreme right.
- Once a custom field is enabled, it appears as part of Requirements.
- If checked then any new projects created in JIRA will be having these fields enabled by default. Project manager has to explicitly disable those fields in their projects.
Deleting a Custom Field Option
A custom field option can be deleted by clicking on the Field Option and subsequently on the Delete Icon shown against the option. In case the option is already associated with an entity, the following dialogue box appears, which enables the user to specify an alternative option for all the linked entities.
Context Menu is accessible by right clicking on any table row. Operations defined in context menu will be performed on that row.
Planned Status Configuration
Using this functionality, custom options/ values for "Status" field can be configured for Planned Requirements.

In order to create a new option/ value for "Status" field,
- Click on row with text "New Status Name" or "Add Status" button.
- Enter the new value/ option and press Enter key.

- If you want to associate a colour with this new created status option,
- Click on the cell corresponding to the "Colour" column.
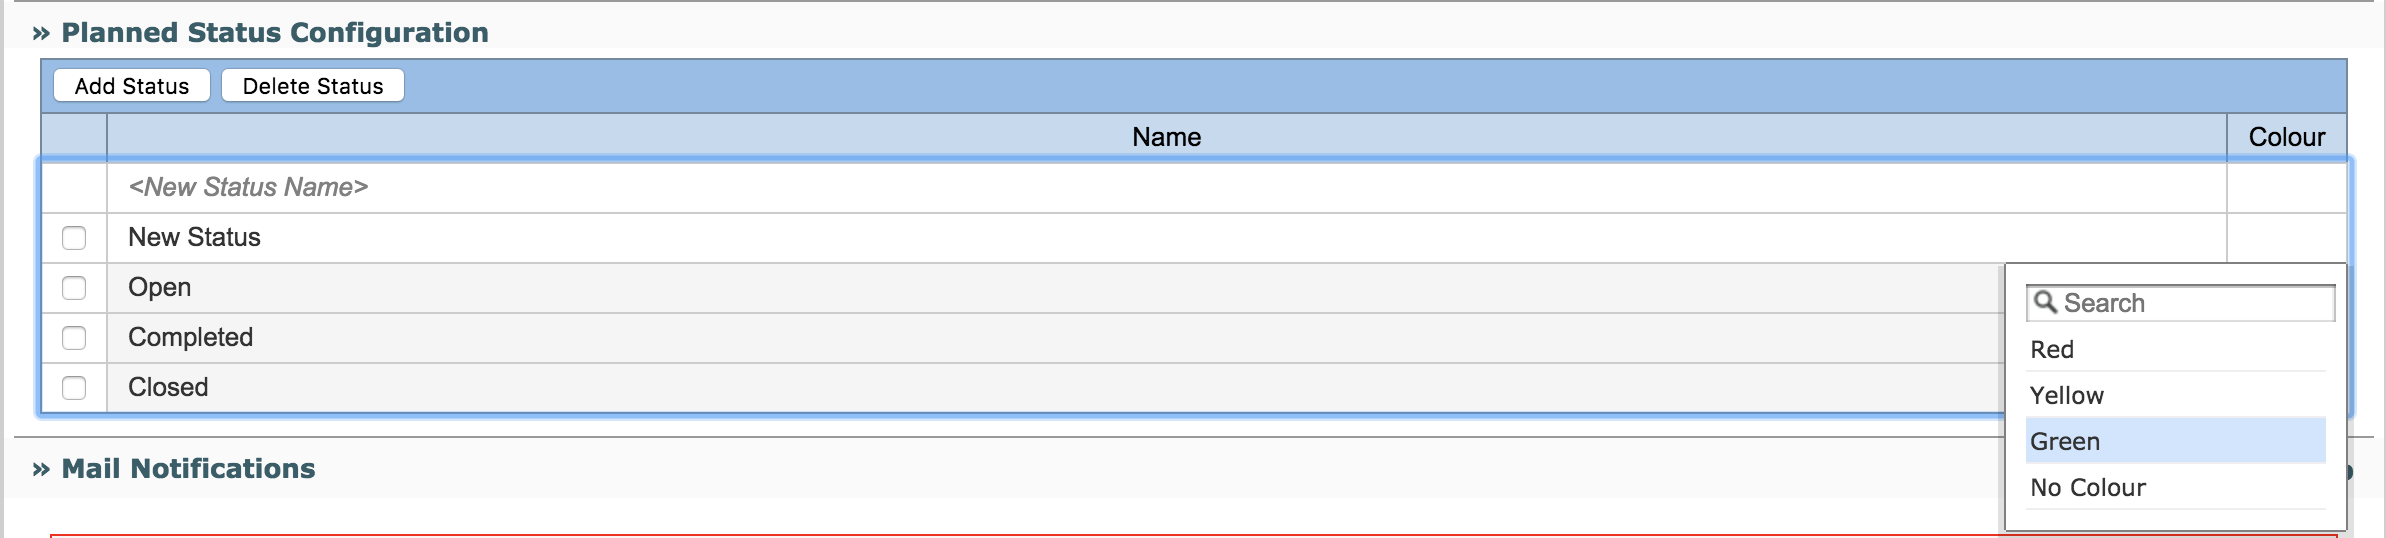
- Select the appropriate colour.

- This colour will be displayed in Status column for Planned requirement.
- Note :
- Custom/ New status once created will be available when requirement workflow is enabled or disabled.
Configuring Mail Notifications

Send Mail For:
Mail Notifications can be configured for:
- Requirement state change events
- These events include Requirement creation, status change events etc.
- Mails can be sent to Project Manager/Requirement Assignee/Requirement Watchers
- General Requirement attribute update events
- These events include Requirement attribute change events.
- Mails can be sent to Project Manager/Requirement Assignee/Requirement Watchers.
Send Mail To:
Select the available options to whom the mails should be sent:
- Manager
- Assignee for the Requirement.
- Watchers for the requirement.
Conditions:
Select the check box "Only when Assignee is available" if you want the mails to be sent only if the requirement has a value assigned for the field "Assignee".
Exporting Requirements as JIRA Issues
- Administrator can specify a Prefix to the Title of Issue being exported.
- Administrator can also specify, if the user can enable export of Requirements to multiple projects.

Enable Baseline Deletion
If this option is enabled by the Administrator, then the Project Manager / a User with appropriate permissions will be able to delete a Baseline. Editing of Baselines is further explained in Project Configuration and Administration.

Enable display of full name of Assignee
If this option is enabled by the Administrator, then full name of user will be displayed in the assignee field in the Planned Requirements/ Traceability view.
Status Computation Rules
RMsis provides an option to automatically compute the status of requirements, based on the statuses of Test Cases linked with the requirement.
The rules can be specified as a set in the following format
- IF
- STATUS OF Any TC | All TC
- EQUALS Pass | Fail | Pass with Exception | Blocked | ???
- THEN
- SET STATUS of REQUIREMENT to
- OPEN | CLOSED | COMPLETED | ???
- SET STATUS of REQUIREMENT to
- Note : The system currently does not check for ambiguous set of rules.
